Raising a bird successfully comes down to three things: matching the bird to your situation, setting up the right environment from day one, and building trust slowly through consistent, low-stress handling. Whether you're bringing home a baby cockatiel, adopting an older rescue parrot, or figuring out what to do with a grounded wild bird you found in your yard, this guide walks you through every stage in plain language.
How to Raise a Bird: Humane Beginner Guide

Maya Harris
9 Apr 2026
Picking the right bird: pet vs. wild rehab context
Before you do anything else, you need to be honest about what kind of bird you're dealing with and what your role actually is. These are two very different situations, and the rules (literally and practically) are not the same.
Raising a pet bird
For pet birds, species choice matters enormously for beginners. Budgies, cockatiels, and lovebirds are genuinely good starting points because they're small, relatively forgiving of beginner mistakes, and well-studied in terms of diet and housing. Larger parrots (macaws, African greys, cockatoos) are intellectually demanding, live for decades, and are better suited to experienced owners. If you're a first-timer, resist the impulse to start big. The commitment and complexity scale up fast.
When you're planning to raise a bird at home, think about your daily schedule, noise tolerance, and how much time you can realistically dedicate. Most companion birds need several hours of out-of-cage interaction per day and do not thrive in isolation. A bird you ignore is a bird that develops behavioral problems.
Found a wild bird? Know the law first
If you've found an injured or orphaned wild bird, your instinct to help is good, but the legal framework matters. In the U. S. , federal law (50 CFR § 21.
76) requires a rehabilitation permit to hold, treat, or transport any migratory bird for rehabilitation. In the U. S. , rehabilitation of migratory birds requires a [federal migratory bird rehabilitation permit](https://www.
law. cornell. edu/cfr/text/50/21. 76) (50 CFR § 21.
76). That covers the vast majority of native songbirds, raptors, waterfowl, and shorebirds. FWS guidance does allow a member of the public to [humanely remove a trapped migratory bird from a building if it poses an immediate health or safety risk](https://www. law.
cornell. edu/cfr/text/50/21. 14), but extended holding and rehabilitation require a permitted rehabilitator. The practical takeaway: if you find a wild bird, your job is to contain it safely, keep it warm and dark, and get it to a licensed wildlife rehabilitator as fast as possible.
Don't try to raise it yourself without authorization. Individual states add additional layers, too. Massachusetts, for example, has a separate permitting framework that governs which species can be kept and under what conditions, so check your state wildlife agency website alongside federal rules.
Knowing how to raise a wild bird responsibly means recognizing that your most important job is often just stabilizing and transferring the bird, not long-term care. Private citizens are not permitted to keep wild birds as pets, and holding them without authorization, even with good intentions, violates state and federal wildlife protection laws.
Safe setup: cage, aviary, perches, enrichment, and temperature

A good enclosure is your bird's entire world, so it's worth getting right before the bird arrives. The three things that matter most are size, bar spacing, and what goes inside.
Cage size and bar spacing
For a single cockatiel, a minimum cage size of 24" W x 24" D x 24" H is a commonly cited starting point, but bigger is always better. Bar spacing for cockatiels should be no wider than 3/4 inch to prevent head entrapment. For budgies, parakeets, and lovebirds, you need tighter spacing: around 3/8 to 1/2 inch depending on the bird. Getting this wrong is a serious hazard, birds can get their heads or wings caught in bars that are too wide apart. Buy species-appropriate cages from reputable bird suppliers and double-check the bar spacing spec before purchase.
| Species | Min. Bar Spacing | Notes |
|---|---|---|
| Budgie / Parakeet | ~3/8 inch (0.95 cm) | Tight spacing critical; small heads at risk |
| Cockatiel | No wider than 3/4 inch | 24x24x24" minimum for single bird |
| Lovebird / Parrotlet | ~1/2 inch | Active fliers; wider space inside cage preferred |
| Larger parrots (conures, etc.) | 3/4–1 inch depending on species | Always verify with species-specific guidance |
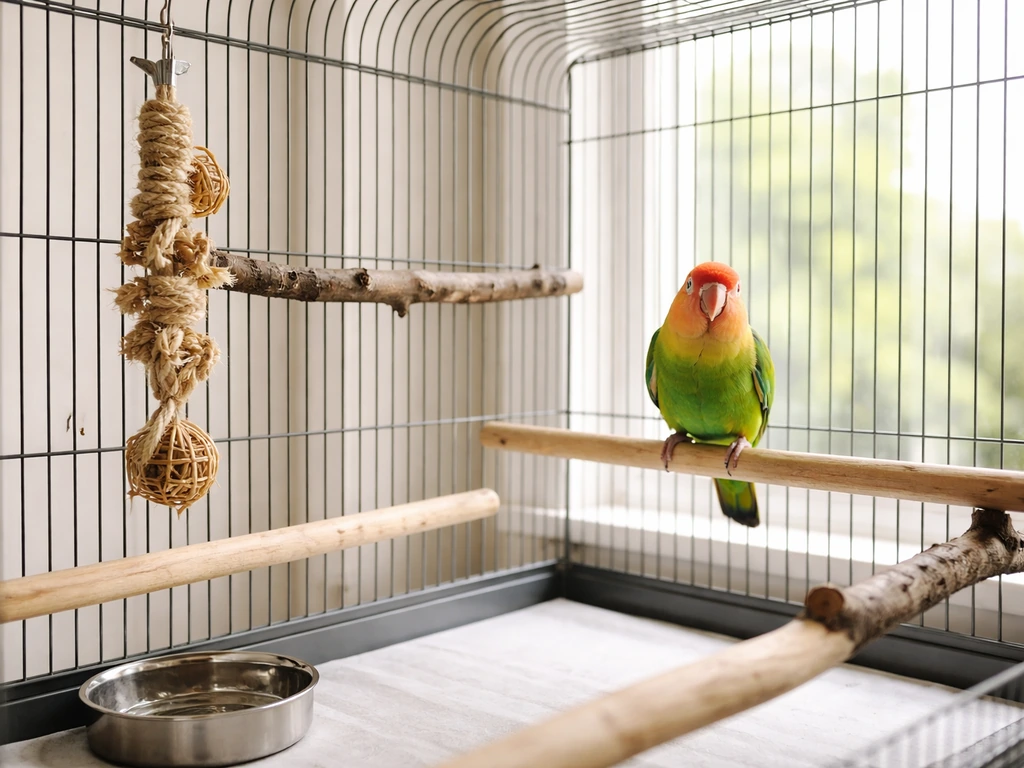
Perches, enrichment, and placement
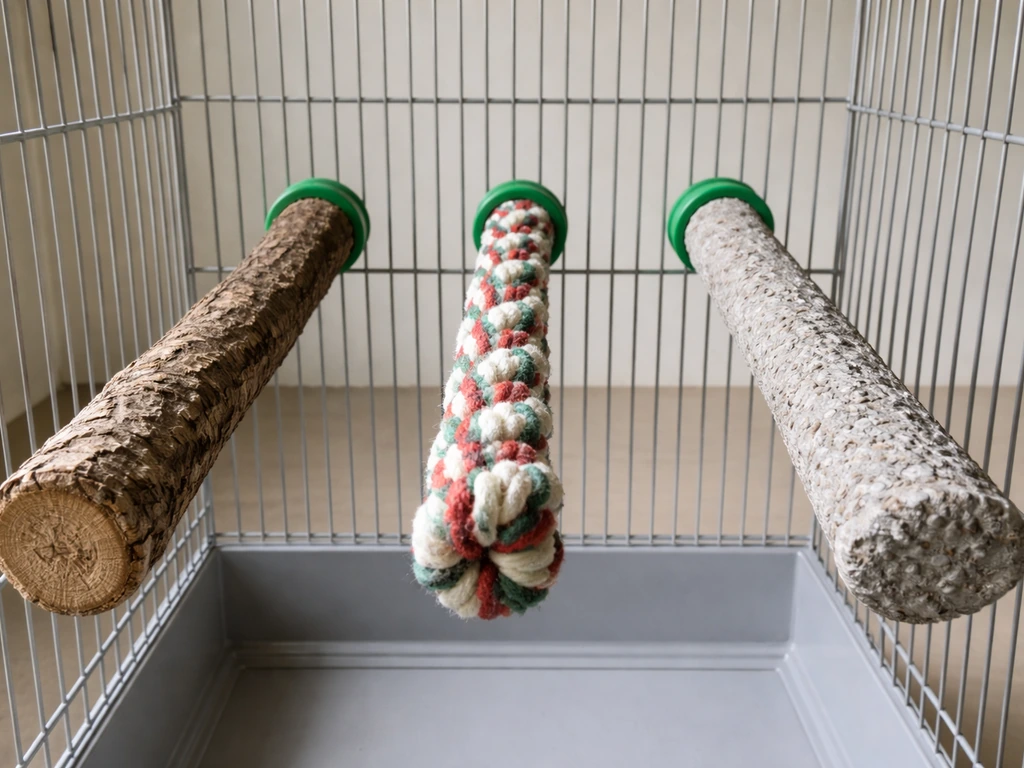
Perch variety is not a luxury, it's a foot health necessity. Use at least two or three perches of different diameters and textures: a natural wood branch, a rope perch, and a cement or mineral perch for nail conditioning. Uniform dowel perches cause pressure sores and can lead to bumblefoot over time. Place perches at different heights but keep the highest ones away from the cage top so droppings don't contaminate food and water below. Add foraging toys, puzzle feeders, and shreddable toys to keep the bird mentally occupied. Boredom is a direct path to feather-destructive behavior.
Position the cage in a room where the bird gets social interaction but away from kitchens (cooking fumes from non-stick cookware are toxic to birds), drafts, and direct all-day sunlight. A spot against a wall gives the bird a sense of security on at least one side. Keep ambient temperature stable, most companion birds do well between 65°F and 80°F, and avoid placing the cage near air conditioning vents or wood stoves.
Feeding basics: species-appropriate diet and daily routine
Diet is where a lot of well-meaning owners go wrong. Seeds are often the default because they're cheap and birds clearly enjoy them, but a seed-heavy diet is high in fat and nutritionally incomplete. For most small companion birds like budgies, cockatiels, and lovebirds, a balanced target looks like this: roughly 40–50% pellets, 30–40% seed mix, 10–15% fresh vegetables, and 5–10% fresh fruit. Pellets should form the nutritional foundation, not seeds.
Fresh vegetables and a small amount of fruit should be offered daily. Dark leafy greens (kale, romaine, Swiss chard), carrots, bell peppers, and broccoli are all solid choices. Remove uneaten fresh food after a few hours to prevent spoilage. Water should be changed every single day. If you use a water bottle, check that it actually flows properly at each refill because clogged bottles leave your bird dehydrated without any obvious sign.
Foods to keep away from your bird
Avocado contains persin, a compound that is toxic to birds and can cause respiratory distress and death. Chocolate contains theobromine and caffeine, which can cause severe neurological and cardiac effects and can be fatal, so even small amounts are dangerous. Alcohol, caffeine in any form, and onions are also on the no-go list. If your bird ingests any of these, contact an avian veterinarian or emergency animal poison line immediately. Don't wait to see how the bird does.
If you're raising a baby or chick: brooding, feeding, and when to hand off
Baby bird care is genuinely different from adult care and carries real risks if done incorrectly. If you're raising a chick from a breeder or aviary, or you've found an orphaned baby, pay close attention to this section.
Keeping a chick warm: brooding basics
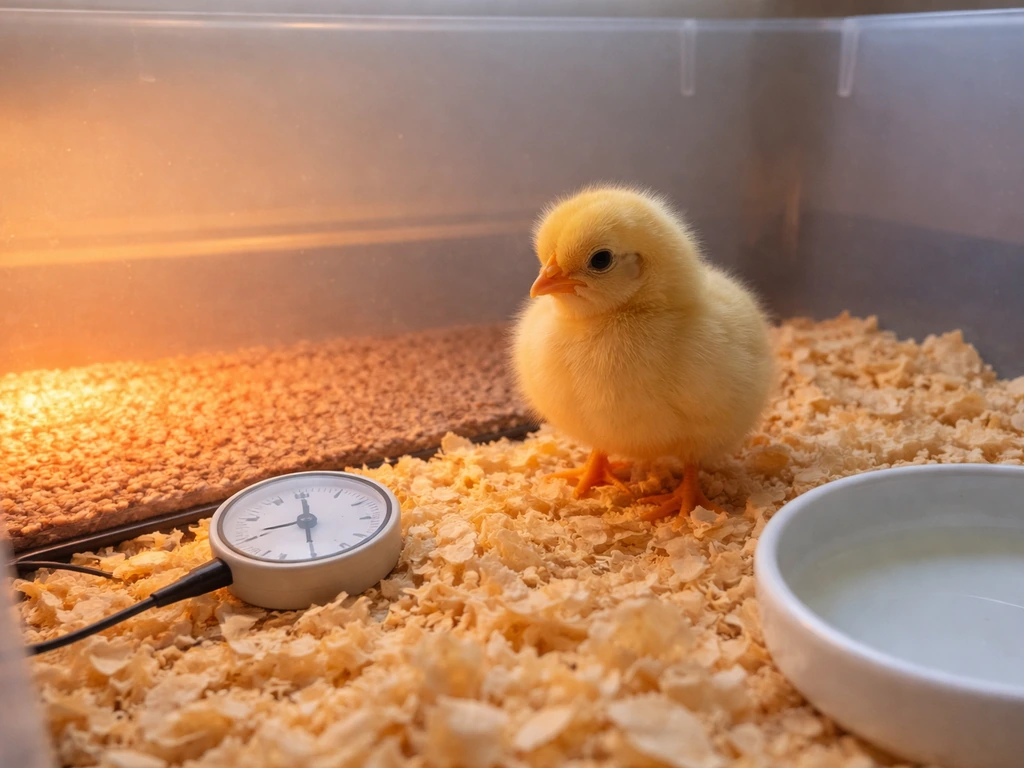
Young chicks cannot regulate their own body temperature. Supplemental heat is not optional. Use a commercial brooder, a heating pad set on low under half the container (so the chick can move away from heat if needed), or a heat lamp positioned to one side. The goal is a temperature gradient that lets the chick self-regulate. A newly hatched chick typically needs around 95–98°F, and you reduce temperature gradually as feathers develop. Watch the chick's behavior: huddling and shivering means too cold, panting and holding wings away from the body means too hot.
Hand-feeding a chick safely
If you're getting into how to hand raise a bird from the chick stage, the most important thing to understand upfront is that aspiration (formula entering the airway) is the leading cause of death in hand-fed chicks. This is a real risk, and if you've never done it before, the best first step is to have an experienced avian breeder or avian vet demonstrate the technique in person before you try it yourself. Read about it, yes, but watch it done first.
Before every feeding, gently palpate the crop (the pouch at the base of the neck). It should be mostly empty before you feed again. A full or slow-emptying crop is a warning sign. Don't overfill. Feed small amounts at the frequency appropriate to the chick's age (very young chicks may need feeding every 2–3 hours during daylight hours). You generally do not need to feed overnight, chicks should be sleeping during those hours. A healthy chick shows a strong feeding response, gains weight consistently, and has a crop that empties normally between feedings. A chick that isn't gaining weight should see an avian vet as soon as possible, not in a few days.
The process of how to hand rear a bird through the nestling and fledgling stages is time-intensive and requires daily weight checks, formula prepared fresh at the correct temperature, and clean feeding equipment every single session. Don't reuse formula between feedings and don't microwave it unevenly. Test formula temperature on your wrist before each feed.
When to step back and call a professional
If you're dealing with a wild chick found on the ground, try to return it to the nest first if you can locate it safely. Birds don't reject chicks because of human scent. That's a myth. If the nest is destroyed or the parents are confirmed absent, contact a licensed wildlife rehabilitator right away. Don't attempt long-term hand-rearing of wild birds without a permit. For pet chicks from a breeder, if you see any of these signs, call an avian vet: crop not emptying, labored breathing, green or yellow discharge from nostrils, weakness, or failure to gain weight over two consecutive days.
Handling, bonding, and first taming steps
Building a real bond with a bird takes time, consistency, and a willingness to move at the bird's pace, not yours. Rushing this stage creates fear responses that can take months to undo.
Start with presence, not contact
For the first few days with a new bird (baby or adult), just be near the cage. Talk softly, move slowly, and let the bird get used to your presence, your voice, and your smell. Don't reach in or try to handle the bird immediately. Let it eat, drink, and explore its space while you're nearby. This passive association is the foundation of trust.
Step-up training and positive reinforcement
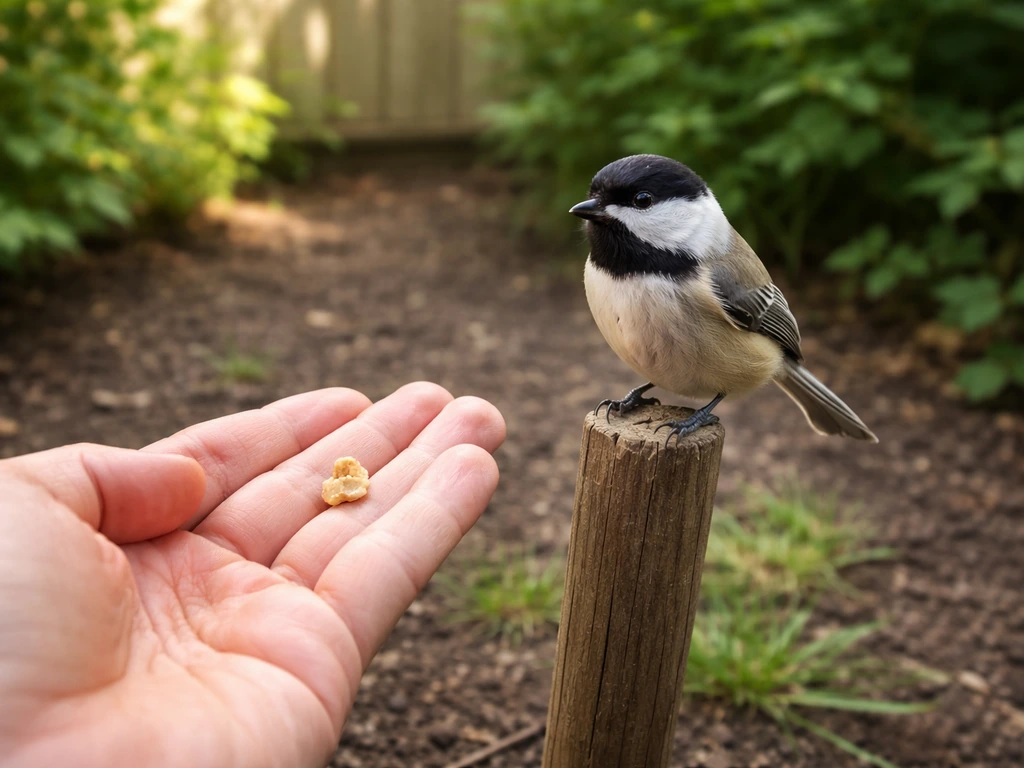
Once the bird is eating normally and not flinching at your presence near the cage, you can start short, low-pressure interaction sessions. Offer a high-value treat (millet for small birds, a small piece of fruit for parrots) from your hand through the cage bars or while the cage door is open. Don't push the treat toward the bird; hold it steady and let the bird choose to approach. When it does, mark the moment with a calm verbal cue like 'good' and let it eat undisturbed.
The step-up cue (training the bird to step onto your finger) is the next milestone. Place your finger gently against the bird's lower chest just above the feet and say 'step up' in a calm, consistent tone. Most birds will step up reflexively. Reward immediately. Keep sessions to 5–10 minutes. Forceful or rushed handling increases stress and injury risk significantly, both to you and the bird. AAHA guidelines on animal handling consistently emphasize that least-stress approaches produce better outcomes than physical restraint.
Understanding the full approach to how to hand feed a bird during training sessions can actually double as a powerful bonding tool: offering food from your hand teaches the bird that your presence means something good, which accelerates trust-building more than almost anything else.
Managing biting and fear responses
If a bird bites, don't yell, jerk your hand away dramatically, or punish. That reaction rewards the biting because it worked: you retreated. Instead, say 'no' calmly, pause the session, and try again another time. Biting is almost always communication, it means the bird is scared, overstimulated, or protecting territory. Figure out what the trigger is and address that, not just the behavior.
Health, hygiene, and hazard prevention
Birds hide illness well. This is an evolutionary survival mechanism that makes them genuinely difficult to read as a caregiver. By the time a bird looks sick, it's often been sick for a while. That means your hygiene routine and your observational skills both matter a lot.
Daily and weekly hygiene tasks
- Change food and water daily; wash bowls with hot water and soap
- Wipe down cage bars and tray liners daily or every other day
- Deep-clean the entire cage (disassembled) with a bird-safe disinfectant weekly
- Wash your hands before and after handling your bird
- Replace perches or cage liners as they wear out or become unsanitary
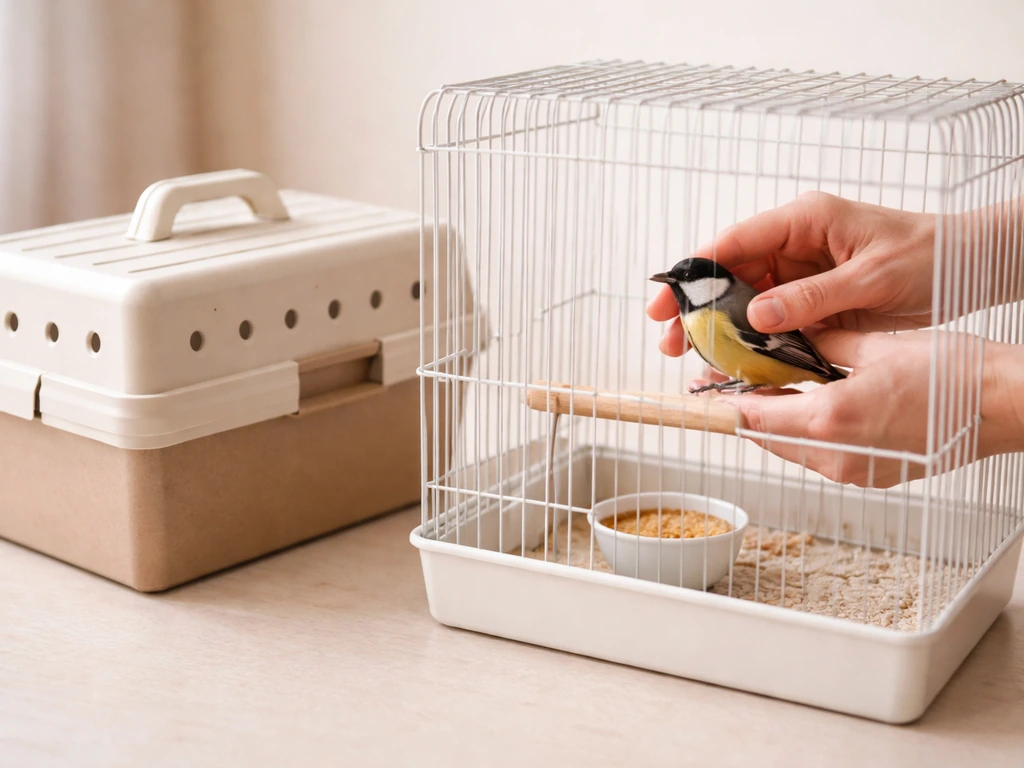
Quarantine any new bird
If you already have birds and are bringing a new one home, quarantine the newcomer for at least 30 days, ideally in a separate room with separate airflow, separate care tools, and handwashing between handling any birds. Some guidance recommends up to 60 days for high-risk situations. Birds can appear completely healthy while carrying infections that can devastate an existing flock. This isn't overcautious, it's standard biosecurity practice.
Emergency warning signs that need immediate vet attention
- Breathing difficulties, open-mouth breathing, or tail-bobbing with each breath
- Reduced or absent appetite lasting more than one day
- Significant weight loss (get a gram scale and weigh your bird regularly so you have a baseline)
- Eye discharge, swelling, or protrusion
- Fluffed feathers combined with inactivity and sitting at the bottom of the cage
- Watery or discolored droppings lasting more than 24 hours
- Exposure to cooking fumes, aerosols, or non-stick cookware and any respiratory symptoms afterward
Birds often mask disease until they're critically ill, so any of the above signs warrant a call to an avian vet the same day, not a wait-and-see approach. Find an avian-specialist vet before you need one. In a crisis, you don't want to be Googling for a vet who has never seen a bird.
Common household hazards to eliminate
- Non-stick (PTFE/Teflon) cookware: releases fumes when overheated that are lethal to birds
- Scented candles, air fresheners, incense, and plug-in diffusers
- Ceiling fans (active fans are a serious injury hazard during out-of-cage time)
- Open toilet lids, full sinks, and any standing water
- Other pets, especially cats and dogs, even brief exposure can be fatal
- Toxic plants including philodendron, poinsettia, and oleander
Troubleshooting common raising setbacks
Even when you do everything right, birds present challenges. Here's how to approach the most common ones without panicking.
The bird won't eat
A new bird often won't eat much for the first 24–48 hours because stress suppresses appetite. Make sure familiar foods (whatever the previous owner or breeder was feeding) are offered first before you try to transition to a better diet. A hungry bird in a stressful new environment is not the time to introduce pellets it's never seen before. Stabilize first, then improve the diet gradually over weeks. If appetite doesn't return within two days or you see weight loss, call your avian vet.
Feather plucking or destructive feather behavior
Feather-destructive behavior is one of the most common and frustrating problems in companion birds, and it almost never has a single cause. Rule out medical causes first: parasites, nutritional deficiency, skin infections, and hormonal issues can all drive feather plucking. If your vet clears those, look at the environment: is the bird bored, understimulated, or spending too much time alone? Increase foraging opportunities, out-of-cage time, and social interaction before trying behavioral interventions. Collar devices are a last resort and don't address the root cause.
The bird keeps escaping or refusing to return to its cage
If your bird won't go back into its cage voluntarily, the cage probably feels like a punishment or the out-of-cage time is better than anything inside. Make the cage more appealing: feed high-value treats only inside the cage, offer a foraging toy that's only available in the cage, and never chase the bird to return it. Chasing destroys trust fast. Train a recall cue using positive reinforcement, and always return the bird to its cage before it gets overtired or overstimulated.
Stress behaviors: screaming, repetitive movements, and feather ruffling
Excessive screaming is almost always either a learned attention-seeking behavior or a sign of genuine distress. Don't run to a screaming bird and don't yell back, both responses reinforce the behavior. Reward quiet moments with attention instead. Repetitive rocking, head-bobbing, or pacing (stereotypies) indicate understimulation or chronic stress and usually require an environmental overhaul plus, often, a consult with an avian behavior specialist.
Baby bird refuses formula or is feeding poorly
If a chick is refusing formula, check the temperature first (should be around 104–106°F), then the consistency, and then the feeding instrument. Some chicks prefer a spoon, others a syringe. A chick that was previously feeding well and suddenly refuses is a medical concern. Check for crop stasis, respiratory symptoms, or lethargy and contact an avian vet immediately. Don't try to force-feed a chick that's actively resisting.
If you're stepping into the more detailed work of baby bird care, reading up on the full workflow of how to hand rear a bird and keeping a written log of weights, feeding times, and crop assessments will help you catch problems before they become crises. Having records also makes it much easier to explain the situation clearly when you call your avian vet.
Where to go from here
Raising a bird well is a long game. The setup, the diet, and the early taming work all matter, but so does keeping your skills current and knowing when to ask for help. Establish a relationship with an avian-specialist vet before you're in an emergency. Find your nearest licensed wildlife rehabilitator contact and save it now, not when you have a bird in your hands. And if you're in the thick of the baby bird stage or working with a newly found wild bird, lean on professionals early rather than late.
The most important mindset shift in bird raising is this: your bird can't tell you when something is wrong in plain language. Your attention, your observation skills, and your willingness to act on small changes are the best health insurance your bird has. Stay curious, keep learning, and don't hesitate to get expert eyes on a situation that doesn't feel right.
FAQ
How do I know which bird species is the right match for my home before I commit?
Start with your realistic time and noise tolerance, then match cage size, social needs, and lifespan. If you work long hours or travel often, choose a smaller species with lower intensity social demands, and plan daily out-of-cage time you can actually maintain. If you want a bigger parrot, budget for long-term care costs and training, not just starter supplies.
What’s the minimum safe space and setup for perches and toys, not just the cage size?
Look beyond the cage dimensions. Ensure horizontal and vertical climbing routes, multiple perch levels, and enough room that the bird can fully spread its wings without touching bars or cage walls. Foraging toys should be placed where droppings will not fall into food or water, and any tethered toys should have a safe breakaway or length limits to prevent entanglement.
Can I use sandpaper or very abrasive perches to control nails and prevent bumblefoot?
Avoid abrasive “sandpaper” surfaces. While mineral perches can help with nail conditioning, they can also irritate feet if overused or if they are too rough. Provide a mix of perch diameters and textures, monitor gait and toe alignment, and if you notice swelling, sores, or limping, switch to a vet-guided plan.
How often should I clean the cage and bowls without stressing my bird?
Use a consistent routine: spot clean daily (droppings, spilled food, wet bedding), do a deeper clean on a schedule you can maintain, and always replace liners promptly. Wash and rinse food and water items with bird-safe products, then fully dry. Most birds tolerate cleaning better when it happens at the same time each day and when you keep movements predictable.
What should I do if my bird refuses pellets but seems fine with seeds?
Expect gradual resistance and avoid a sudden overhaul. Offer pellets alongside familiar foods, use warm or slightly moist preparation only if your pellet instructions allow, and increase pellet access at calm times. If weight drops or appetite falters, consult an avian vet early rather than forcing the change.
Is it okay to give grit or supplements if my bird eats mostly seeds?
Usually avoid random supplements. Grit is species-specific, and many “starter” supplements are unnecessary if the diet is correct. Focus on getting pellets as the nutritional base and add vegetables, then ask your avian vet about any supplements only after assessing weight, lab work if needed, and diet details.
Which foods are safest to start with when introducing vegetables?
Begin with mild, familiar textures and one new vegetable at a time, chopped small enough to be easy to pick up. Many birds do well with dark leafy greens plus orange or red vegetables like carrot or bell pepper. Remove leftovers after a few hours and track which items your bird actually eats so you can build variety without wasting food.
How do I prevent aspiration or choking when feeding a hand-reared chick?
Use the correct technique your breeder or avian vet demonstrates, and never rush the process. Always check crop emptiness before feeding, ensure the formula temperature is correct, and stop if the chick coughs, struggles, or shows respiratory effort. If any aspiration signs occur (wheezing, labored breathing, sudden lethargy), treat it as urgent and contact an avian vet immediately.
My chick’s crop is full after feeding, but it later empties slowly, what does that mean?
Slow-emptying or persistent fullness can indicate crop stasis, improper temperature, formula issues, or stress. It’s not something to monitor for days. Adjust based on vet guidance and contact an avian vet the same day, especially if the chick is not gaining weight or seems weak.
What’s the safest way to warm a chick without overheating it?
Aim for a temperature gradient so the chick can move toward or away from heat. Warmers should be set up so you can observe behavior, huddling and shivering means too cold, panting or holding wings away means overheating. Avoid direct, blanket heat that can trap heat under the body.
I found a baby bird. How can I tell whether it should be returned to the nest?
If the baby has feathers or is mostly feathered and you can locate the nest safely, return it when possible. If it appears fully helpless, cold, or you cannot access or relocate it safely, contact a licensed wildlife rehabilitator right away. For the “return it” approach, minimizing handling time matters, and keep the bird warm and dark while arranging help.
Can I keep a rescued wild bird temporarily until I find a rehabilitator?
You may need to stabilize it briefly, but long holding without authorization is risky. The safest approach is immediate containment for warmth and safety, then prompt transfer to a permitted wildlife rehabilitator. If it’s a migratory species in the U.S., authorization is required for treatment or transport beyond basic containment.
What should I do if my adult pet bird bites suddenly after being okay before?
Treat sudden biting as information about triggers, not “bad behavior.” Common causes include hormonal changes, overstimulation, reduced sleep, poor diet, pain, or fear during handling. Pause interaction, reduce intensity, and watch body language. If biting persists or you notice lethargy, fluffed posture, or breathing changes, schedule an avian vet exam.
How should I handle quarantine for a new bird, and does it really need a separate room?
Ideally, quarantine uses a separate room with separate airflow and dedicated tools, plus strict handwashing between birds. If separate airflow is impossible, increase separation distance, use dedicated clothing or gloves if appropriate, and disinfect tools carefully. Quarantine can still prevent major outbreaks, especially because birds can look healthy while carrying infections.
How long should quarantine last if the new bird seems healthy?
Follow your vet or local wildlife guidance, and in many home-bird scenarios people use at least several weeks to cover incubation windows. If the bird came from an uncertain source, is stressed, or shows any respiratory or droppings changes, extend quarantine and involve an avian vet sooner rather than assuming it will “pass.”
What are early signs that my bird is sick even if it still looks normal?
Watch for subtle changes: decreased interest in toys, quieter vocalizations, changes in droppings consistency or frequency, tail bobbing, staying fluffed for longer periods, reduced preening, or slower response to familiar routines. Birds often hide illness, so if appetite drops or behavior changes last more than a day, contact an avian vet rather than waiting.
Why does my bird scream when I leave the room, and what’s the best first fix?
It’s usually either loneliness stress or learned attention. Provide predictable routines, increase daytime engagement and foraging before you leave, and avoid rewarding screaming with immediate attention. If the bird is not settling, review sleep quality and environmental stressors, then consider working with an avian behavior specialist for a structured plan.
What should I do if my bird won’t step up, even with treats?
Check the bird’s comfort level and avoid making the finger a “catch tool.” Try stepping up at times when the bird is already calm, offer the treat slightly behind the bird’s feet to encourage forward movement, and keep sessions short. If the bird shows fear or aggression, pause training and build trust first with near-cage presence and voluntary approach rather than forcing step-up.
How do I keep a new bird from developing fear that will take months to fix?
Keep handling minimal at first, focus on predictable, low-pressure routines, and let the bird choose the pace of interaction. Avoid sudden grabs, quick movements overhead, and forcing access to the cage door. Consistency matters, if the bird learns that your presence is safe, progress accelerates.
Next Article
How to Hand Feed a Bird: Pet and Wild Steps
Step-by-step humane guide for how to hand feed pet or wild birds safely, with food, setup, approach, and troubleshooting