You can absolutely train a Labrador retriever to be a capable, humane bird dog, and the good news is that Labs are practically built for it. They have the nose, the drive, the soft mouth, and the people-pleasing attitude that makes bird-dog work feel natural to them. The process runs from basic obedience through steadiness, delivery to hand, and finally controlled exposure to real birds. Done right, with reward-based methods and a clear progression, most Labs are hunting-ready within one to two seasons of consistent work. Here is exactly how to get there.
How to Train a Lab to Be a Bird Dog: Step-by-Step Plan

Maya Harris
12 May 2026
What 'bird dog' actually means for a Lab
Labs are retrievers, not pointers or flushers, so the phrase 'bird dog' means something specific when you apply it to the breed. Your Lab's job is to mark where a bird falls, stay steady until you send them, retrieve to your hand, and repeat that cleanly across a morning of hunting. For hunting retrievers, Puget Sound Labrador Retriever Association [Hunt Test Requirements](https://www. pslra.
org/hunt-test-requirements/) say the dog is not required to be steady at the retrieving line and may be hand-held (collar or leash) to assist steadiness. That is different from what an upland flusher or a pointing dog does, and it is worth being clear about the goal before you start.
If you have looked into how to train an upland bird dog, some of those principles overlap, but a Lab's core skill set is built around marking, steadiness at the line, and delivery rather than quartering or holding a point. If you are specifically looking for how to train an upland bird dog, focus on steadiness at the line, clean delivery, and careful progression from obedience into real bird exposure.
Hunt test programs like AKC and UKC/HRC actually define these skills clearly. AKC retriever hunt tests judge elements like steadiness and delivery of the bird as scored criteria. UKC/HRC rules list being steady at the line and retrieving to hand as explicit requirements. Even entry-level tests used by organizations like the Puget Sound Labrador Retriever Association allow a handler to hold a dog by collar or leash at the line, which tells you something useful: steadiness is a goal you build toward, not a prerequisite. Set your expectations accordingly and enjoy the progression.
Start with obedience and foundation retrieves

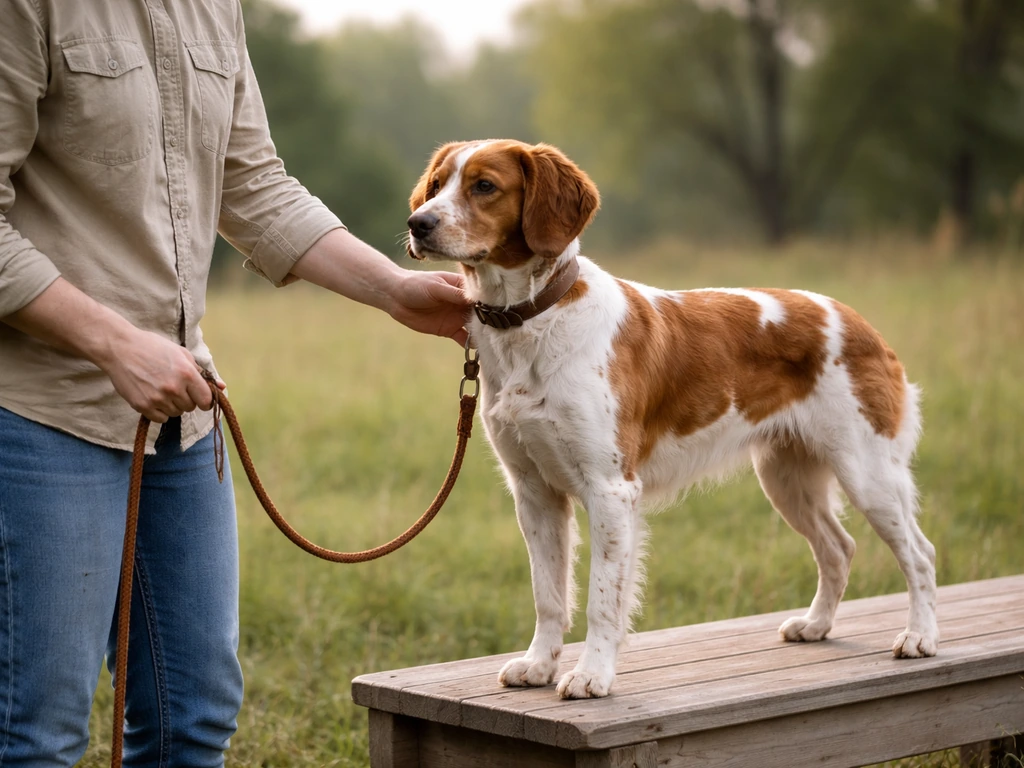
Before a single feather enters the picture, your Lab needs a reliable obedience foundation. Sit, stay, come, heel, and place are not optional extras. Ducks Unlimited frames this directly: a retriever running wild creates an unsafe situation, and steadiness and obedience drills are foundational for safety, not just polish. Rushing past this phase is the single most common mistake new trainers make.
Use reward-based training throughout. The American Veterinary Society of Animal Behavior (AVSAB) and the BSAVA both recommend positive reinforcement as the approach least likely to cause harm and most aligned with LIMA principles (Least Invasive, Minimally Aversive). In practice, that means marking the behavior you want with a consistent word or clicker the instant it happens, then following with a reward. Oregon Humane Society describes it simply: present something pleasant immediately after the desired behavior, using a marker to signal a reward is coming. That is the framework for everything in this guide.
Beginner foundation checklist
- Sit: reliable on a single verbal cue, no luring needed
- Stay: hold for 30 seconds at 10 feet before you add distractions
- Come/recall: solid in the yard before you try it in a field
- Heel: loose-leash walking at your side, no pulling
- Place or kennel: dog goes to a mat or crate on cue and stays calm
- Basic retrieve: dog chases a bumper, picks it up, and returns to you
On the retrieve specifically, do not over-drill. Ducks Unlimited advises keeping pups calm and focused with only a few retrieves per week, especially early on. Three to five short retrieves per session, ending while the dog still wants more, is a solid rule. If your dog is already charging and spinning with excitement before you even pick up the bumper, dial it back. That energy needs to be channeled, not amplified.
Introduce bird-specific motivation: scent, feathers, and controlled games
Once your Lab has a solid obedience base and a reliable basic retrieve, you start layering in bird-specific elements. The goal here is to transfer the dog's retrieve drive onto objects that smell and feel like birds, before you ever use a live animal. This keeps the experience positive and controlled for both the dog and any birds involved.
Feathered bumpers
Wrap game-bird feathers around a standard training bumper using electrical tape or a feather bumper sleeve. Ducks Unlimited recommends this approach specifically to help a dog learn that feathery objects are to be retrieved to the handler, not chewed or mouthed. Start by letting your dog sniff the feathered bumper casually before throwing it. If your Lab has never interacted with feathers, there may be a brief hesitation or extra excitement, both of which are normal. Keep sessions short and calm.
Scent introduction
You can add bird scent to bumpers using commercially available scent sprays or by storing bumpers in a bag with feathers or wings. Work this into your regular retrieve sessions gradually. The idea is not to whip the dog into a frenzy but to make the scent familiar and to associate it with a calm, successful retrieve. Dogs can react very differently to a real bird than to a plain bumper, so this transition period matters.
The chase game (use sparingly)

Ducks Unlimited describes one technique for dogs that need a motivational boost: pull a few primary flight feathers from a pigeon so it flutters but cannot fly well, then toss it so the dog has to work briefly to catch it. This is an intermediate-level tool, not a beginner one. If your dog's drive is already strong, skip it. If your dog is low-energy or disconnected from the retrieve game, it can help. Either way, welfare matters here: the bird should be handled calmly before and after, kept safe, and never used as a repetitive prop.
Add the bird-dog behaviors: steadiness, delivery, and handling
This is where most of the real training work happens. The three pillars are steadiness (staying put until sent), delivery to hand (bringing the bird all the way to you and releasing on cue), and handling (following signals to a retrieve they did not see). Each one builds on the last.
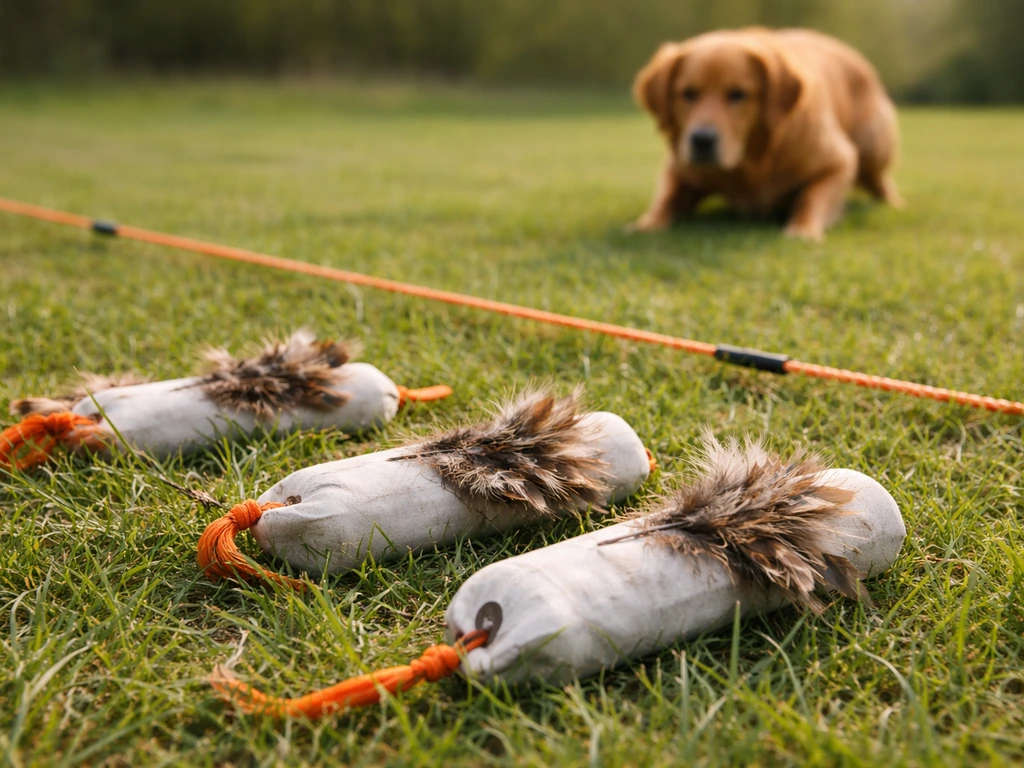
Building steadiness
Steadiness means the dog sits at your side and does not break until you give the send command, regardless of what lands in front of them. Ducks Unlimited calls steadiness critical for every other gundog skill: marking, honoring, flushing, and sitting quietly in a blind all depend on it. Start simple. Ask your dog to sit, toss a bumper a short distance, wait two to three seconds, then send with a clear release word like 'back' or 'fetch.' Gradually increase the wait time before sending. If the dog breaks, calmly reset and shorten the delay. Do not punish the break; just make it unrewarding by picking up the bumper yourself and starting again.
Game and Fish describe using light pressure as a hold cue until the release command is given. A hand gently resting on the dog's shoulder while you both watch the thrown bumper is a low-pressure way to reinforce the stay without adding stress. The 'whoa' command, which you may see referenced in whoa-break guides, is used more in pointing-dog training but the principle of a strong stop-and-hold behavior is relevant here too. Gun Dog Magazine notes that progressing through steadiness steps can take roughly a month, with full steady-to-shot training taking longer. Be patient.
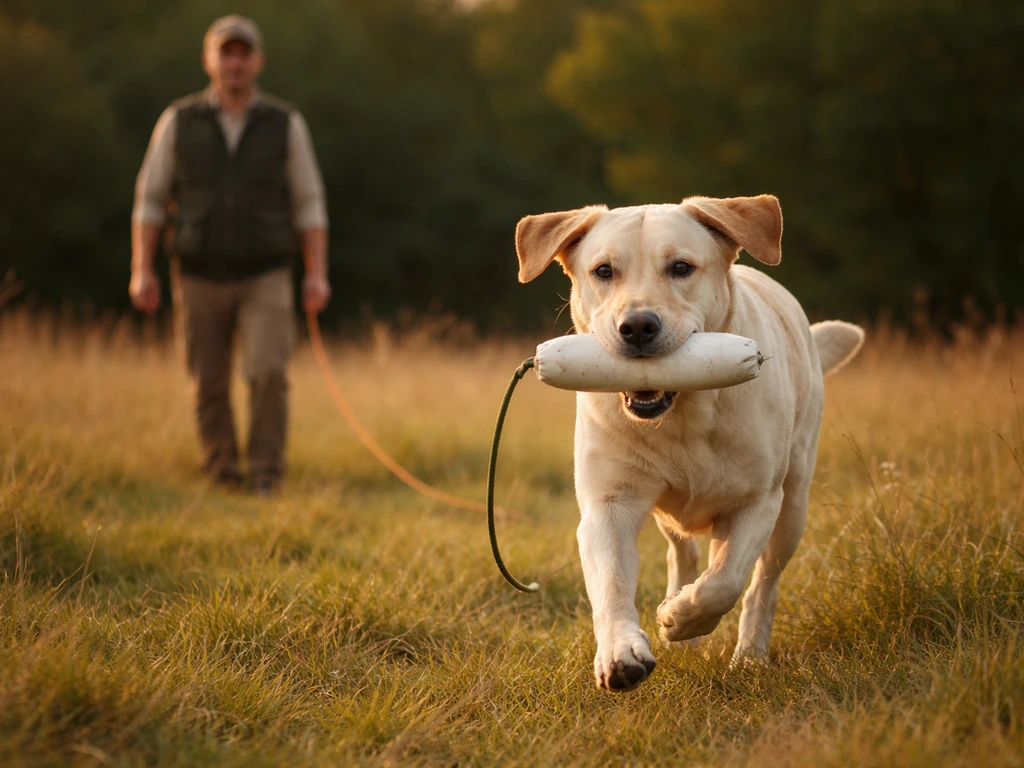
Delivery to hand
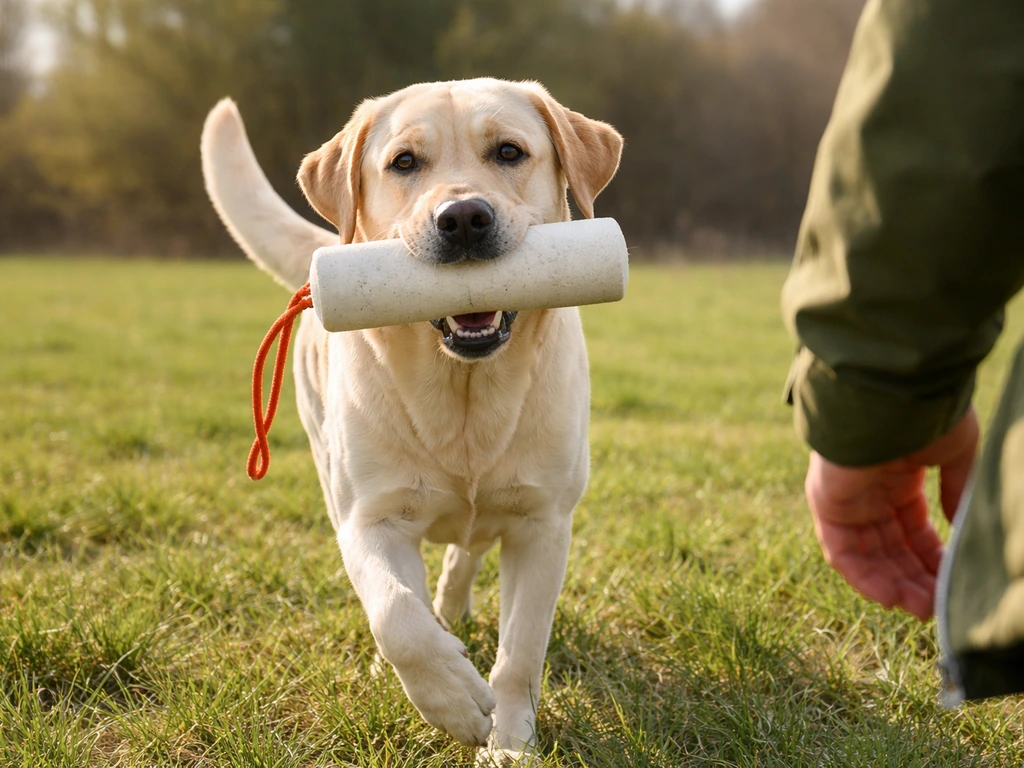
A retrieve that ends with the dog dropping the bird six feet away is not a retrieve. Delivery to hand means the dog carries the bird all the way to your side, holds it until you take it, and releases on a give or drop cue. SportDOG recommends kneeling, using a hand under the dog's jaw to support the hold, and praising continuously to prevent premature dropping. Ducks Unlimited adds: be consistent about how you accept the delivery every single time. Pick one method, one command, and stick to it. Commands like 'hold,' 'give,' or 'dead' all work; the key is consistency and clarity.
If your dog has a soft mouth, the transition to feathered bumpers and eventually frozen birds goes smoothly. If your dog tends to crunch or chew, work extra reps on the hold command with regular bumpers first. Never grab the bumper and pull; that teaches the dog to grip harder.
Handling (casting to unseen birds)
Handling means directing your dog with hand signals and whistle to a bird they did not mark. This is an intermediate-to-advanced skill. Teach it by first getting a reliable sit-whistle response, then adding simple back, over-right, and over-left casts in a familiar yard. Use a white bumper in short grass so the dog can see it, and reward generously for following the cast. This is one of the most mentally demanding skills for a Lab, so keep sessions to five to ten minutes.
Field training: building up to live birds safely
Moving into the field is exciting but requires a deliberate, staged approach. Rushing a dog into a scenario they are not ready for creates bad habits that can take months to undo.
Intermediate progression steps
- Start in a mowed field or short grass with single feathered-bumper marks at 20 to 30 yards.
- Add a simulated shot (voice or starter pistol from a distance) before the throw to condition the dog to the sequence.
- Introduce double marks once single marks are clean: two bumpers thrown in succession, dog retrieves each in order.
- Move to uneven terrain: light cover, slight hills, water edges, to challenge marking skills.
- Add frozen birds as the next step. A dog can react very differently to a real bird, and frozen birds bridge the gap between bumpers and live game by adding authentic scent and feel.
- Progress to pen-raised pigeons, quail, or ducks with wings taped or clipped, under controlled conditions, before working with fully flying birds.
The LRCGB Working Certificate in the UK tests natural retrieving instincts using a planted bird placed about 30 to 40 yards from the dog and handler, which is a useful benchmark for where your dog should be comfortable before you consider a hunt test or real hunting scenario. Ducks Unlimited recommends finding access to live birds through a local retriever club if you do not have your own birds, and that is genuinely good advice. Clubs often have trained birds, experienced mentors, and setups that let you work your dog safely and legally.
When you do use live birds, keep the sessions short and calm. Ducks Unlimited recommends live pigeons, pen-raised quail, or domestic ducks for steadiness work. Limit live-bird contact to two to three reps per session at first. The goal is a positive, controlled experience for the dog, not overwhelming stimulation.
A realistic training timeline
| Phase | Skills covered | Approximate timeline |
|---|---|---|
| Foundation | Sit, stay, recall, heel, basic retrieve | Weeks 1 to 6 |
| Bird intro | Feathered bumpers, scent exposure, calm retrieve | Weeks 4 to 10 |
| Steadiness | Hold at line, send command, no-break drills | Weeks 8 to 16 |
| Delivery | Delivery to hand, hold and give commands | Weeks 10 to 18 |
| Field work | Marks in cover, double marks, simulated shots | Weeks 14 to 24 |
| Live birds | Frozen bird transition, pen-raised birds, steadiness with birds | Weeks 20 onward |
| Handling | Whistle sit, back, over casts to unseen bumpers | Weeks 20 onward |
These timelines overlap by design. You are not finishing one phase before starting the next; you are layering skills on top of a solid base. Some dogs move faster, some slower. A 12-month-old Lab that started at 8 weeks can realistically be hunting-ready by their first fall season with consistent, focused training. Older dogs can absolutely learn this work too; they just need a bit more patience during the transition from bumpers to birds.
Troubleshooting common problems
Dog chases but won't retrieve
This usually means the dog learned that running back to you ends the fun. These bird taming tips can also help you turn high-energy chasing into a calm, reliable retrieve. Go back to basics: use a long line to guide the dog back to you after the pick-up, and immediately reward the return with praise and another throw. Make coming back the best part of the game. Never chase the dog or grab at the bumper when they return.
Dog breaks before the send command
Reduce the distance and reduce the wait time. You need the dog to succeed. If the dog breaks, calmly pick up the bumper yourself and walk away. Do not throw it again immediately. Reset the exercise at a level where the dog can hold. Increase delay by just one or two seconds per session, not in big jumps.
Dog drops the bird before reaching you
Work on the hold command separately from the retrieve. Have your dog hold a bumper in the sit position for increasing durations before releasing on cue. When you rejoin this to the retrieve, kneel down and use the hand-under-jaw technique to support the hold as they arrive. Reward heavily for holding until you take it.
Dog mouths or chews the bird
Switch back to feathered bumpers and work on the give command until the dog is reliably releasing on cue without dropping. Avoid getting into a tug-of-war. A calm, flat hand extended at nose height for the drop is more effective than reaching down and grabbing.
Dog loses focus in the field
This is almost always a sign that the environment is too stimulating for the current training level. Go back to an area with fewer distractions, rebuild focus there, and advance more gradually. Keep sessions to 10 to 15 minutes in the field. A tired dog loses focus fast, and a bored dog does too.
Dog is excited around birds but won't settle
Ducks Unlimited specifically warns against running 'bird-crazy' training sessions and recommends keeping dogs calm and controlled. If your dog is over-aroused around birds, reduce live-bird exposure temporarily and do more obedience and feathered-bumper work in low-stimulation settings. Impulse control games, like waiting for a treat placed on the floor before being released to eat it, build the mental brakes your dog needs.
Safety, humane methods, and legal considerations
Training a Lab to retrieve birds means you are working at an intersection of dog training, wildlife handling, and in many cases state and federal law. All three deserve your attention.
Humane training standards
The AVSAB position is clear: reward-based training methods are least harmful, and aversive methods are not necessary for effective dog training. The BSAVA agrees, citing LIMA principles as the welfare-aligned framework. In practice, this means no shock collars during initial training, no force-fetch methods that use pain as a motivator, and no training sessions that leave your dog stressed, shut-down, or avoidant. Watch for stress signals: lip licking, yawning, flat ears, whale eye, or repeated avoidance of the training area. If you see these, end the session and assess what you need to change. General bird training tips also emphasize reading behavioral cues carefully and adjusting before stress escalates.
Welfare of the birds you train with
If you use live birds in training, they deserve the same welfare consideration as your dog. Pen-raised birds should be housed in appropriate conditions with food, water, and space to behave naturally. Birds used in contact drills should not be repeatedly stressed or physically harmed. Frozen birds sourced from licensed game processors are a lower-stress option for early bird introduction and are perfectly legal in most jurisdictions when obtained through proper channels. Handle all birds calmly and with care, both during and between training sessions.
Legal requirements you need to know
This is an area where many people get tripped up. Laws around training dogs with birds vary significantly by state and country. Iowa DNR notes that training with wild or pen-raised game can require a valid hunting license and habitat fee. Oregon requires a Game Bird Release Permit to release game birds and has administrative rules around wildlife use in dog training.
Michigan DNR prohibits training on State Game Areas or Wildlife Areas during certain seasons (April 16 to July 7 per their regulations). Colorado Parks and Wildlife defines 'training' specifically for permit purposes. Before you work your dog around any live birds, check your state's wildlife agency website for specific requirements. Joining a local retriever club is one of the easiest ways to access legally managed training birds and get mentorship from experienced trainers who already know the local rules.
Using video and photos to monitor progress
Set up a phone on a tripod to record training sessions when you are working alone. Watching the footage lets you catch things you miss in the moment: a dog that looks slightly hesitant at the flush, a pattern of breaking on the left side, or a subtle soft-mouth issue that only shows at full-speed retrieves. Keep a simple training log noting what you worked on, how many reps, and any observations. This makes it much easier to spot patterns and troubleshoot effectively.
Your immediate next steps
- Evaluate your dog's current obedience: sit, stay, recall, and basic retrieve. Identify the weakest link and start there.
- Order two to three feathered bumpers or make your own using game-bird feathers and electrical tape.
- Begin three to five short retrieve sessions per week, ending each session while the dog still wants more.
- Practice the hold command separately: dog holds bumper in sit position for five to ten seconds before you cue the drop.
- Research your state's wildlife training laws before sourcing any live birds.
- Find a local retriever club or hunt test group. Most welcome beginners and offer access to trained birds, mentors, and structured tests to work toward.
- Record at least one session per week on video and review for stress signals and technique issues.
- Set a milestone goal: a clean single retrieve with delivery to hand at 30 yards within 90 days.
FAQ
My Lab is bird-crazy when birds are involved, how do I keep training controlled without losing momentum?
Yes, but you need a clear plan to prevent overexcitement. Use only short steadiness delays, reward calm eye contact at your side, and keep early bird work to 1 to 2 controlled reps while you hold sessions at 10 to 15 minutes. If the dog starts “wrapping” the bird (rushing in to mouth), pause and go back to feathered bumpers until delivery to hand is consistent again.
What should I do if my Lab retrieves to my hand but keeps dropping the bird early?
A dog that frequently drops on approach may not be ready for that level of distance or handling. Kneel closer, support the hold with the hand-under-jaw method, and rebuild the give command with bumpers first until the dog releases calmly at your cue. Also check mouth pressure by rewarding only soft, full holds, because grabbing is often a grip-strength issue rather than a disobedience issue.
Can I use different commands like “whoa,” “hold,” “back,” and “give” for the same behavior during training?
Avoid mixing release words and acceptance styles, because inconsistency teaches the dog to guess. Pick one command for steady release (for example “back” or “fetch”) and one for delivery (for example “give” or “dead”), and always accept the retrieve the same way. If you already have multiple cues, choose the one you will keep, stop using the others for a week, and use the same timing every repetition.
My Lab won’t stay steady at the line even with basic obedience, what’s the fastest fix?
If your dog keeps breaking at the line, reduce the delay and the distance of the first toss, then rebuild from success. Instead of repeating the same exercise louder, reset quickly (pick up and end the rep), then start again at a shorter wait time. When you do send, make sure the release cue comes immediately before the toss or you will accidentally reinforce the break.
Is it okay to use frozen birds early, and what changes in training compared with feathered bumpers?
“Frozen birds” can be a good bridge if you keep the reps short and your dog already has a reliable hold and give on feathered bumpers. Use the same delivery criteria as you do for bumpers (full carry to your side and release on cue), and expect that the first few frozen introductions may feel different in texture or scent. Don’t jump straight from bumpers to high-stimulation field conditions the same day.
My Lab sometimes ignores the bird they did not see. How do I train handling without creating pressure?
If your dog does not mark the fall, you should not “force” the retrieve. Start by building a rock-solid sit and whistle response in the yard, then add short, visible casts with a white bumper before any bird work. For handling drills, keep the cast geometry simple (back, slight over-right, slight over-left) and reward quickly for the correct response even if the dog arrives behind your expectations.
Will an older Labrador (for example 6 to 8 years old) learn to be a bird dog as reliably as a young pup?
Yes, but you’ll need more patience with steadiness and delivery. Plan smaller step-ups in delay, and expect extra time when transferring from bumpers to live or feathered objects. If older dogs show stiffness or frustration, reduce reps, shorten sessions, and focus on calm reward history first, because older Labs can be less tolerant of fast progression.
How do I respond if my dog shows stress signals like lip licking or whale eye during bird training?
Your recovery plan is to decrease arousal, not to keep “pushing through.” After a stress sign or a failed rep, end the session or move back to a simpler exercise (obedience, hold on bumpers, short seen retrieves). Resume only when the dog is relaxed and taking treats easily. If you repeatedly see avoidance, yawning with lip licking, or whale-eye, it usually means the environment or rep level is ahead of the training stage.
What should I record in my training log to make troubleshooting easier?
It helps a lot. Many Labs will improve faster when you track not just successes, but also failure patterns like which side they break on, how often they drop at the same distance, and whether delays correlate with excitement. Add one note for each rep, “steady yes/no,” “delivered to hand yes/no,” “released on cue yes/no,” and “behavior around birds calm/excited,” then adjust only one variable at a time the next session.
My Lab gets excited and starts charging before I send, should I correct that in the moment?
Don’t. If the dog is charging or spinning before you even pick up the bumper, the trigger likely needs a reset and a new calm routine. Practice leash or collar hold at the line, reward quiet behavior before the send, and delay the toss until the dog is calm for a few seconds. Your goal is to make “calm and steady” the start button, not “load the dog with energy then try to control it.”
Next Article
How to Whoa Break a Bird Dog: Humane Step by Step Guide
Humane, step-by-step how to teach bird dog whoa and fix creeping, chasing, breaking point, and inconsistency with reward