Training a wild bird is possible, but the path you take depends on one key question: is this bird staying with you, or are you helping it get back to the wild? If it's an injured or orphaned bird, your first job today is to get it to a licensed wildlife rehabilitator, not to start training it. If you're in a situation where you're working with a legally permitted bird, or you're a rehabilitator yourself, then you can build trust, reduce stress, and teach basic handling tolerance using the same patient, welfare-first methods that work for any animal. This guide walks you through both paths, step by step.
How to Train a Wild Bird Safely and Humanely

Maya Harris
24 Apr 2026
Before you do anything: legality, ethics, and when to call a rehabilitator
This part isn't optional reading. In the United States, the Migratory Bird Treaty Act (MBTA) makes it unlawful to take, capture, kill, or possess migratory birds, including their feathers, nests, and eggs, except as permitted by federal regulation. That covers the vast majority of wild birds you're likely to encounter: songbirds, waterfowl, raptors, and more. Violations can result in misdemeanor or felony penalties depending on the circumstances. Many states layer additional protections on top of federal law. Virginia, for example, makes it unlawful to hunt, trap, possess, sell, or transport wild birds except as permitted. North Carolina allows someone without a rehabilitation license to temporarily hold an injured bird only if they transfer it to a licensed vet or licensed rehabilitator within 24 hours. Iowa requires a specific state license to take and temporarily possess protected species for rehabilitation.
To legally care for migratory birds in a rehabilitation context, federal USFWS migratory bird rehabilitation permits are required, and most states stack their own permits on top of that. Massachusetts, like most states, directs the public to contact a licensed wildlife rehabilitator if a bird needs help, since rehabilitators hold the federal migratory bird rehabilitation permit required to legally care for those species. Bottom line: if you've found a wild bird and you don't hold the appropriate permits, your legal and ethical move is to contact a licensed wildlife rehabilitator today. You can find one through your state wildlife agency website or the National Wildlife Rehabilitators Association (NWRA) directory.
If you're a licensed rehabilitator, a falconer (for raptors), or you're working with a non-native species not covered by the MBTA, such as European starlings or house sparrows in the US, the rest of this guide applies directly to you. If you're still figuring out your legal status, sort that out before you continue. The welfare of the bird, and your own legal standing, depends on it.
Quick assessment: figure out what you're dealing with before anything else

Before you try to house, handle, or train a wild bird, spend five minutes doing a calm visual assessment from a distance. You need to know two things: what species it is (roughly), and whether it's sick, injured, or simply a fledgling doing exactly what it's supposed to do.
Signs a bird needs immediate help
- Sitting on the ground and unable to fly or stand upright
- Visible wounds, blood, or asymmetrical wing position
- Eyes partially or fully closed in the middle of the day
- Fluffed up and unresponsive to nearby movement
- Breathing with an open beak for extended periods
- Seizures, trembling, or uncoordinated movement
- Crop (the area at the base of the neck on some species) appears impacted or swollen
If you see any of those signs, this bird needs veterinary or rehabilitator care before any training conversation is relevant. Contain it gently in a cardboard box with air holes, lined with a soft cloth (not terry cloth, which catches nails), keep it in a dark, quiet place at room temperature, and make your calls immediately. Do not offer food or water yet. Aspiration is a real risk if a sick or injured bird is force-fed.
Species matters more than you might think
A rough species ID changes everything about how you approach this bird. Raptors (hawks, owls, falcons) are powerful and can cause serious injury with talons and beaks. They need experienced handlers and specialized diets. Songbirds and finches are fragile and high-stress, and most will not tolerate handling well at all. Corvids (crows, jays) are highly intelligent and can adapt to human presence faster than most species. Parrots found wild in the US are often escaped pets or feral non-native birds, and may already be partially tame. Waterfowl and shorebirds have different housing and dietary needs entirely. Knowing your species lets you set realistic expectations and choose the right approach from the start. If you're unsure, take a clear photo and use a free app like Merlin Bird ID or iNaturalist to narrow it down.
Set up for success: housing, quiet, and safe feeding

Stress kills wild birds faster than almost anything else. Before you attempt any interaction, get the environment right. A wild bird in a chaotic, noisy, brightly lit space is in a constant fight-or-flight state, and no meaningful training or trust-building can happen from that baseline.
Housing basics
- Use the smallest appropriate enclosure at first to reduce flight-panicking and injury. A cardboard carrier or small wire kennel works for initial containment.
- Line the bottom with non-slip material. Paper towels work well and are easy to change for hygiene.
- Keep the enclosure in a quiet room away from pets, children, loud appliances, and direct sunlight.
- Maintain ambient temperature between 70-80°F (21-27°C) for most passerines and small birds. Raptors tolerate a slightly wider range.
- Provide a low perch at a height where the bird can easily reach it without full wing extension in a small space.
- Cover three sides of the enclosure with a light cloth to reduce visual stressors while still allowing airflow.
Feeding and enrichment
Feed species-appropriate food only. This sounds obvious but it's where a lot of people go wrong. Bread, milk, and generic seed mixes are not appropriate for most wild birds. Insectivores (robins, wrens, most songbirds) need live or dried mealworms, not seed. Raptors need whole prey like pinky mice or day-old chicks, not chicken scraps. Corvids are omnivores and easier to feed appropriately with a mix of insects, small pieces of raw meat, eggs, and some fruit. Seed-eaters (finches, sparrows) do fine on a quality wild-bird seed mix. Fresh water should always be available in a shallow dish. For birds being conditioned toward release, hiding food in substrate or branches to encourage natural foraging behavior is far better than presenting it in an open bowl. That foraging enrichment also keeps the bird mentally engaged without requiring direct human interaction.
Building trust: desensitization, distance, and positive reinforcement
Wild birds are not domesticated. Their default response to a large animal (you) approaching is to treat it as a predator. The only way to change that is through slow, consistent, low-pressure exposure over time. There are no shortcuts here, and pushing too fast always sets you back further than where you started.
Desensitization: start farther away than you think you need to
Identify the bird's flight distance, which is the distance at which it begins to show stress signals: tail flicking, alarm calling, crouching, moving away from you, or attempting to flee. Your goal at first is simply to exist within that distance without causing those responses. Sit or stand just outside that threshold for five to ten minutes at a time, doing calm, predictable things. Read a book, work on your phone, or just sit quietly. Don't make direct eye contact, which many species read as a threat. Approach slightly closer each session only when the bird holds still and shows no stress signals at the current distance. This process can take days to weeks depending on the species and the individual bird.
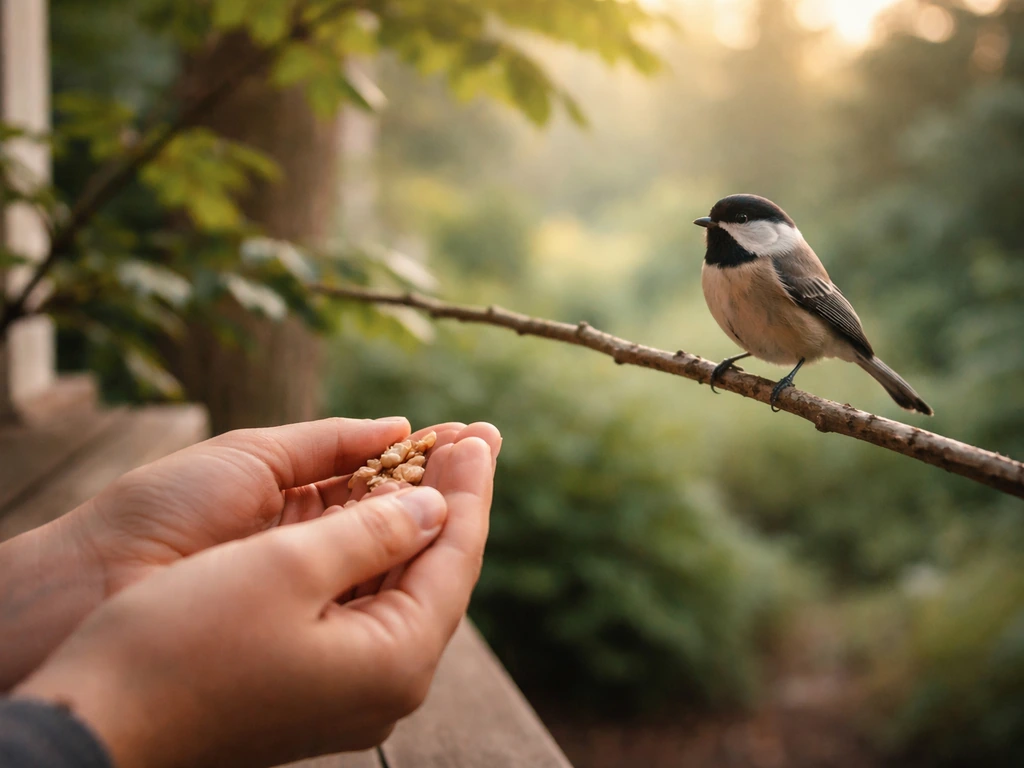
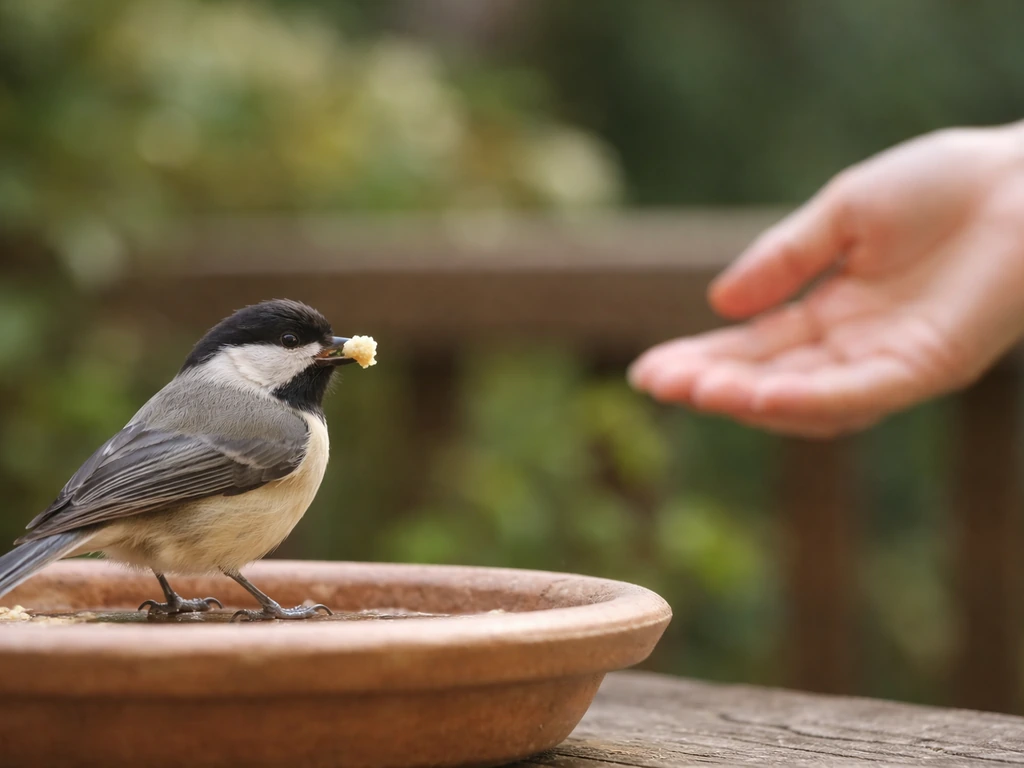
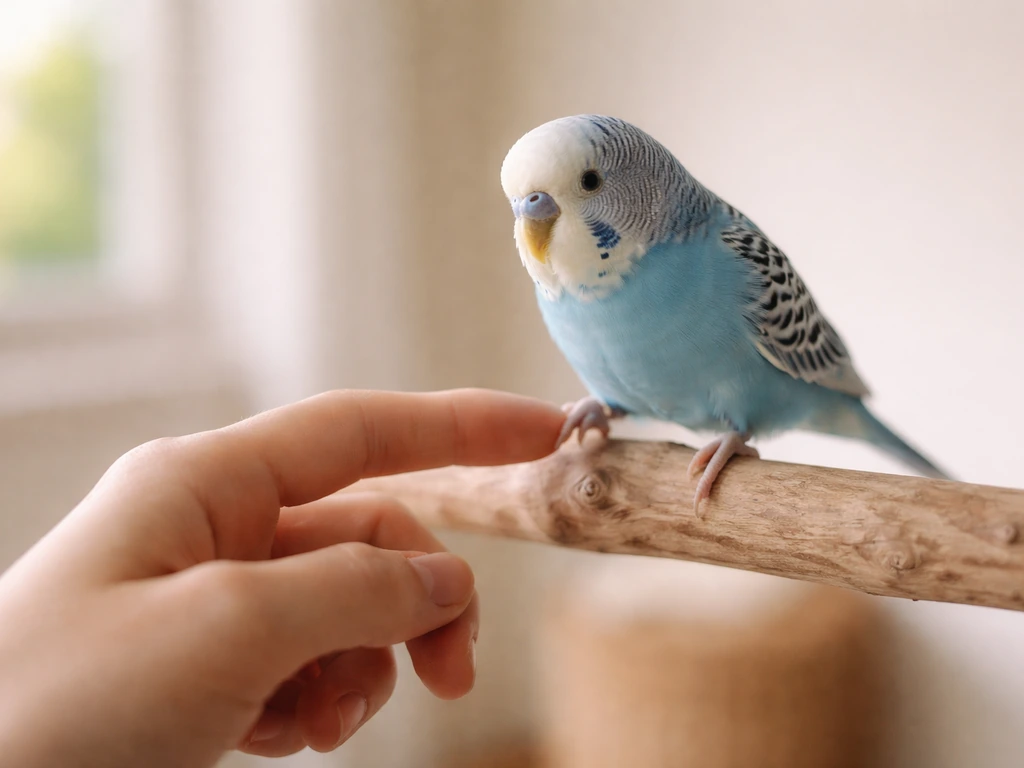
Positive reinforcement: high-value food is your primary tool
Once the bird is tolerating your presence at a distance, introduce food as a bridge. Offer the highest-value food item the bird will eat, placed at progressively shorter distances from your body. The goal is simple: your presence predicts good things. Over multiple sessions, move the food closer to your hand, then onto your hand, then require the bird to approach your hand to get it. This is the foundation of hand-feeding and the precursor to every other step-up and target training technique. Keep sessions short (five to fifteen minutes maximum) and always end on a calm, successful moment, not a moment of stress or struggle.
Practical training steps: perch tolerance, target training, and hand-feeding
Once your bird is consistently approaching you for food and showing low stress at close range, you can begin introducing deliberate training behaviors. The three most useful ones for wild birds are step-up tolerance, target training, and sustained hand-feeding.
Step-up and perch tolerance
- Start with a short, natural-diameter perch (a stick or dowel appropriate to the bird's foot size) held low and steady in one hand, with a food reward in the other.
- Hold the perch gently against the bird's lower legs, just above the feet, while offering the food reward. Many birds will step up reflexively to reach the food or simply because the perch pressure triggers the stepping response.
- The instant the bird places even one foot on the perch, mark it with a calm verbal cue (a quiet 'good' works fine) and deliver the reward.
- Build duration gradually. First reward one foot on the perch, then two feet, then a few seconds of holding position, then standing calmly for longer stretches.
- Only introduce your bare hand as the perch surface after the bird is reliably stepping onto the stick perch without hesitation. Move at the bird's pace, not yours.
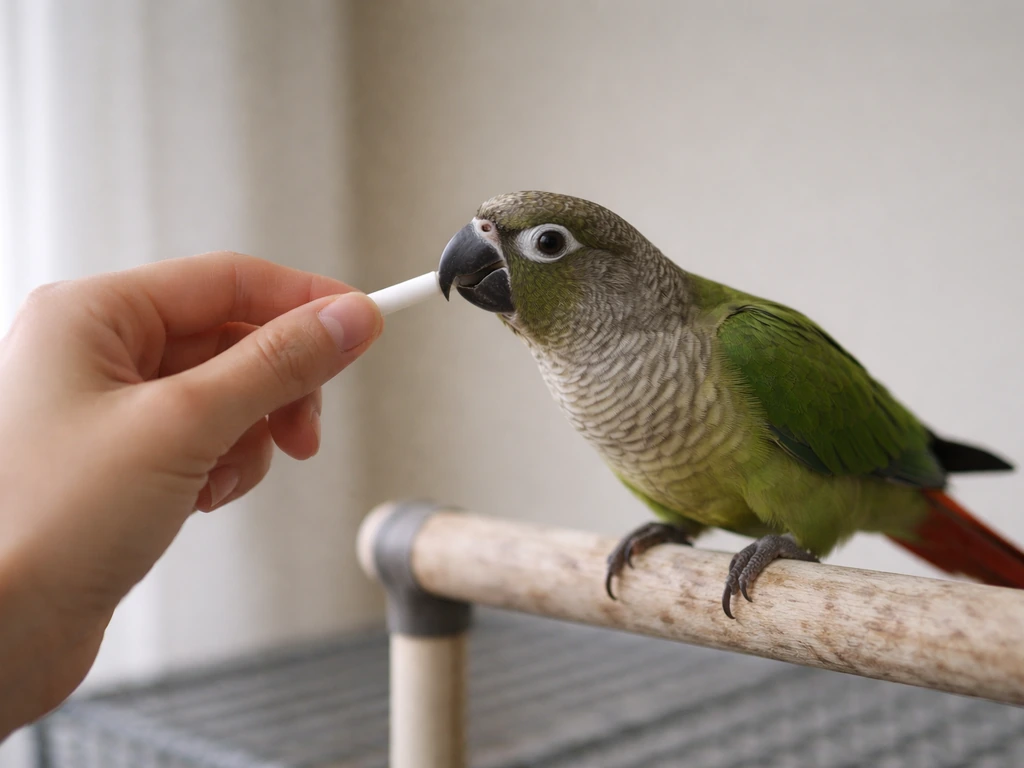
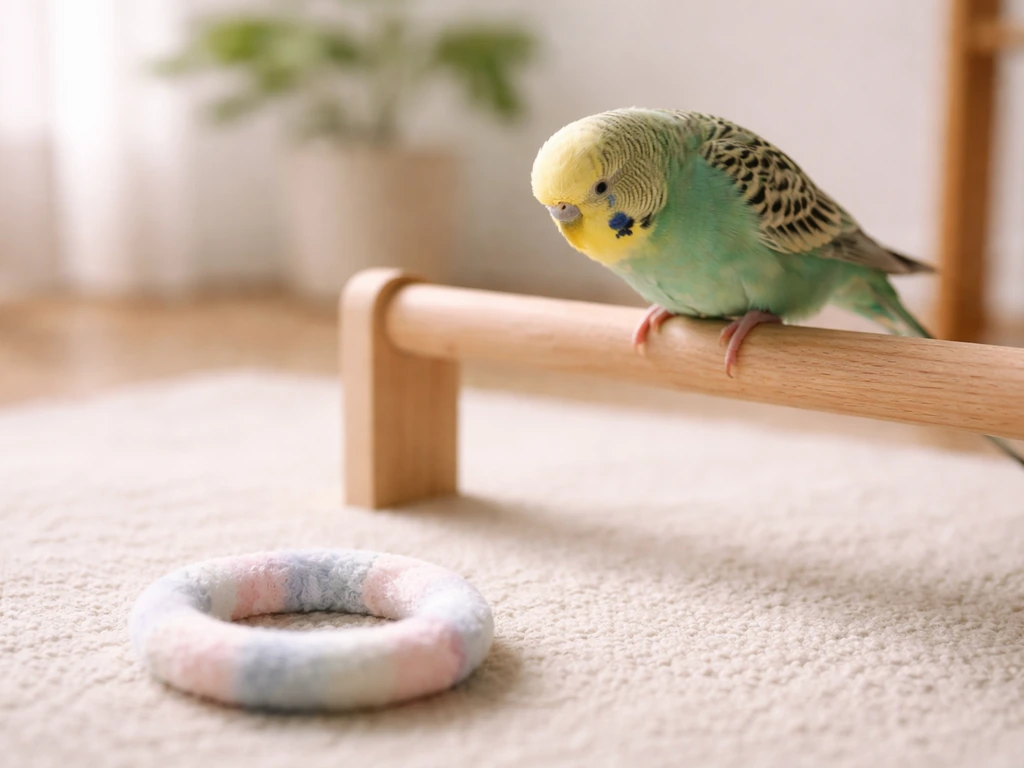
Target training
Target training teaches the bird to touch a specific object (a chopstick, a pen cap, a ball on a stick) with its beak on cue. It's an incredibly useful foundational skill because it gives you a way to guide the bird's movement, build confidence, and introduce new objects or environments without direct handling. Present the target within reach of the bird, and the moment it investigates or touches it, mark and reward. Once the bird is reliably touching the target, you can use it to lure the bird onto a scale for weight checks, into a transport carrier, onto a new perch, or through other training steps. Corvids, parrots, and raptors in falconry training pick this up particularly quickly. Finches and most small passerines are harder to target-train and are generally better served by simple positive reinforcement for proximity and perch tolerance rather than complex behavior chains.
Species-specific notes for training
| Species group | Training approach | Key caution |
|---|---|---|
| Songbirds / passerines | Patience-heavy desensitization, minimal direct handling, food-based reinforcement | Extremely stress-sensitive; avoid restraint |
| Corvids (crows, jays) | Target training, puzzle feeders, food reward chains; responds well to enrichment | Highly intelligent; boredom causes problem behaviors |
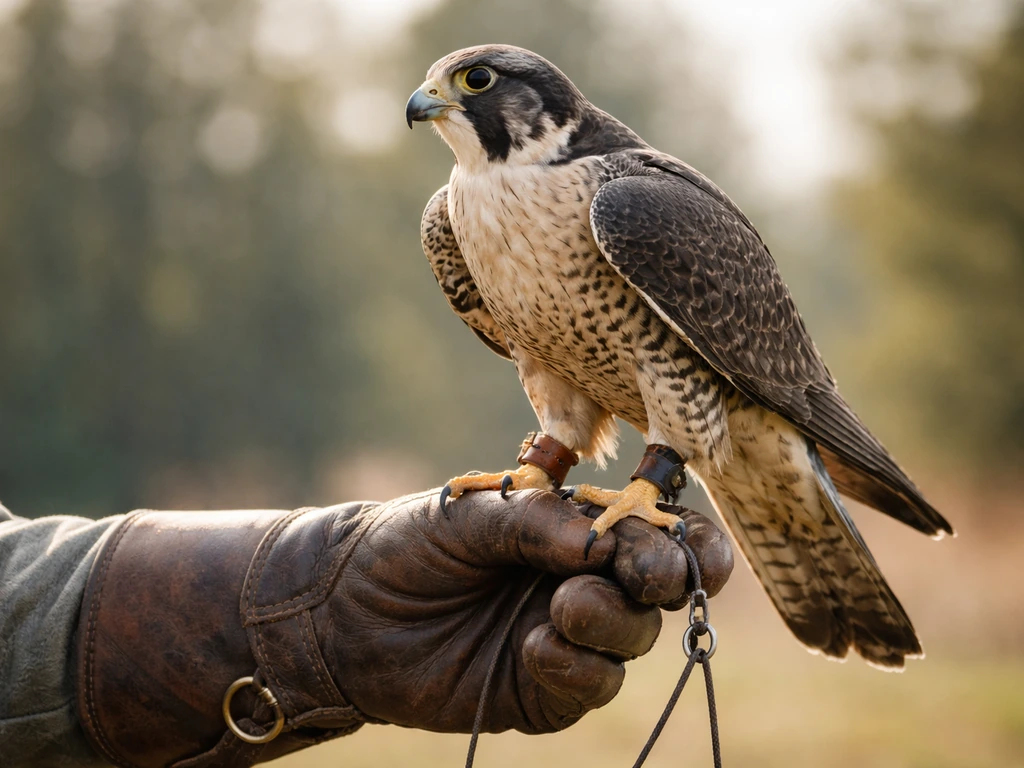
| Raptors / birds of prey | Falconry-style weight management, glove tolerance, lure training | Requires experience, protective gear, and permits |
| Parrots (feral or escaped) | Standard parrot taming methods apply; may already be hand-tame | Verify legal status; non-native species rules vary |
| Waterfowl / ducks/geese | Approach desensitization, food-based trust; minimal direct handling needed | Imprinting risk is high; keep human contact minimal for release candidates |
| Finches / small seedeaters | Minimal handling protocol; focus on calm enclosure environment | Fragile; captures cause stress injuries easily |
If this bird is going back to the wild: minimizing imprinting
If your goal is release, the training approach flips almost entirely. To get results with a towa towa bird, focus on gradual trust-building first, then use target training and hand-feeding as described in the practical steps how to train a towa towa bird. For raptors like falcons, the exact steps differ, so it helps to also review how to train a falcon bird. Instead of building a bond with humans, you're actively working to prevent one. An imprinted bird, one that has associated humans with food, safety, and companionship during a critical developmental window, will often be unable to survive independently or will become a nuisance animal that approaches people and is ultimately euthanized. This is one of the most important welfare points in this entire guide.
Minimize imprinting from day one
- Keep human contact to the minimum necessary for feeding and health checks only.
- Use a hand puppet or hide behind a barrier when feeding young birds so they do not associate the food with a human face or hands.
- House the bird with conspecifics (same species) whenever possible. A bird that bonds with its own kind is far more likely to re-wild successfully.
- Keep the bird in a large outdoor enclosure ('flight cage') as soon as it is healthy enough, so it begins experiencing natural light cycles, weather, and ambient wildlife sounds.
- Introduce live prey or natural foraging opportunities early. A raptor that has never hunted live prey before release has a much lower survival probability.
- Reduce food predictability before release. Instead of scheduled feedings, scatter food or use puzzle feeders that require the bird to work for it, mimicking natural foraging.
Pre-release conditioning
In the weeks before release, the bird should be flying full distances in a large flight enclosure, eating independently, and showing wariness around humans. These are good signs, not problems to fix. A bird that hisses at you when you enter the flight cage is doing exactly what it should. Coordinate release timing with your wildlife agency or a licensed rehabilitator. Seasonal timing, habitat, and the presence of conspecifics in the release area all affect survival outcomes significantly. For raptors specifically, the training toward survival skills overlaps with falconry techniques in some ways, and you'll find more detail on that in the dedicated guide on how to keep a bird of prey and how to train a falcon bird covered elsewhere on this site.
Troubleshooting: biting, panic, won't eat, won't step up
Wild bird training doesn't go smoothly every day. Here's how to handle the most common problems without derailing the trust you've built.
The bird bites or lunges
Do not pull away sharply or make a sound. A calm, slow withdrawal tells the bird that biting does not produce the panicked response it's looking for. Move back to a greater distance, reduce the pressure of the session, and return to an earlier step in the desensitization process. For raptors, always wear a falconry glove. A hawk or owl bite from even a small species can break skin and cause serious injury. Biting in small songbirds is almost never dangerous but is always a clear signal that you've moved too fast.
The bird panics and thrashes
End the session immediately. Cover the enclosure, leave the room, and give the bird at least 30 to 60 minutes of complete quiet before checking on it. Repeated thrashing episodes cause feather damage (called 'barbering' or 'bashing'), bruising, and sometimes fatal injuries. If a bird is consistently panicking despite slow, calm approaches, consider whether this individual is a good candidate for taming at all, or whether transfer to a rehabilitator with a more appropriate facility is the kinder choice.
The bird won't eat
First, rule out health problems. A bird that hasn't eaten in 24 hours and is also showing lethargy, fluffing, or weight loss needs veterinary attention today, not troubleshooting tips. If the bird appears healthy but is not eating, double-check that you're offering species-appropriate food in the right format. Some insectivores will only take live prey at first and won't recognize dried mealworms as food. Some birds won't eat from a dish placed at an unfamiliar height. Try different containers, different food presentations, and place food near natural perching positions. Covering the cage and leaving the bird alone for a few hours often helps, since many birds won't eat when they feel watched.
The bird won't step up
Go back to basics. Step-up behavior requires the bird to already be comfortable at close range and motivated by the food reward you're offering. If either of those conditions isn't met, step-up won't happen. Check your reward value (is this food item actually high-value for this species?), your approach speed (slow is almost always better), and your body position (crouching or sitting reduces your apparent size significantly for small birds). Never physically force a bird onto a perch. Forced contact breaks whatever trust you've built and can injure the bird.
When to stop and call a professional
Some situations are simply beyond DIY handling, no matter how patient and well-intentioned you are. Contact a licensed wildlife rehabilitator or avian vet if you see any of the following:
- The bird has not eaten or drunk anything in 24 hours
- There is visible injury, bleeding, asymmetry, or swelling
- The bird is losing weight despite eating
- Repeated panic episodes are causing feather damage or physical injury
- The bird shows neurological signs: head tilt, circling, seizures, or falling off its perch
- You are unsure of the species and therefore unsure of dietary or housing needs
- You feel out of your depth at any point
Calling a professional is not giving up. It is the most responsible and compassionate choice you can make for a wild animal in your care. Licensed rehabilitators have the training, facilities, permits, and species-specific knowledge to give wild birds the best possible chance. Your job, done well, is to keep the bird calm and safe until you can make that handoff.
FAQ
Can I keep training a wild bird if it is still afraid, but it’s eating when I offer food?
Eating with low stress is a good sign, but you should still match your progress to stress signals like tail flicking, alarm calling, crouching, or attempts to flee. If the bird shows any of those at your current distance, slow down to the previous step (more distance, less interaction) and keep sessions short (5 to 15 minutes). Continue only when the bird remains calm at the close-range step you are working on.
What should I do if the bird bites but does not seem injured?
Treat biting as a “too fast” warning, not a sign to correct the bird. Withdraw slowly without sudden movements or loud sounds, return to a greater flight distance, and resume from an earlier desensitization stage. For raptors, always use appropriate handling protection, because bites can cause serious injury even when the bird seems small or is not thrashing.
Is it safe to handle a wild bird to put it in a carrier or to relocate it to a safer spot?
Only do this if you are already at the close-range stage where the bird is consistently tolerating your presence, and use training tools like target behavior to guide movement. If you have to grab the bird, you are likely moving too fast and may injure it or increase stress. If relocation is urgent and you are not properly trained, contact a licensed wildlife rehabilitator.
How can I tell the difference between a fledgling and an injured bird when I’m trying to decide whether to train?
A fledgling usually behaves like it is using the environment correctly, staying where it belongs and responding normally for age, while injury signs include weakness, visible wounds, inability to stand or perch, unusual lethargy, or disorientation. If the bird is calling distressfully but not moving appropriately for its age, or it appears uncoordinated, treat it as injured and seek rehabilitator or veterinary care before any training.
Do I need to provide water and food immediately if I’m calling for help?
Give the bird species-appropriate food and water only when it is safe to do so and the bird is not showing illness or injury signs. If you suspect a sick or injured bird, avoid forced feeding and also avoid offering food in a way that could cause aspiration. Follow the “contain quietly, call immediately” approach first, then provide appropriate food once a professional advises or the bird is clearly stable.
What if the bird won’t eat from a dish, but it seems alert and otherwise healthy?
Recheck species-specific diet first, then change the presentation. Some insect-eaters ignore dried food at first and prefer live or fresh prey, and some birds will not feed from unfamiliar dish placement or height. Try different containers and place food near natural perching positions. Covering the enclosure and leaving the bird alone for a few hours often reduces watchfulness-driven stress.
How long should I wait before I decide the bird is “not a good candidate” for taming at home?
Use the bird’s welfare response, not a timer, but repeated severe thrashing or persistent panic that does not improve after you reduce pressure is a red flag. If you cannot reach basic steps like tolerating your presence without repeated panic, or the bird is not eating after addressing diet and stress factors, transfer to a rehabilitator or avian vet promptly.
Is target training always the right next step after hand-feeding tolerance?
Target training is often useful, but it depends on species and temperament. Some small passerines and fragile birds may do better with simpler reinforcement for proximity and perch tolerance rather than complex behavior chains. Choose the lowest-risk skill that supports your welfare goals, like carrier tolerance or transport readiness, and stop if the bird shows rising stress at the “touch” stage.
How do I know my session is too long or too intense?
If you see escalation in stress behaviors, such as increased alarm calling, repeated attempts to flee, tail flicking that grows more frequent, or frantic movement, your session is too intense. End on a calm, successful moment rather than waiting for stress to peak, then give the bird a quiet recovery period (30 to 60 minutes) before checking again.
Can I train a wild bird that is legally protected but not migratory, or a non-native species?
Your training approach can differ based on your legal status and welfare obligations, but the core welfare-first principles still apply. For non-native birds in the US that are not covered by the migratory protections you are avoiding, you still should confirm correct diet, minimize stress, and prevent injury. If you are uncertain whether your bird is covered by protections, pause and verify with local wildlife authorities before continuing.
For release-focused training, what are the “must-have” signs before the bird goes out?
Before release, the bird should be flying full distances in a flight enclosure, eating independently with appropriate species food, and showing wariness around humans. Hissing or obvious boundary behavior during cage entry is not necessarily a problem, it can indicate appropriate survival wariness. Coordinate release timing with a rehabilitator or your wildlife agency to match seasonal and habitat conditions.
Next Articles
How to Train a Falcon Bird Step by Step for Welfare-First Care
Step-by-step welfare-first falcon training: safe setup, bonding, recall cues, target and step-up, feeding, and troublesh
How Do You Train a Bird Safely With Hand Training
Welfare-first hand training for pet birds: set up routines, step-up and touch tolerance, plus bite fear troubleshooting.
How to Teach a Bird to Fetch Step by Step Guide
Humane, step-by-step training to teach your bird to fetch safely, with targets, rewards, troubleshooting, and gradual re