Training a bird comes down to one core principle: you earn trust first, then teach behaviors. Whether you have a budgie, a cockatiel, an African grey, or something more unusual, the process is the same. You start by making yourself safe and predictable to the bird, then you layer in clear communication using positive reinforcement. No forcing, no grabbing, no flooding the bird with scary experiences. Done right, training is something your bird will actively look forward to.
How Do You Train a Bird Safely With Hand Training

Maya Harris
2 Apr 2026
Pick the right approach for your bird's species and temperament
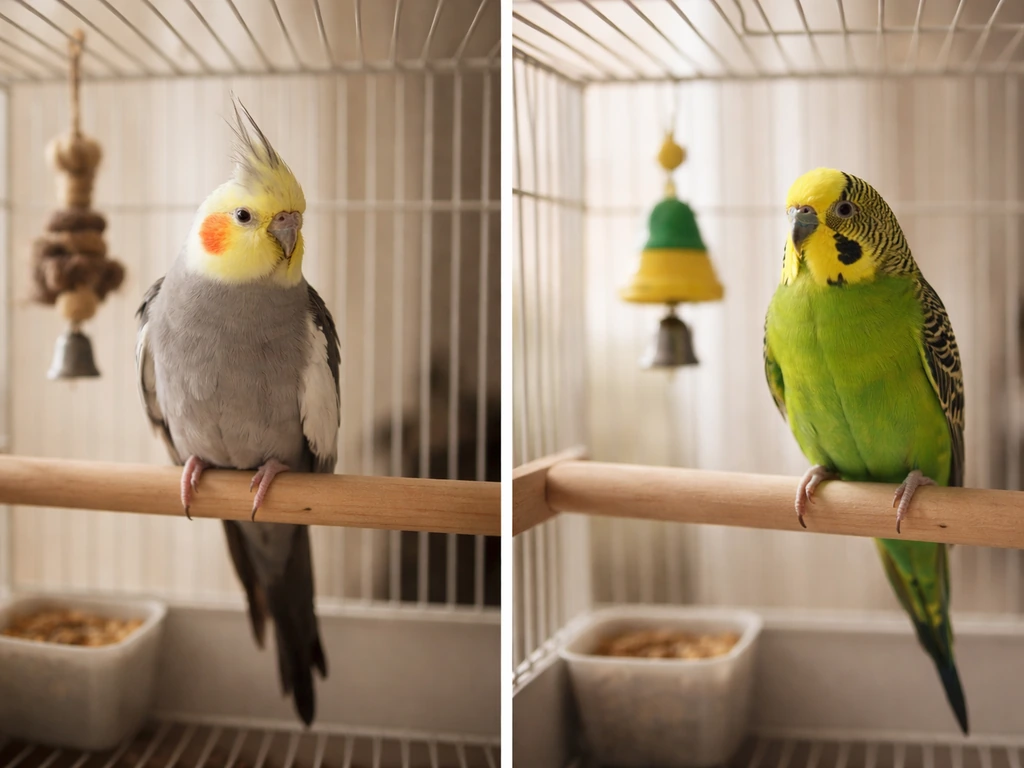
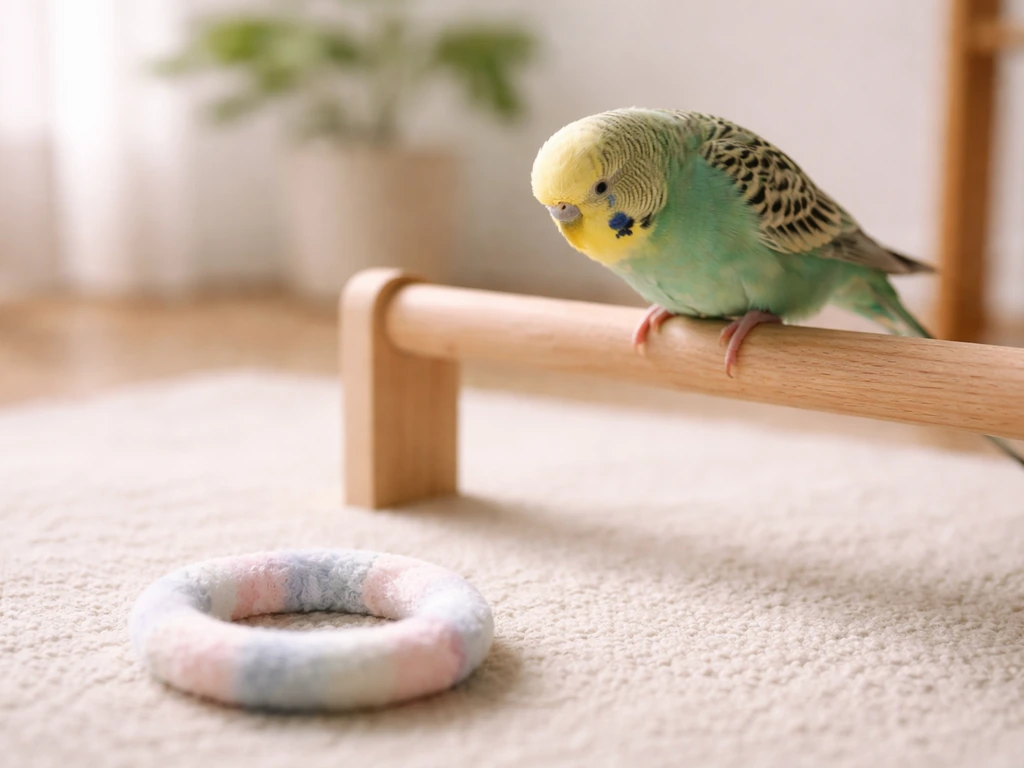
Not every bird trains the same way, and starting with a realistic picture of your specific bird saves a lot of frustration. A hand-raised cockatiel that already tolerates people is a completely different project from a recently rehomed adult Amazon parrot with a history of rough handling. Species matters too: budgies and cockatiels are typically quick to tame with patient, gentle work; larger parrots like macaws, African greys, and cockatoos are highly intelligent but can also be more sensitive or reactive; birds of prey require a very specialized falconry framework that is built around entirely different welfare and legal rules.
Before you start, honestly assess your bird's baseline. Does it move away from your hand, freeze, or actively try to bite when you approach? That tells you where to start in the process. A bird that is already curious and approaches the cage bars just needs light guidance. A bird that screams and bashes against the cage when your hand comes near needs a much slower desensitization plan. If you have a wild or semi-wild bird you are hoping to work with, the framework for how to train a wild bird is meaningfully different from what works for pet birds raised in captivity, so treat that as a separate starting point.
Temperament is partly species-typical but also highly individual. Two birds of the same species from the same breeder can have very different personalities. Watch your bird for a few days before you even try hands-on work. Note when it is most active and relaxed (usually morning or late afternoon), what foods it gets excited about, and whether it tracks your movements with curiosity or fear. That observation period is not wasted time. It is data you will use throughout the training process.
Set up a safe, low-stress environment before training even starts
Environment directly affects how fast training progresses. A bird that is chronically stressed by noise, irregular schedules, inadequate sleep, or poor diet is not in a state to learn. Before you work on behaviors, get the basics right.
- Sleep: Most pet birds need 10 to 12 hours of uninterrupted sleep in a quiet, darkened space. Chronic sleep deprivation raises baseline stress hormones and makes birds reactive and harder to work with.
- Diet: A nutritionally complete diet (species-appropriate pellets, fresh vegetables, and limited seed as a treat) keeps energy and mood stable. If your bird is primarily seed-fed, this is a good time to start transitioning gradually.
- Routine: Birds feel safer when they can predict their day. Feed, train, and interact at consistent times.
- Cage placement: Position the cage at roughly chest height in a room with moderate, calm activity. Avoid high-traffic corners, kitchens (fumes are dangerous), and spots near exterior doors.
- Training space: Choose a small, bird-proofed room or use a play stand away from the main cage. A familiar, enclosed space reduces distractions and prevents escape during early sessions.
Consent and agency matter enormously here. A bird that has some control over interactions is a bird that stays engaged rather than becoming shut down or aggressive. From day one, give your bird the option to approach or move away. If it moves away, you stop and try again later. This sounds simple, but it is the foundation of every cooperative behavior you will ever teach. Guidelines from organizations like the IAABC emphasize that welfare plans should actively provide learner choice and control where safe and reasonable, and that fear or refusal signals the need to slow down, not push harder.
One practical tip: keep early training sessions short, around two to three minutes each, and run multiple sessions per day rather than one long block. Research from operant conditioning work with birds supports this. Short sessions prevent fatigue and keep motivation high. You can do six short sessions in a day and see faster progress than you would from one thirty-minute session.
Step-by-step hand training: from approach to step-up
This is the core of taming a pet bird. Work through these stages in order. Do not skip ahead just because the bird seems tolerant. Patience here pays off with a genuinely calm, willing bird rather than one that tolerates handling while secretly stressed.
Stage 1: Approach tolerance (hands outside the cage)
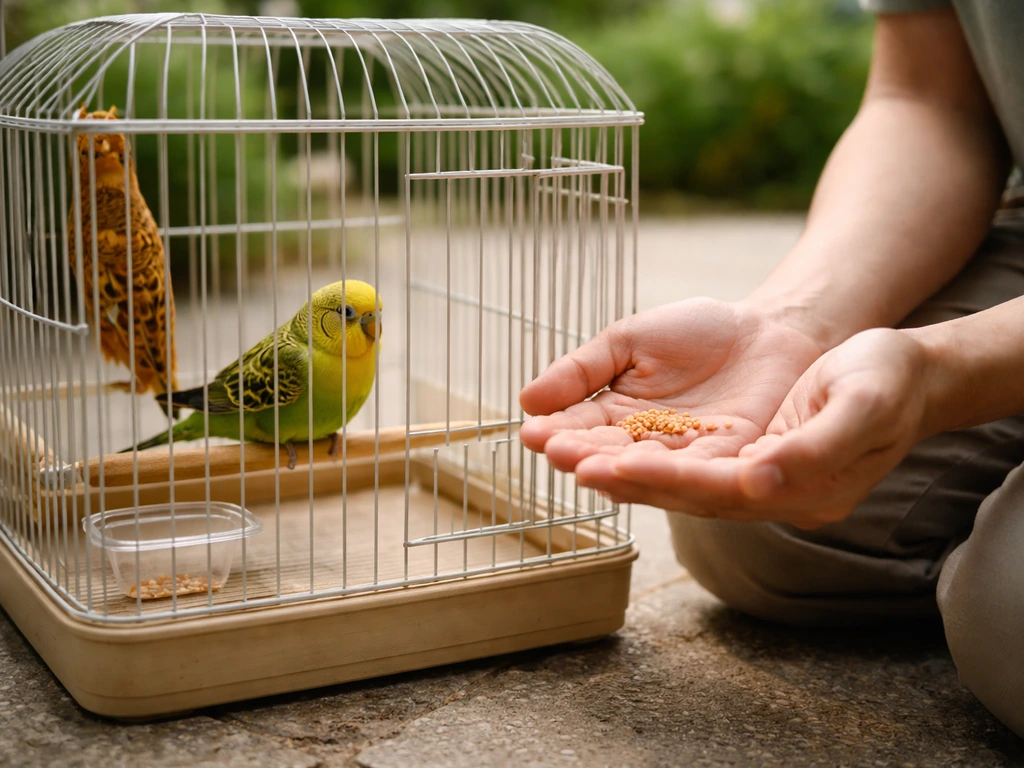
Start by simply sitting near the cage and talking softly. Do this daily until the bird does not react with alarm when you sit close. Once the bird is relaxed with your presence, begin moving your hand slowly toward the cage exterior. Stop immediately if the bird shows alarm (puffed feathers are actually relaxed; flattened feathers, wide eyes, open beak, and retreating are stress signals). Reward calm behavior by tossing a small, high-value treat into the cage. Your hand appearing should start to predict good things before you ever try to touch the bird.
Stage 2: Hand inside the cage
Once the bird is comfortable with your hand near the cage, introduce your hand slowly inside the cage. Move slowly, avoid reaching directly at the bird, and hold a treat in your fingers. Let the bird make the choice to come to you. If it retreats, withdraw your hand and try again in the next session. Do not leave your hand in the cage hovering over a scared bird hoping it will come around. Remove it and try again when the bird is relaxed. Reward any movement toward your hand, even a single step in your direction.
Stage 3: Touch tolerance
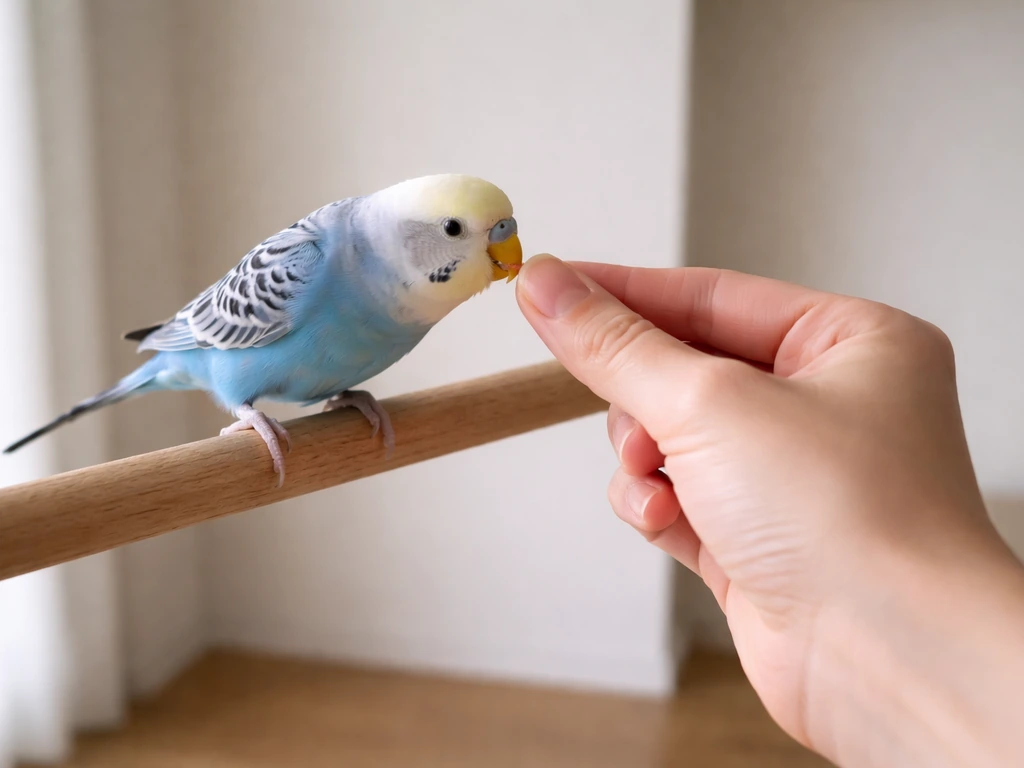
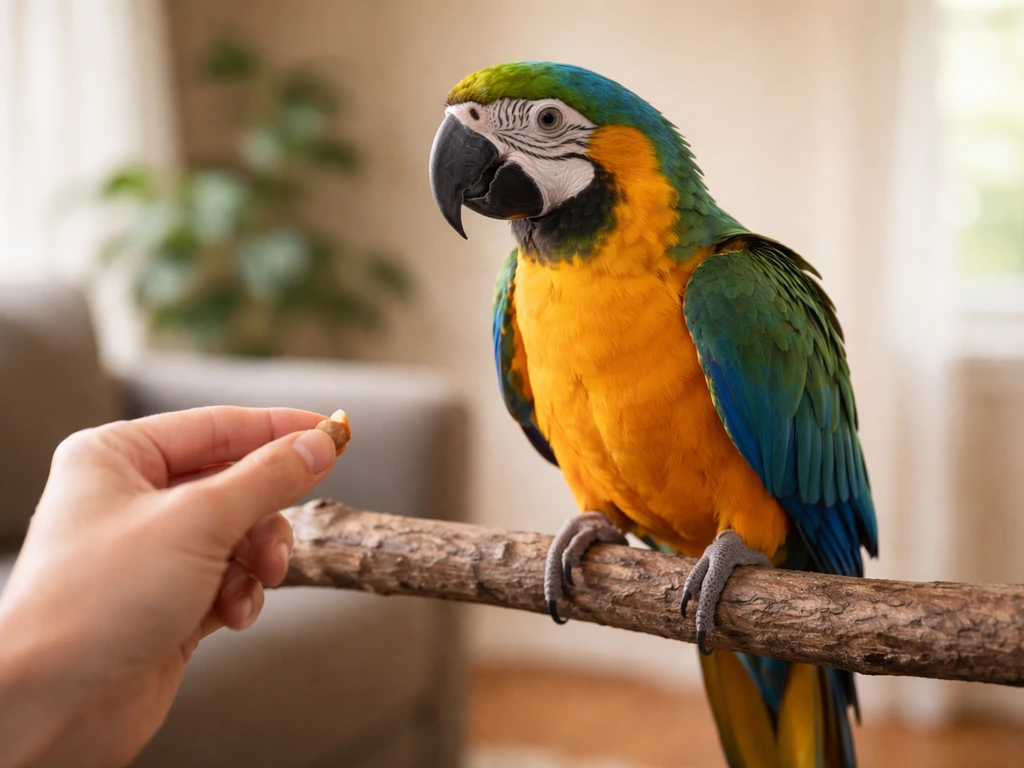
Once the bird takes treats from your hand reliably, start working toward touch. Begin with the least threatening spot: the beak area and the chest, not the top of the head (which many birds find threatening). Offer a treat and, as the bird leans forward to take it, gently let your finger make brief contact with its chest. Click or say "yes" at the moment of contact and let the bird take the treat. Gradually increase touch duration over multiple sessions. Never grab. The goal is that the bird accepts and eventually enjoys contact, not that it simply tolerates being restrained.
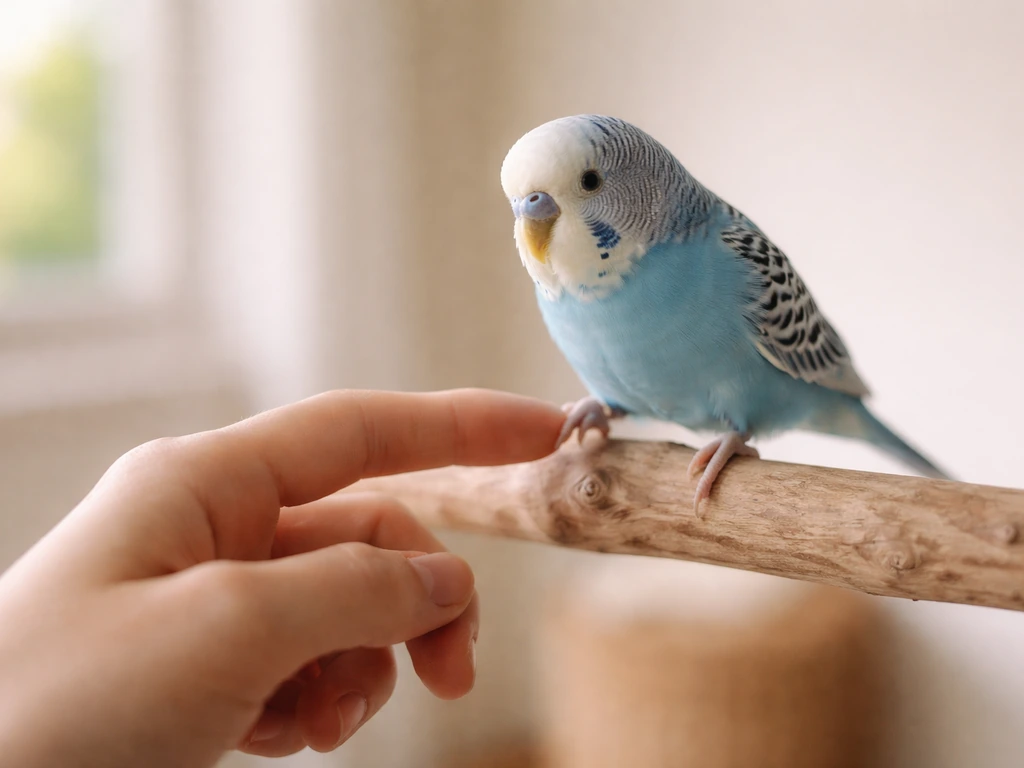
Stage 4: The step-up
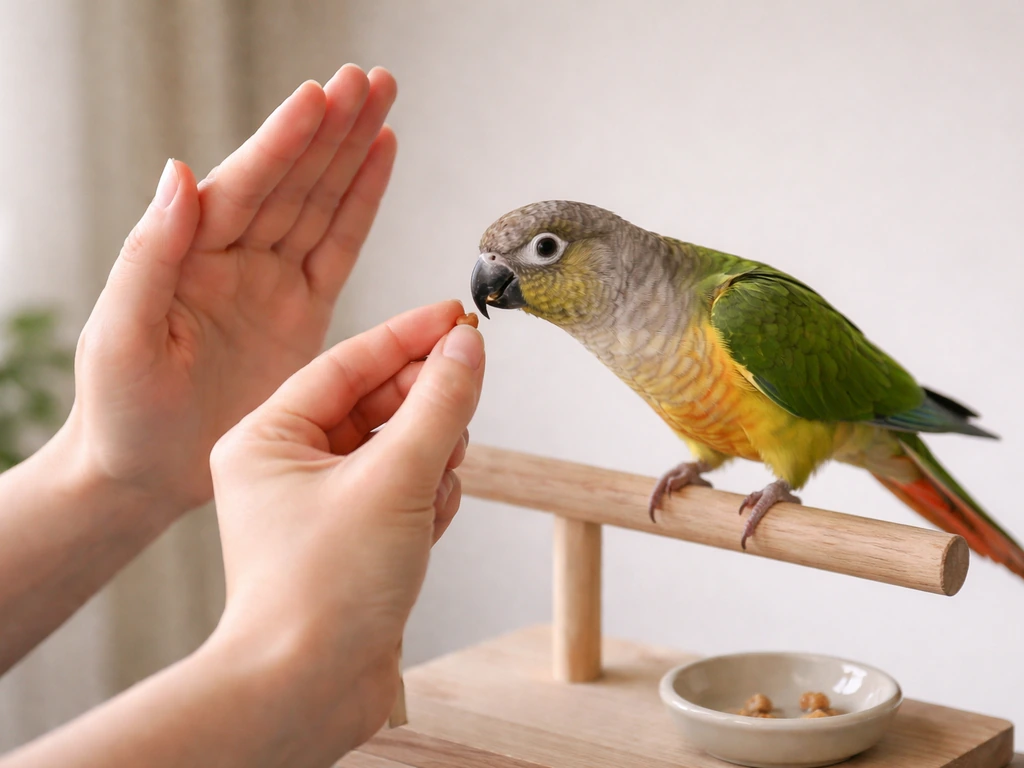
The step-up (bird stepping onto your finger or hand) is the most important handling behavior you will teach. Present your finger horizontally at the bird's lower chest, just above its feet, and apply light forward pressure while offering a treat at the same time. Say "step up" calmly and consistently. Many birds will step up naturally to reach the treat. Click and reward the moment the first foot comes up onto your finger. Do not try to lift the bird immediately. Just reward the first foot, then reward both feet up, then gradually introduce a slight lift before rewarding. Keep sessions to just a few repetitions before ending on a positive note.
Using positive reinforcement: treats, clicker training, and session structure
Positive reinforcement is not just a philosophy, it is the most effective and humane tool you have. The basic mechanic is simple: mark the exact moment a desired behavior happens, then immediately deliver a reward. Clicker training (also called marker training) uses a small clicking device to create a precise, consistent marker signal. The click tells your bird "that exact thing you just did earned a reward." Professional organizations like AVSAB have clearly stated positions that humane animal training should rely on positive reinforcement and avoid aversive methods, and that standard applies just as well to birds as to any other species.
If you do not have a clicker, a consistent short word like "yes" works fine. The key is consistency: always use the same marker, always follow it with a treat within one to two seconds. Your bird will learn the association quickly. Target training builds naturally on this: you teach the bird to touch a small stick or target with its beak, and then use that target to guide it toward new positions and behaviors without ever physically moving the bird yourself. This method, described by organizations like the World Parrot Trust and used widely in avian enrichment settings, is particularly useful because the bird is always choosing to follow the target rather than being pushed or grabbed.
For treats, use something your bird genuinely gets excited about and that is small enough to eat in one or two seconds. For most small birds, a piece of millet, a sunflower seed, or a small bit of fruit works well. For larger parrots, a small piece of walnut, almond, or a favorite pellet is effective. Withhold the treat entirely outside of training sessions so it retains high value. A bird that has unlimited access to its favorite food all day has little motivation to work for it.
Structure each session with a clear start and end. Open the cage or approach the play stand at your consistent training time. Run five to ten repetitions of whatever behavior you are working on, always ending on a successful repetition so the session closes on a positive moment. Then put treats away and step back. This clarity helps your bird understand when training is happening versus regular interaction time.
Teaching common pet bird behaviors beyond the step-up
Once the step-up is solid, you have a foundation to build almost any practical handling behavior. Here are the most useful ones to work on next.
Recall (come to me)
Recall means the bird flies or walks to you on a verbal cue. Start with the bird on a nearby perch and call it to your hand (which is holding a treat) using a consistent word or whistle. Click and treat when it arrives. Gradually increase the distance over days and weeks. Recall is one of the most practically useful safety behaviors your bird can learn, and it doubles as daily bonding time.
Target training for positioning
Use a target stick (a chopstick or a pen works fine) to guide your bird to different perches, into a carrier, or to stand still for nail trims. Hold the target where you want the bird to move, reward the touch, then move the target to the next position. This approach makes vet visits and carrier training far less stressful because the bird is following a familiar cue rather than being grabbed and placed. The World Parrot Trust's training materials recommend a "watch and wait" approach: hold the target in position and let the bird make the choice to reach for it, rather than pushing the target toward the bird.
Routine handling behaviors
Wing spread, towel acceptance, and beak/nail inspection are all behaviors you can train using the same positive reinforcement framework. Break each one into tiny steps. For towel acceptance (useful for vet visits), start by just rewarding the bird for looking at a towel, then touching it with a beak, then having a corner draped lightly over its back. Build up incrementally. A bird that has been trained to accept toweling voluntarily is dramatically easier and safer to handle during veterinary care.
Species-specific notes
Falconry birds like hawks and falcons follow a very different taming and training path governed by specific legal licensing requirements. If you are working with a bird of prey, the methodology in a dedicated guide to training a falcon will be far more relevant than the pet-parrot approach described here. Similarly, the towa towa bird training process has its own species-specific nuances worth reading about separately.
When things go wrong: fear, biting, aggression, and refusal
Every bird trainer deals with setbacks. Biting, refusing to step up, screaming, and retreating are not signs of a bad bird. In a Reddit discussion about trouble with step up training, a Quaker parrot owner describes variability and aggression while the bird learns very early, with advice to switch to target training and move at the bird's pace. They are communication. The bird is telling you something is wrong with the current approach, the environment, or the bird's internal state. Here is how to troubleshoot the most common problems.
| Problem | Likely cause | What to change |
|---|---|---|
| Bird refuses to take treats during sessions | Too stressed, not hungry enough, or treat not high-value enough | Lower the difficulty of what you are asking, try a different treat, check for environmental stressors |
| Bird bites when hand approaches | Hand = threat; no positive association built yet | Go back to Stage 1; reward the bird for your hand being near the cage, do not reach for it |
| Bird steps up at home but not elsewhere | Generalization not built yet | Practice in multiple locations and on multiple perches gradually |
| Bird suddenly stops cooperating mid-session | Fatigued, overstimulated, or in a hormonal period | End the session immediately; reassess session length and time of day |
| Bird is aggressive only at certain times of year | Hormonal/breeding season behavior | Reduce training complexity during this period; do not push through aggression |
| Bird lunges or bites during towel or vet handling | Specific fear not desensitized | Build towel acceptance incrementally from scratch using counterconditioning |
The most important rule when something goes wrong is to stop before the bird escalates. Continuing to handle a stressed bird almost always makes the problem worse. As guidance from animal handling experts consistently notes, extended or forced handling typically deepens a bird's aversion to interaction rather than resolving it. Watch for early warning signs: feathers slicked flat, tail fanning, rapid breathing, eye pinning in parrots, or a bird that is very still and stiff. These are arousal red flags. End the session, give the bird space, and come back the next day with a simpler task.
If a bird bites you, do not jerk your hand back sharply (this rewards and reinforces the biting behavior because the threat retreated) and do not punish the bird. Simply withdraw slowly and calmly, and reassess. A single bite is a data point. Repeated biting at the same point in your training sequence means you have moved too fast through that stage and need to go back a few steps.
If your bird shows persistent severe aggression, feather-destructive behavior, or extreme fear that is not improving after weeks of patient work, that is a signal to bring in a professional. A certified avian behaviorist or an avian vet with behavior experience can assess whether there is an underlying health issue (pain often looks like aggression), a welfare problem in the environment, or a training approach that needs to be redesigned. Do not push through severe or persistent problems on your own.
Safety, welfare, and legal considerations every bird owner should know
Welfare-first training is not just an ethical choice, it is a practical one. A bird trained with aversive methods (punishment, flooding, grabbing and forcing) may appear compliant but typically shows chronic stress, feather destruction, aggression, and reduced lifespan. Professional bodies including the BSAVA have stated clearly that aversive training methods are fear-provoking and harmful, and that positive reinforcement is the appropriate standard. Humane training is also simply more effective for building the kind of genuinely cooperative relationship most bird owners actually want.
On the legal side, bird ownership is regulated at multiple levels. The USDA Animal Welfare Act covers bird welfare standards, though specific species inclusions and exclusions apply (for example, birds protected under the Migratory Bird Treaty Act have different regulatory standing than domestically bred pet birds). The AVMA has noted that ownership and possession of wild or exotic bird species is regulated at international, federal, state, and local levels, and owners are expected to comply with all applicable laws and coordinate with appropriate authorities if they can no longer care for the animal. Always research the specific legal status of your bird species in your region before acquiring or training it.
If you are keeping or considering keeping a bird of prey, the legal and husbandry requirements are substantial. Falconry licensing, housing standards, and regulated handling protocols apply in most jurisdictions, and a thorough understanding of what it takes to keep a bird of prey legally and humanely is essential before you commit.
Animal cruelty laws in most jurisdictions cover birds directly. For example, state-level laws in places like Maine include explicit cruelty-to-birds provisions, and some states impose multi-year ownership bans on cruelty offenders. These laws exist because birds are sentient animals capable of experiencing pain, fear, and chronic stress. That is not a reason to be anxious about training. It is a reminder to take the welfare responsibility seriously and to use training methods that genuinely serve your bird's wellbeing.
Your starting plan: what to do today
Here is a simple progression you can start right now, regardless of where your bird currently is in the taming process.
- Observe for two to three days without any training attempts. Note your bird's stress signals, favorite foods, and most relaxed time of day.
- Spend five minutes per session just sitting near the cage talking softly. Do this three times a day for two to three days until the bird is fully relaxed with your presence.
- Introduce your hand near (then inside) the cage with a treat. Reward any calm behavior or movement toward you. Do not reach for the bird.
- Once the bird takes treats reliably from your hand, introduce light touch on the chest. Click and treat for any accepted contact.
- Introduce the step-up cue: finger at lower chest, gentle pressure, treat lure. Click and reward the first foot up. Build to both feet, then a slight lift, over multiple sessions.
- Add target training with a stick once the step-up is solid. Use the target to guide the bird to new positions and eventually into a carrier.
- Layer in recall, towel tolerance, and routine handling over the following weeks using the same click-and-treat structure.
- If you hit a wall with fear, biting, or refusal at any stage, go back two steps, simplify the task, and reassess your environment and session length before pushing forward.
Training a bird is genuinely one of the most rewarding things you can do as a bird owner. When your bird steps up willingly, flies to you on recall, and sits calmly for a nail trim, that is not just a party trick. It is evidence of a trusting, communicative relationship built on clear, kind guidance. Start slow, stay consistent, and follow your bird's lead on pace. The progress will come.
FAQ
How long does it usually take to train a bird to step up?
It varies a lot by species, history, and stress level, but many birds show reliable step up within days to a few weeks if sessions stay short (2 to 3 minutes), treats are genuinely high value, and you only move forward when the bird offers approach. If your bird steps up inconsistently, go back to rewarding just placing one foot on your finger before trying to lift or fully step-in.
What if my bird refuses treats during training?
First check timing and hunger, train when the bird is naturally active, and reduce distractions. If treats are available all day, the treat may not be reinforcing, so reserve it for training only. Also confirm the size and type, some birds reject certain seeds or fruit on taste preference, then use a safe favorite that your bird already seeks voluntarily.
Should I train with the cage door open or closed?
Start where the bird feels most predictable, for many pet birds that is training with the door open only after hand and step-up are working near the doorway. If opening the cage increases fear or escape behavior, keep the bird in the cage and progress from hand at the bars to hand inside only when alarm-free.
How do you prevent a bird from learning that biting ends the interaction?
Use a stop-and-withdraw response immediately after a bite without sudden movements, then lower difficulty for the next attempt (start earlier in that stage, for example rewarding approach rather than step up). Also avoid repeating the same trigger too quickly, if the bird bites, end the session and resume later with a simpler cue.
Can I train two behaviors at the same time, like step up and recall?
Yes, but do it in short, separated blocks so the bird can clearly distinguish cues. For recall, keep the bird on a nearby perch first, use the same cue consistently, then reward only when the bird reaches you. If you mix cues, you may accidentally reinforce partial behaviors, like approaching but not stepping up.
What should I do if my bird starts stepping up but then suddenly escalates to biting?
Treat it as fatigue or overstimulation, not as “bad behavior.” End the session on the last calm success, reduce session length, and review what changed (time of day, new people, noise, hunger, or how long you asked for touch). Resume with a smaller request, such as rewarding a single step rather than a full interaction.
How can I train for carrier entry and vet handling without forcing the bird in?
Use target training to create voluntary carrier approach, reward any interest first, then reward touches to the carrier interior, and only later reward full entry. Keep the carrier stable and familiar between sessions, place it in the same area, and avoid late-stage rewards that only happen after the bird is already stressed, because that can accidentally teach avoidance.
Is it okay to use a towel or nail tools before my bird is comfortable being touched?
No, do not introduce restraint tools early. Build a touch tolerance first (chest and beak contact on short repetitions), then transition to very brief tool exposure while the bird remains calm. If the bird freezes or retreats at towel presence, reduce the size or duration of towel contact and reward visible acceptance, like looking at the towel and leaning in.
How do I choose a marker word or clicker, and how precise does it need to be?
Use one consistent marker only, either a clicker or a short word, and deliver the reward within 1 to 2 seconds every time. If you find yourself repeating the cue before marking, reduce the difficulty so the bird can succeed, then mark the first moment of the exact behavior you want.
What if my bird is not comfortable with hands but seems fine with perches?
You can still make progress by training targets and stationing first, using a target stick to guide feet and body position while the bird chooses distance from your hand. Once the bird understands the “touch target equals reward” pattern, you can gradually pair step-up with your finger as the target, rather than trying to start with direct hand contact.
When should I stop training and get a professional?
If aggression, feather-destruction, severe fear, or refusal to progress continues for weeks despite slowing down, shortening sessions, and optimizing diet and routine. Also get help sooner if there are signs of pain or illness (reduced appetite, abnormal droppings, limping, persistent fluffed posture), because discomfort can mimic “behavior problems.”
Next Articles
How to Teach a Bird to Fetch Step by Step Guide
Humane, step-by-step training to teach your bird to fetch safely, with targets, rewards, troubleshooting, and gradual re
How to Teach Your Bird: Calm, Positive Training Steps
Step-by-step humane training to bond, reduce stress, and teach behaviors with positive reinforcement for parrots and sma
How to Teach a Bird to Wave: Step-by-Step Training
Humane step-by-step training to teach your bird to wave on cue, with shaping, safety, troubleshooting, and proofing tips