You can fly with a pet bird on a plane, but it takes real preparation. Most domestic U.S. airlines allow small pet birds in the cabin for a fee, provided the bird fits in an airline-approved carrier that slides under the seat, you have a health certificate from your vet, and you call the airline ahead of time to reserve a spot. Wild or rehabilitated birds are a different story and require federal permits before you even book a ticket. Either way, the steps are manageable if you start early and know exactly what to ask. If you are planning a trip, make sure you also account for the practical details of how to travel with a bird, from carriers to paperwork.
How to Take a Bird on a Plane: Step-by-Step Guide

Maya Harris
16 May 2026
Start by picking the right airline and transport option
Not every airline accepts birds, and the ones that do have very different rules. Your first call before anything else is to the airline's live-animal desk, not just their general customer service line. Policies change, and flight-specific limits apply. Most U.S. carriers that allow pet birds in the cabin use a first-come, first-served system, meaning if another passenger already booked a bird on your flight, you may be out of luck.
Delta allows household birds to travel in the passenger cabin on domestic U.S. flights as long as the bird, carrier, and your documentation meet their requirements. They collect a one-way fee at check-in and cap how many animals are allowed per flight. American Airlines allows in-cabin birds as long as the combined weight of the pet and carrier stays under 20 lb (9.07 kg). If your bird is too large for the cabin, American routes it through their cargo service, which involves completely different logistics and paperwork. For international routes, Turkish Airlines is one example of a carrier with published in-cabin carrier dimensions: no larger than 23 cm tall x 30 cm wide x 40 cm long, with a combined weight limit for pet and carrier.
The FAA makes clear that airlines set their own pet-in-cabin rules, so there is no universal standard. Your three transport options are: in-cabin (bird stays with you under the seat), checked baggage (bird travels in the hold in an IATA-approved crate), or air cargo (separate booking through the airline's cargo division). For bird welfare, in-cabin is almost always the better choice when the bird's size allows it. Checked baggage and cargo expose birds to temperature swings, noise, and handling stress that dramatically increase risk.
Questions to ask the airline before you book
- Do you accept pet birds in the cabin on this specific route and aircraft type?
- How many pets are allowed per flight, and how do I reserve a spot?
- What are the exact carrier dimensions and combined weight limits?
- What documentation do you require (health certificate, vaccination records)?
- What is the per-flight fee, and when is it collected?
- Are there any aircraft types on this route that do not accept live animals (e.g., certain wide-body jets)?
- What happens if my connecting flight has a different rule or the animal limit is already full?
Legal paperwork and permits

For pet birds on domestic U.S. flights, the main document you need is a health certificate signed by an accredited veterinarian, typically issued within 10 days of travel (confirm the exact window with your airline). The vet examines your bird, confirms it is healthy and free of signs of disease, and signs off. Keep the original with you at all times during travel.
International travel layers on significantly more requirements. USDA APHIS oversees the import of pet birds into the United States. Once your accredited vet signs the health certificate, you generally have a limited window (around 30 days is the common example) to get USDA endorsement and complete your travel before the destination country or U.S. entry requirements will no longer accept that certificate. USDA endorsement fees may apply. If your import permit specifies a travel date and your plans shift by more than 30 days, you will need to apply for an amended or new permit. For international arrivals, APHIS also requires you to arrange an inspection with the USDA port veterinarian at your entry point at least 3 business days in advance.
Wild birds and wildlife rehabilitators face a separate legal framework. The U.S. Fish and Wildlife Service (USFWS) administers the Migratory Bird Import/Export permit under 50 CFR 14. This permit authorizes transport of migratory birds across international boundaries. It does not apply to birds legally classified as domesticated under 50 CFR 14.4. If your bird is a CITES-listed species, additional CITES documentation is required and enforced by both USFWS and U.S. Customs and Border Protection (CBP). CBP recommends contacting your anticipated port of arrival ahead of time to avoid delays at the border. If you are a rehabilitator transporting a wild bird domestically, your state wildlife agency permit and your federal migratory bird rehabilitation permit must both be in order before the bird ever enters a carrier.
| Scenario | Key Document(s) | Issuing Authority |
|---|---|---|
| Pet bird, domestic U.S. flight | Vet health certificate | Accredited veterinarian |
| Pet bird, international import to U.S. | Health certificate + USDA endorsement + APHIS import permit | USDA APHIS + accredited vet |
| CITES-listed species (any international travel) | CITES permit/certificate + health certificate | USFWS + CITES authority |
| Migratory bird, international transport | Federal Migratory Bird Import/Export permit | USFWS |
| Wild bird, rehabilitator transport (domestic) | State wildlife permit + federal rehab permit | State agency + USFWS |
Choose and set up the right travel carrier safely
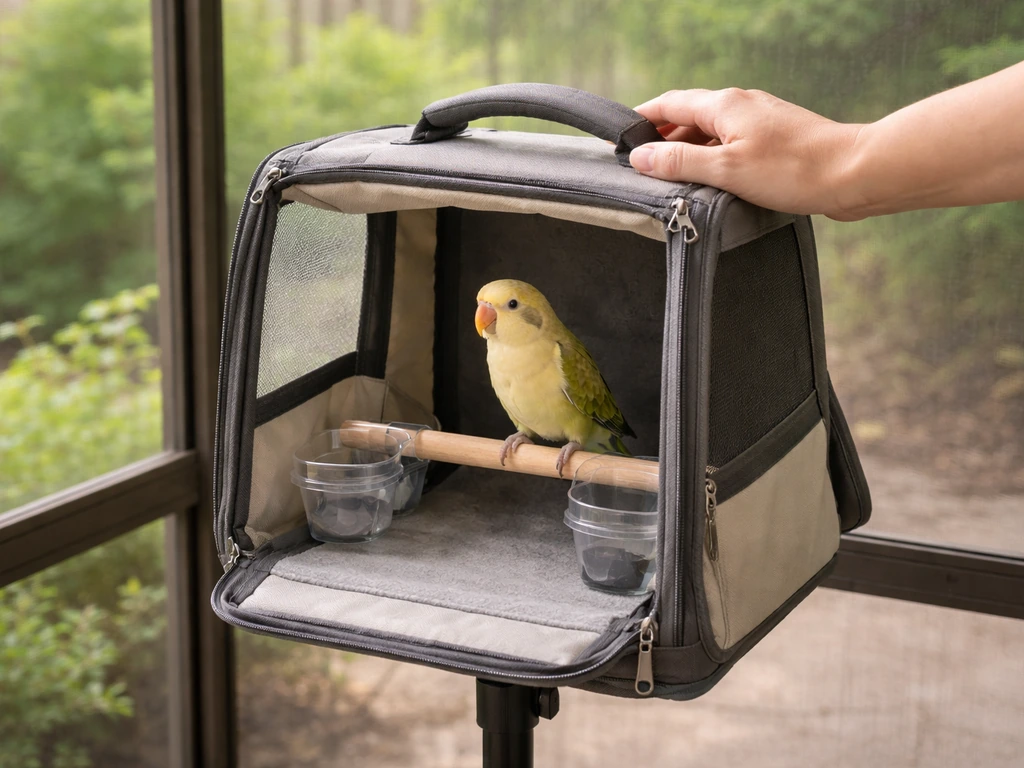
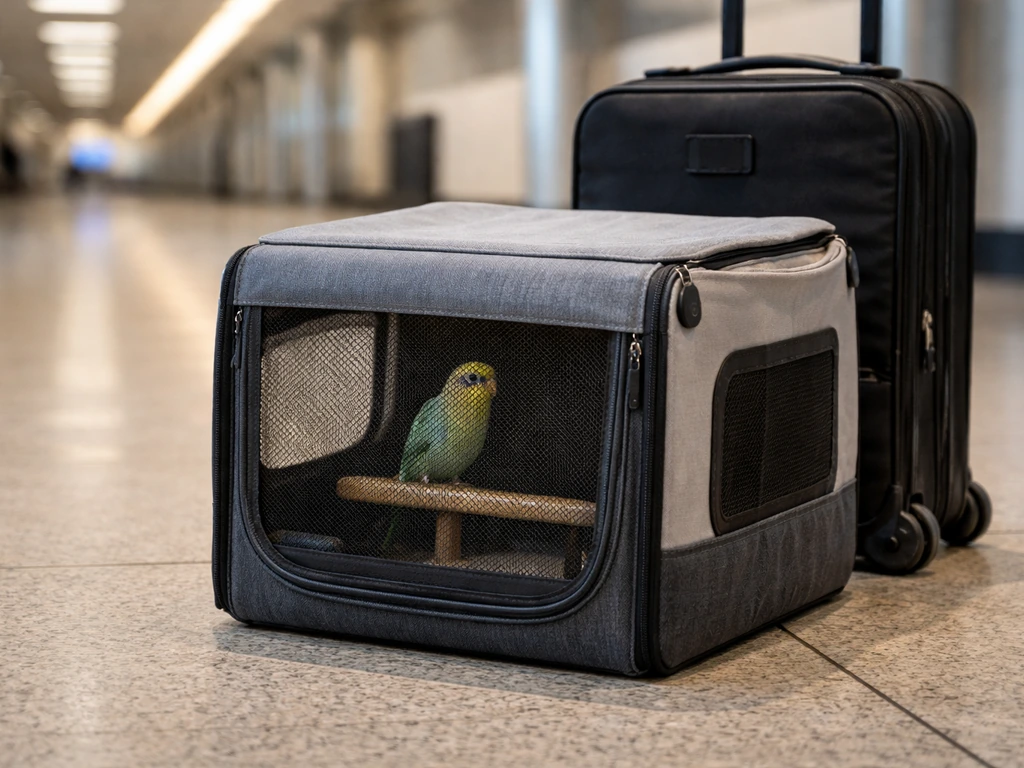
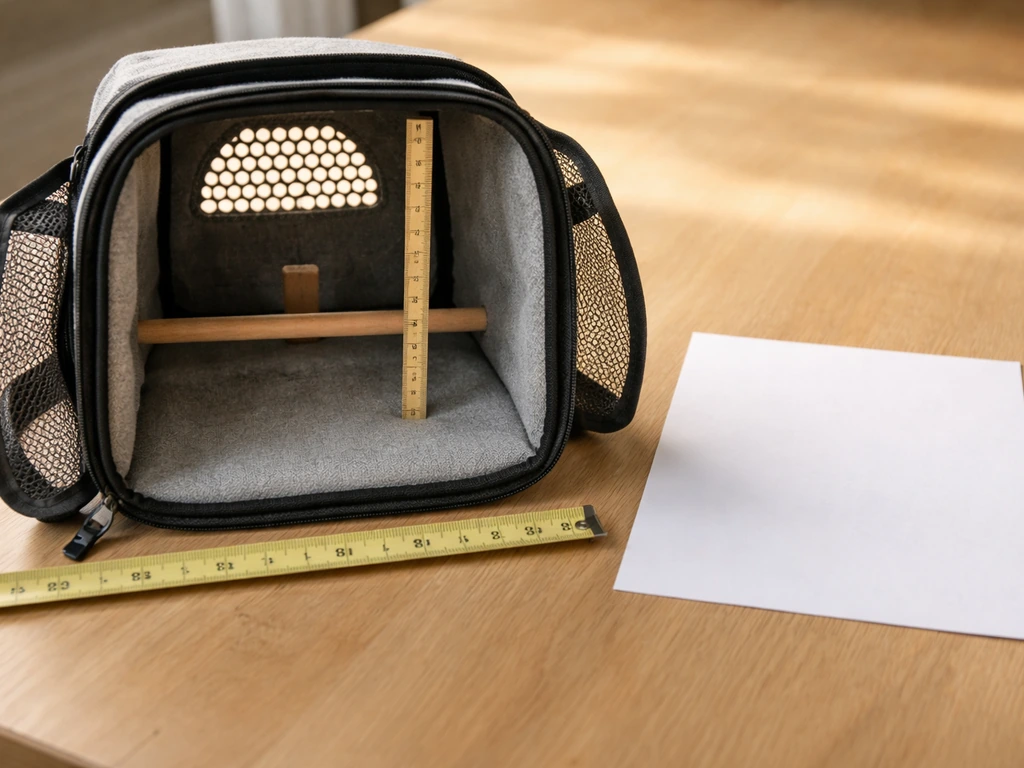
The carrier is the single most important piece of gear you will buy for this trip. Get it wrong and no amount of preparation elsewhere will fix the stress your bird experiences. The carrier must fit under the aircraft seat in front of you, meet the airline's exact published dimensions, and give your bird enough interior height to stand fully upright without pressing its head against the top. IATA's container requirements are explicit on this: the bird must be able to stand normally inside the container. A carrier that is barely big enough is not acceptable just because it technically fits the dimensions.
Ventilation is non-negotiable. Turkish Airlines, for instance, requires ventilation holes of at least 2.5 cm in diameter on at least three sides of the carrier. Even if your airline does not state a specific ventilation spec, that is a reasonable minimum standard to apply yourself. Soft-sided carriers with mesh panels on multiple sides work well for small birds like budgies, cockatiels, and small conures. Hard-sided carriers with ventilation cutouts are better for larger or more anxious birds that might chew through soft mesh. Never use a carrier with a single front-facing ventilation panel.
Carrier setup checklist
- Verify carrier dimensions match your airline's published requirements before purchasing
- Confirm interior height allows the bird to stand fully upright
- Check that ventilation holes are present on at least three sides (minimum 2.5 cm diameter each)
- Line the floor with non-slip material (a thin towel or paper towel works fine)
- Attach a small clip-on food dish and a water or hydrating food source (cucumber slices, apple pieces, or soaked pellets) for flights over 2 hours
- Fasten a perch at a comfortable height so the bird is not forced to stand on the carrier floor
- Secure all latches and test them while the carrier is in an upright position
- Attach your contact information and the bird's name to the outside of the carrier
- Do not cover the carrier completely with a cloth during flight; partial coverage on one side can reduce visual stress while keeping airflow open
For small birds like budgies or cockatiels, a carrier roughly 12 inches long x 8 inches wide x 10 inches tall is usually workable for single-bird travel. For medium birds like cockatiels sharing with a companion or a small conure, go larger. For larger parrots like African Greys or Amazon parrots, in-cabin transport may not be possible given the weight and size limits. Those birds should travel via air cargo with a fully IATA-compliant shipping crate if flying is necessary at all.
Acclimate and prepare your bird before the flight
Start carrier training at least 4 to 6 weeks before your flight. The goal is for the bird to see the carrier as a safe, familiar space rather than a scary trap. Leave the carrier open in your bird's environment with treats, foraging opportunities, and a perch inside. Let the bird explore it on its own terms. Once the bird is comfortable going in and out, practice closing the door for short periods while you stay visible. Gradually increase the duration over several weeks.
About a week before departure, start taking short car trips with the bird in the carrier. This builds tolerance for movement, vibration, and the sounds of travel. It also gives you a realistic preview of how your bird handles confinement in a moving environment. If the bird panics heavily after repeated short exposures, that is important information: flying may not be appropriate for that individual bird.
Do not sedate your bird before flying. Multiple veterinary sources, including the Merck Veterinary Manual, specifically advise against sedation for air travel because an adverse drug reaction (such as respiratory distress or cardiovascular collapse) can occur in-flight where you have no access to emergency veterinary care. If your bird is extremely anxious, talk to your avian vet about non-sedating calming options, but go in knowing sedation is off the table for good reason.
Feeding timing matters. Offer a light meal 2 to 3 hours before departure. A full crop can cause discomfort during pressure changes and increases the risk of regurgitation. Do not withhold food for extended periods either, especially for small birds like budgies, which have high metabolisms and can become hypoglycemic quickly. Plan hydrating foods (cucumber slices, apple pieces, moist pellets) instead of a water bowl in the carrier to reduce spill risk while keeping the bird hydrated.
Airport and security: day-of process and what to expect
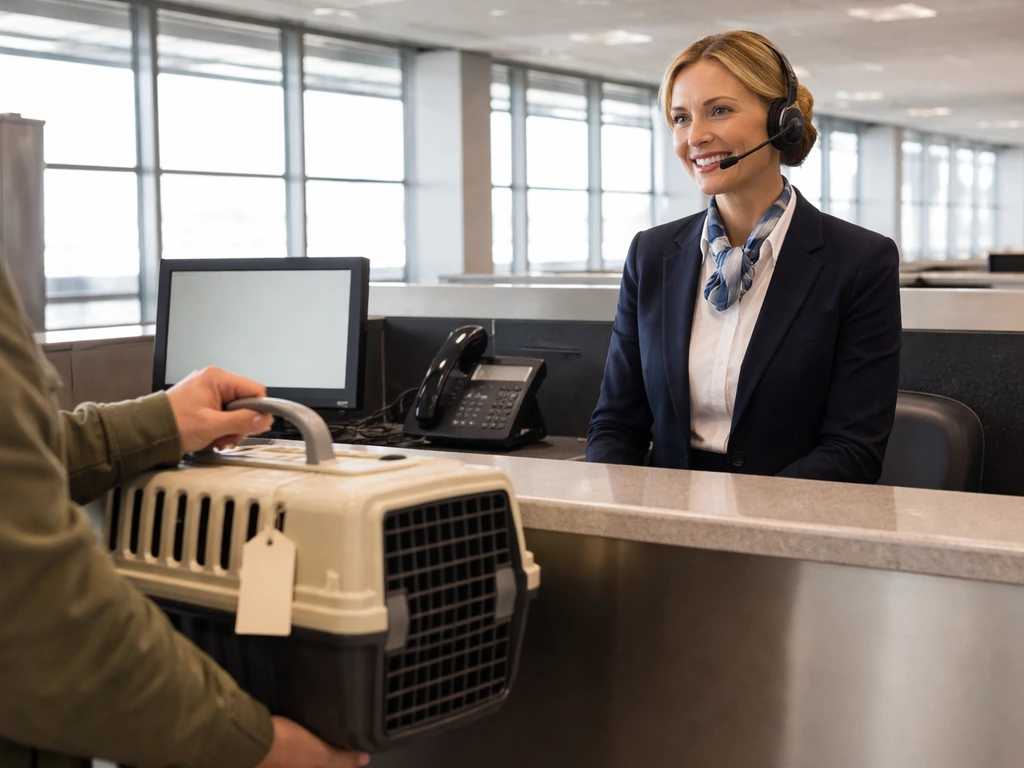
Arrive at the airport earlier than you normally would, at least 30 minutes more than your usual buffer. You will need extra time at check-in to pay the pet fee, show your documentation, and confirm your bird's spot on the flight. Have your health certificate and any permits in a folder you can access without digging through your bag.
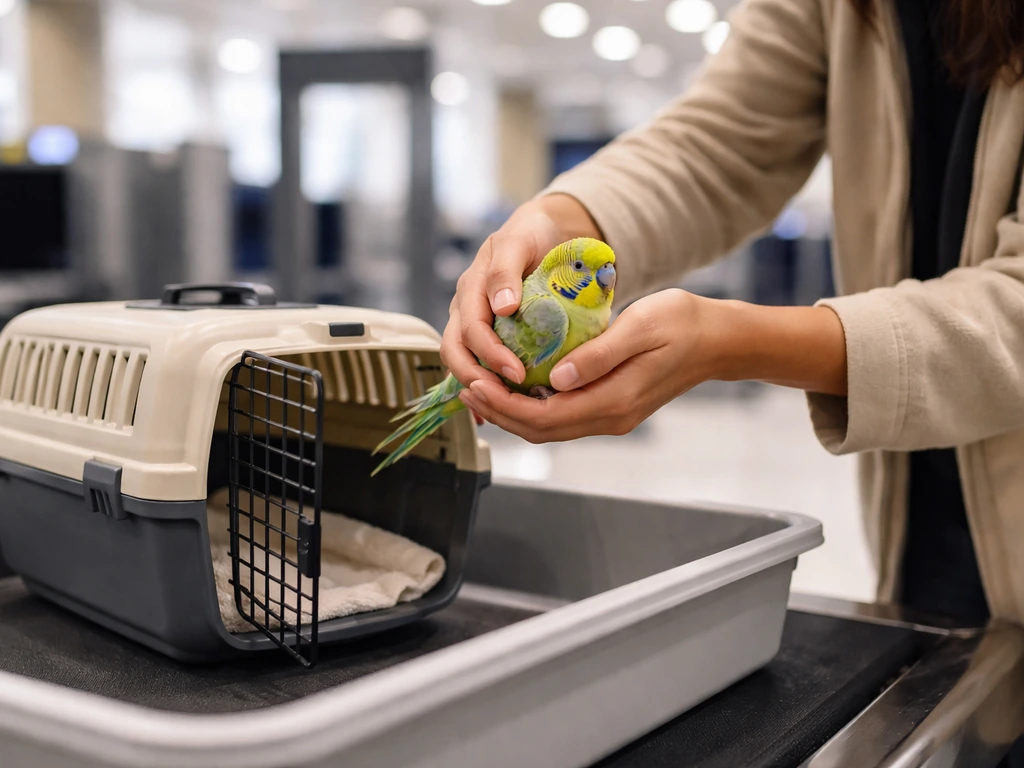
At the TSA security checkpoint, you will need to remove your bird from the carrier. The carrier goes through the X-ray machine, and you carry the bird through the metal detector or body scanner with you. Hold your bird securely against your body, supporting its chest and feet. This is the moment that stresses most bird owners out, and honestly, it stresses most birds out too. Having your bird harness-trained before this trip makes it dramatically safer and easier. Before you plan an outside day, make sure you know how to take your bird outside safely and start with supervised, gradual exposure. If you are still learning how to lead a bird safely, practice the steps well before you ever bring the bird to the airport. If your bird bites when stressed, wear a light glove or have a small towel ready to hold it securely without squeezing.
Once through security, get to your gate and stay calm. Birds read your energy. Sit somewhere quieter if possible, and resist the urge to keep opening the carrier to check on your bird. Every time you open it in a busy airport, you create an escape risk and add stimulation. A brief, quiet check-in through the mesh is enough.
During boarding, let the gate agent know you have a live animal. Board early if early boarding is offered to passengers with special needs or families, so you can get your bird settled under the seat before the aisle fills with people.
In-flight care: feeding, water, stress reduction, and monitoring
Once you are seated, slide the carrier under the seat in front of you with the ventilation side facing you if possible. Do not put it in the overhead bin, ever. Keep the carrier in place for the duration of the flight. On short flights under 2 hours, most birds do fine without supplemental food or water if they were fed and hydrated before departure. On longer flights, use the hydrating food options you packed (cucumber, apple, or moist pellets) to keep the bird comfortable. Follow any care instructions you have attached to the carrier and use IATA's principle: food and water according to the handling instructions, with proper ventilation always maintained. IATA’s Live Animals Regulations (LAR) describe these humane transport considerations, including how factors like disturbance and sedation should be managed and how in-flight environments should be set up for animal welfare Follow any care instructions you have attached to the carrier and use IATA's principle: food and water according to the handling instructions, with proper ventilation always maintained..
Keep noise and disturbance around the carrier minimal. Avoid letting other passengers tap on or peer into the carrier repeatedly. A partial cover (a light cloth over one side only) can reduce visual stimulation from busy aisles without blocking airflow. Talk to your bird softly and briefly if it vocalizes, then go quiet. Constant reassurance can actually increase anxiety by signaling that something unusual is happening.
Monitor your bird through the mesh. Normal signs during flight include sitting quietly, light feather ruffling, or perching with one foot tucked. Signs of serious stress include heavy open-mouth breathing (panting), falling off the perch repeatedly, convulsions, or complete unresponsiveness. If you see any of those severe signs, press the call button immediately and ask for a flight attendant. Let the crew know your bird is in distress so they can help coordinate any response needed upon landing.
Species and size notes for in-flight care
- Budgies and small finches: high metabolism, do not skip pre-flight feeding, offer millet spray inside carrier for comfort and distraction
- Cockatiels: often vocal when stressed; a light partial cover reduces visual triggers; they calm down faster when they can hear your voice
- Small to medium conures: can be nippy under stress; harness training before the trip is strongly recommended for TSA handling
- African Greys and Amazon parrots: size and weight usually exceed cabin limits; if cargo transport is unavoidable, only use IATA-certified crates and work directly with the airline cargo team
- Lovebirds: do well in pairs; separating bonded pairs for travel increases stress for both birds, keep them together if the carrier size allows
Troubleshooting and when not to fly
Even with excellent preparation, things can go sideways. Here are the most common problems and how to handle them without panicking.
Common problems and fixes
| Problem | What to do |
|---|---|
| Bird refuses to enter carrier at the airport | Practice carrier entry at home daily in the weeks before; never force the bird in on travel day; use a familiar treat as a lure |
| Biting during TSA screening | Use a small towel to hold the bird securely; harness-train weeks before travel; stay calm and move deliberately |
| Loud vocalization on the plane | Partial cover on one side, speak quietly once then stop; do not keep opening the carrier; sustained vocalizing often decreases once the bird adjusts |
| Feather stress or plucking during or after travel | This signals the experience was too stressful; consult your avian vet post-trip; consider whether future air travel is appropriate for this individual |
| Airline changes the plan at the gate (no birds on this flight) | This happens; always have a backup plan such as a pet-friendly ground transport option, a boarding facility near the airport, or a trusted contact who can pick up the bird |
| Bird shows signs of heat or cold stress | Avoid early morning winter flights or peak summer afternoon connections; request a bulkhead or window seat away from vents; never leave the bird in a parked car |
When flying is not the right answer
Flying is not appropriate for every bird. If your bird has an underlying respiratory condition, heart disease, or is recovering from illness or surgery, talk to your avian vet before even considering air travel. Senior birds and very young birds (under weaning age) are also high-risk for travel stress. If your bird has shown signs of severe phobia during carrier training, repeated panic responses that do not improve over weeks, or extreme feather-destructive behavior after even short confinement sessions, air travel is likely to cause more harm than the trip is worth.
For moves within driving distance, ground transport with a proper travel carrier is almost always less stressful than flying. For moves within driving distance, ground transport with a proper travel carrier is almost always less stressful than flying, which can be a useful comparison point when you think about how to guide a bird outside. For longer relocations, a professional pet transport service with live-animal specialists may be worth the cost. Leaving your bird with a trusted bird-savvy caretaker at home while you travel is often the most welfare-appropriate choice when the flight is short or the trip is optional. Flying is a tool, not a requirement. Use it only when you have genuinely prepared both yourself and your bird for it.
Your pre-flight checklist
- Call the airline's live-animal desk and confirm birds are accepted on your specific flight and aircraft
- Reserve your bird's in-cabin spot and confirm the fee
- Book a vet appointment for a health certificate within the required window before departure
- Obtain any required permits (USDA APHIS import permit, USFWS migratory bird permit, CITES documentation) well before travel
- Purchase a carrier that meets the airline's exact dimensions and has proper ventilation on at least three sides
- Begin carrier acclimation training 4 to 6 weeks before departure
- Practice short car trips in the carrier 1 to 2 weeks before departure
- Confirm your bird's ID (leg band, microchip) is documented in case of emergency
- Pack hydrating foods, a clip-on dish, and any daily medications in an easily accessible bag
- Print two copies of all documentation and store one in your carry-on and one in a checked bag
- Arrive at the airport at least 30 minutes earlier than your normal buffer
- Know the signs of in-flight distress and have a plan for who to contact at your destination if emergency vet care is needed
FAQ
Can I take a bird other than common household pets (for example a conure or parakeet) on a plane in the cabin?
Yes, but only if the airline allows the species in-cabin and the bird can fit the carrier rules, including ventilation and your ability to keep it under the seat. Always confirm with the live-animal desk because “pet bird” policies often differ from airline to airline, and some carriers also restrict certain species due to beak size or stress risk.
What if the carrier fits under the seat but my bird can’t stand fully upright inside it?
If your bird can’t be fully upright inside the carrier, it is usually noncompliant even if the exterior dimensions fit. Airlines and IATA-style expectations focus on interior usable height, so choose a carrier where the bird can stand normally without head contact.
Do I need to check in with the live-animal desk in person, or can I handle everything at online check-in?
Plan for a separate check-in step. Many airlines require that the bird spot is confirmed at the pet check or live-animal desk when you arrive, and the fee is often collected there. Bring the health certificate and any permits in an easy-to-reach folder and arrive early enough to avoid missing a final verification.
If my flight changes, do I need a new health certificate or updated permits?
For most itineraries, you need a health certificate dated within the airline’s required window, then endorsed for certain international routes, but the certificate itself is typically not “re-issued” mid-trip. If your travel date slips beyond the accepted window, you may need a new certificate and possibly amended import paperwork, depending on the country and the permit terms.
What happens if I already bought my ticket, but another passenger brings a bird and the flight’s bird limit is reached?
It depends on the airline, but many require a dedicated reservation for the bird and apply a per-flight cap. If you miss your assigned bird allowance or you show up without a confirmed in-cabin spot, the airline may refuse transport even if you have the documents.
Can I pack toys, treats, or extra items inside the carrier for comfort?
Do not put any loose items inside the carrier that can fall or get tangled. Use stable, attached accessories (like a small perch if the carrier design supports it) and secure food containers so they cannot spill into ventilation holes. Avoid anything with strings, dangling toys, or unsecured paper that could be chewed or block airflow.
Is it okay to cover the carrier during the flight to calm my bird?
Yes, but keep it simple and bird-safe. A light cloth cover can reduce visual stimulation, but ensure it does not cover ventilation openings or create airflow restrictions. Never use a cover that could slip into the carrier or fully block the side vents.
When can my bird be out of the carrier during the airport and flight?
If the bird is in-cabin, you generally remove it from the carrier only when instructed for security, and you should not take it out of the carrier once seated. For any other time, follow airline instructions because opening the carrier in a crowded cabin increases escape and stress risk.
How should I handle hydration if my airline allows in-cabin birds but no water bowl?
For in-cabin travel, you can usually bring a small amount of hydration food, but you should not rely on a water bowl in the carrier. Choose foods you can measure easily, and use the same hydration approach you practiced during carrier training, so you do not create novelty or mess right before boarding.
If my bird starts panicking mid-flight, what exactly should I tell the flight attendants to do?
If your bird shows severe stress signs, alert the crew immediately and be prepared to describe what you are seeing (breathing pattern, responsiveness, perch stability) and when it started. Also be ready to request assistance at landing, since the crew may not be able to intervene beyond coordination.
How do I decide whether flying is safe for an older bird or a bird with mild health issues?
It can be, especially if your bird is older, has a medical history, or has already shown severe carrier phobia. Your best step is to consult your avian vet early and decide on a “go/no-go” plan, including whether ground transport or a professional live-animal transport service is safer for your specific bird.