Traveling with a bird is doable, and it can be remarkably low-stress when you plan ahead. The key is matching your preparation to the bird you have, the trip you're making, and the mode of transport involved. Whether you're driving a budgie to the vet or transporting a found injured hawk to a licensed rehabilitator, the core principles are the same: the right container, calm handling, controlled environment, and a clear plan before you leave the driveway.
How to Travel with a Bird: Safe Humane Step by Step Guide

Maya Harris
7 Apr 2026

First: what kind of trip and what kind of bird?
The very first question to answer before anything else is whether you're traveling with a pet bird or a wild bird in temporary care. These two situations carry different legal requirements, different handling approaches, and different equipment needs, and mixing up the two is where people get into trouble.
For pet birds, travel is generally straightforward domestically. USDA APHIS does not regulate interstate movement of pets by their owners within the U.S., but interstate and international travel with birds does trigger documentation requirements depending on species and destination. If you're crossing an international border, you'll need an Import Permit and a Veterinary Health Certificate, and you should plan well ahead for quarantine and port inspection steps. For CITES-listed species (which includes parrots and many other common pet birds), the U.S. Fish & Wildlife Service offers a "pet passport" process through Form 3-200-64, and those certificates are typically valid for three years and multiple border crossings.
For wild birds, the legal picture is more serious. Most wild birds in North America are protected under the Migratory Bird Treaty Act (MBTA). A Federal Migratory Bird Rehabilitation permit is required to take, transport, and temporarily possess sick, injured, or orphaned migratory birds for rehabilitation purposes. However, the "Good Samaritan" provision allows any member of the public who finds an injured or sick migratory bird to take temporary possession for the sole purpose of transporting it immediately to a permitted rehabilitator. That's the limit of what an unpermitted person can legally do. One critical point: a Federal permit is not valid unless you're also in compliance with your state's requirements, which can be more restrictive than the federal standard. Always check state rules before you do anything with a wild bird.
Gear checklist: carrier setup, comfort items, and safety basics
The carrier is the most important piece of equipment you own for travel. A bad carrier makes every other preparation harder. Here's what to look for and what to pack.
Choosing the right carrier
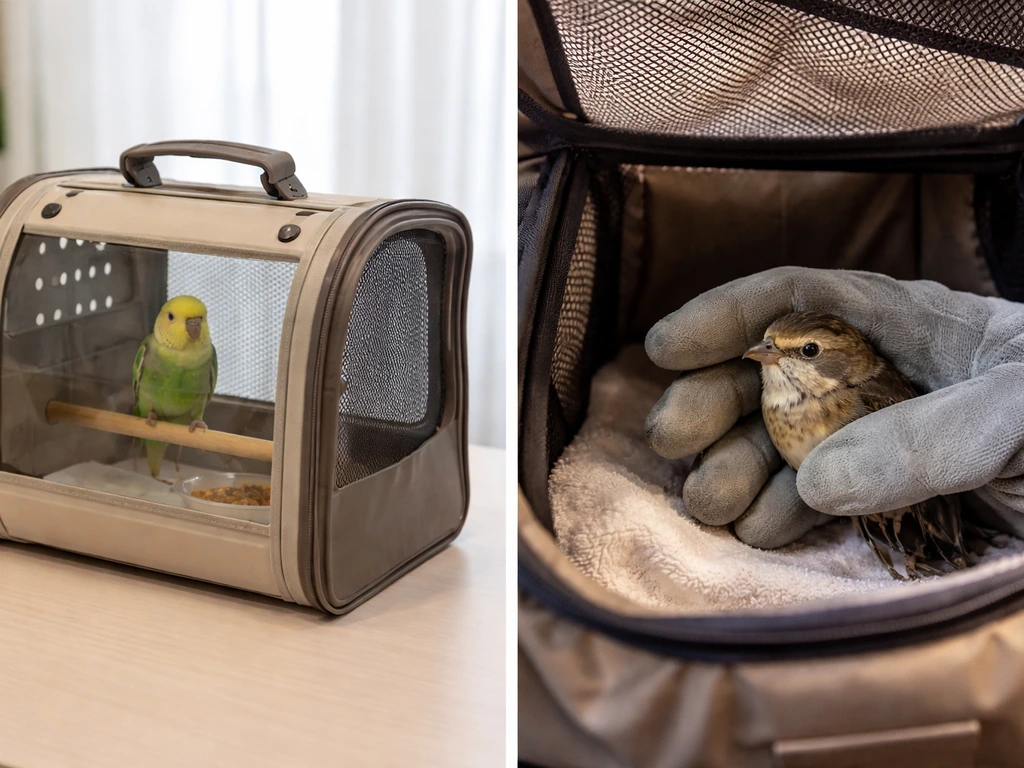
For small to medium pet birds (budgies, cockatiels, lovebirds, small conures), a hard-sided carrier with a secure latch and ventilation on multiple sides works well. For larger parrots (African greys, amazons, macaws), you'll want a larger crate, still hard-sided, with horizontal bar spacing narrow enough that the bird can't catch toes or beak. For small wild birds being transported to a rehabilitator, a cardboard box with ventilation holes punched near the top and a soft cloth on the bottom is often the best option because it's dark, enclosed, and less stimulating than a wire cage.
Ventilation is non-negotiable. WOAH (OIE) guidance for air transport specifies ventilation clearance of at least 25 to 30 cm (about 10 to 11 inches) above the floor on all four sides to allow adequate air circulation. Even for car travel, this standard is a useful benchmark. Carriers with solid sides and only top ventilation trap heat and CO2 quickly.
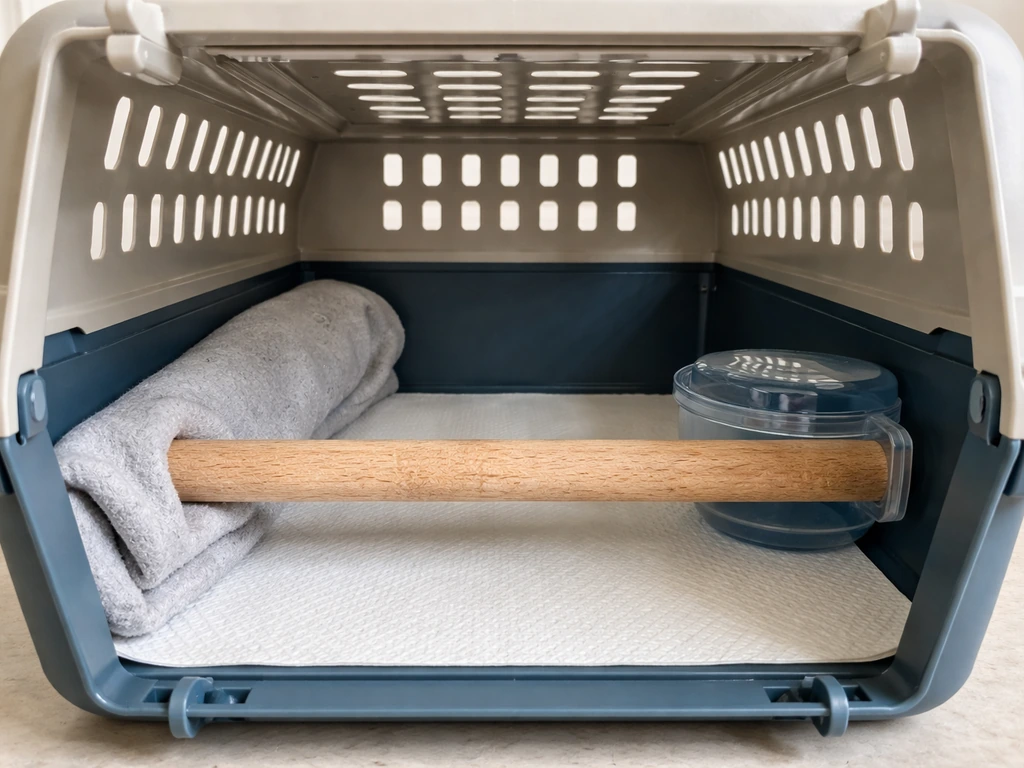
What to pack in and around the carrier

- A non-slip mat or paper towel on the carrier floor (easier to change than cage liner)
- A low perch that allows the bird to grip without hitting the ceiling (skip the perch for injured wild birds)
- A small water dish that won't slosh, or water-rich foods like cucumber slices for hydration on short trips
- A light cover (breathable fabric, not plastic) to reduce visual stimulation and drafts
- A spare cover or towel for handling
- Your bird's regular food in a small sealed container
- A heat source option for cold weather: a chemical hand warmer placed outside the carrier wall (never inside), or a warm water bottle wrapped in a cloth
- A basic bird first aid kit: roll gauze, vet wrap, styptic powder, a small flashlight, and your avian vet's number
Moving your bird into the carrier calmly
This step is where most travel stress originates, for both bird and owner. Rushing the carrier transfer is the fastest way to trigger panic, injury, or escape. The goal is to make the carrier a familiar, non-threatening space before travel day even arrives.
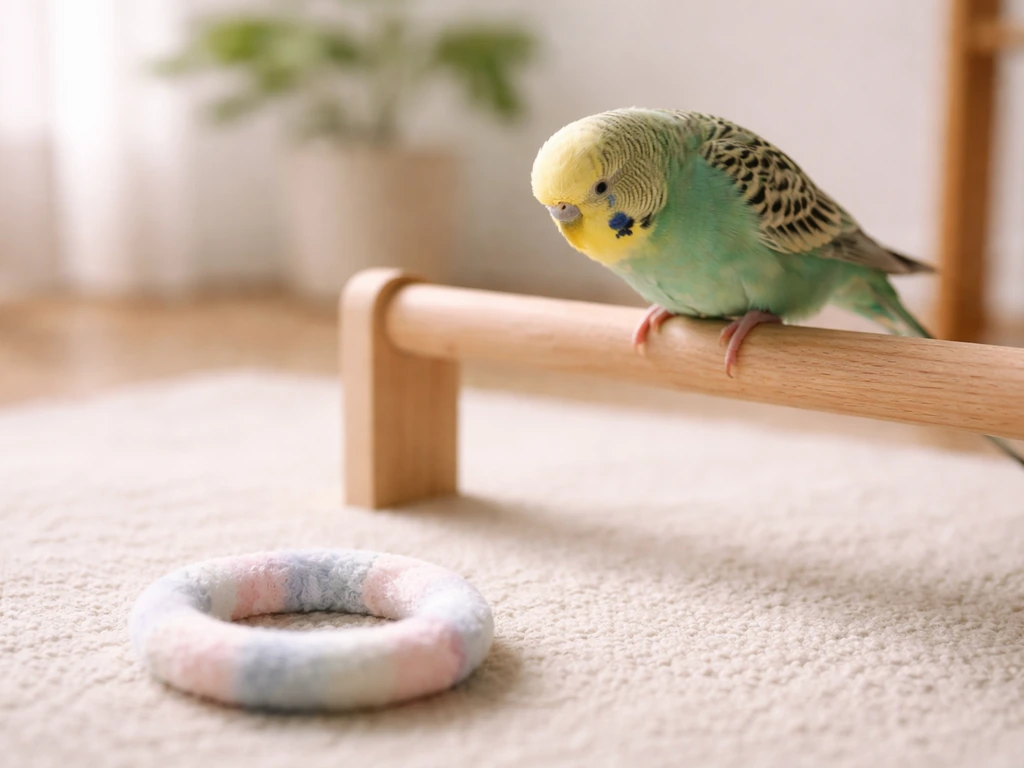
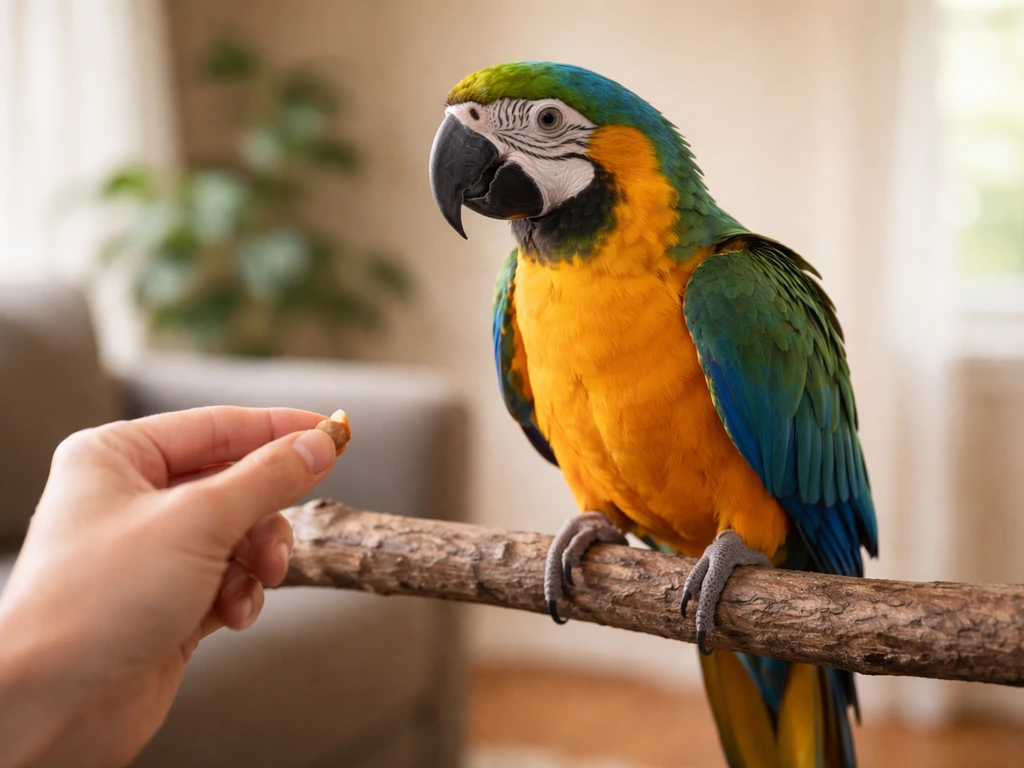
For pet birds: desensitize before the trip
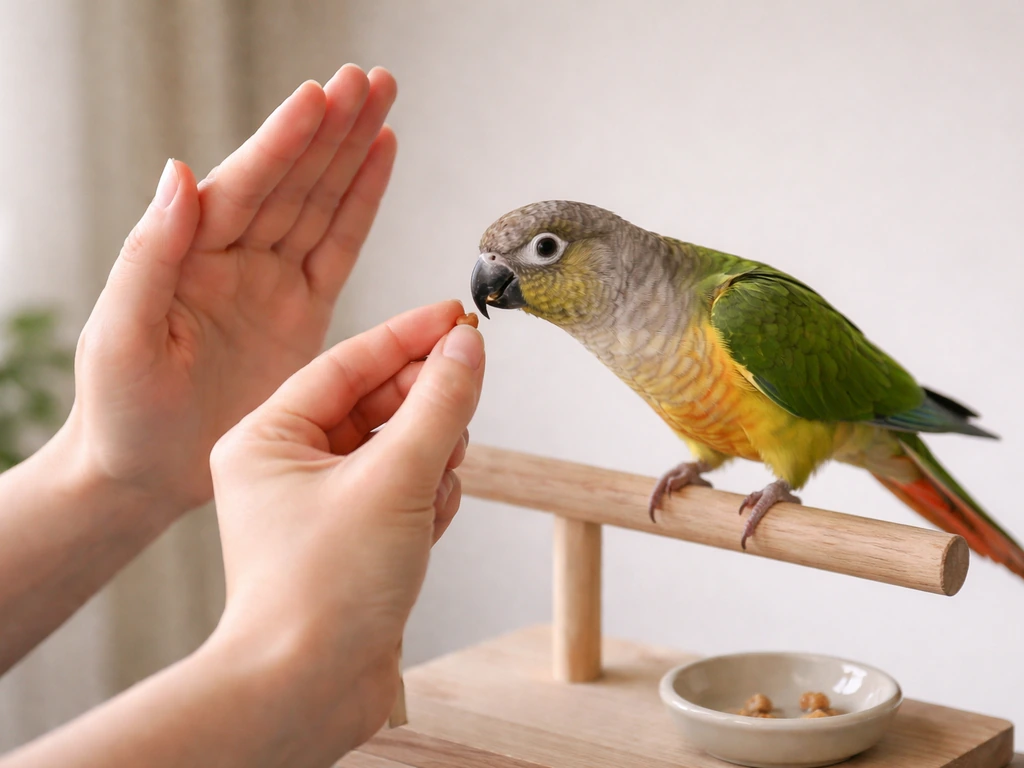
If you have time before your trip, leave the carrier open in your bird's space for several days. Put treats inside. Let the bird explore at their own pace. This is a form of target training applied to the carrier itself, and it dramatically reduces transfer stress. For birds already comfortable stepping up, you can guide the bird onto your hand or a target stick, position them at the carrier door, and let them walk in. If they're reluctant, practice how to lead a bird onto a perch or hand target first, then repeat the carrier approach until it feels routine.
For birds that won't step up reliably or are prone to flying off, dim the lights slightly before the transfer. Birds are calmer in low light. Have the carrier door open and ready, guide the bird in steadily, and close the door behind them before they have a chance to reverse out. Avoid chasing. If a bird is flying around the room in a panic, stop, wait, and give them time to land before approaching again.
For wild birds in temporary care
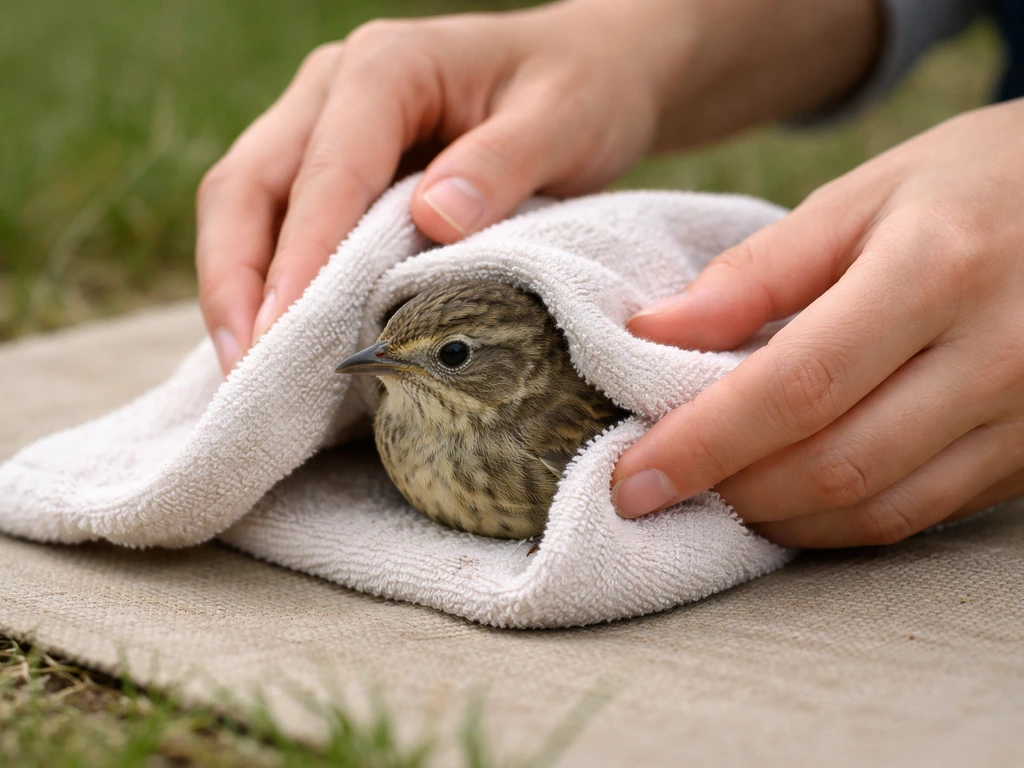
Wild birds should almost always be handled with a towel. Approach from above and behind, drape the towel over the bird, wrap gently but firmly around the wings (keeping them against the body), and lower the bird into the box or carrier. Control the head carefully if dealing with a bird with a sharp beak or talons. Get the bird into the carrier quickly, close it, and minimize handling from that point forward. The goal is to get them to a permitted rehabilitator as fast as possible, not to assess or comfort them beyond what's necessary.
Managing travel day in the car
Car trips are the most common type of bird travel, and the details matter more than most people expect. Temperature, ventilation, and carrier position can make the difference between a calm bird and a bird in distress.
Temperature and ventilation
Keep the car interior between 65 and 80 degrees Fahrenheit for most pet bird species. Never leave a bird in a parked car, even with windows cracked. On a 70-degree day, a car interior can reach over 100 degrees in under 20 minutes. Run the air conditioning or heat for several minutes before loading the bird. Position the carrier where it won't receive direct sunlight through the window, and avoid placing it directly in front of an air vent, which can chill the bird or expose them to forced air that irritates airways. Birds are extremely sensitive to fumes, so no smoking in the car, no air fresheners, no aerosols.
Securing the carrier and managing feeding
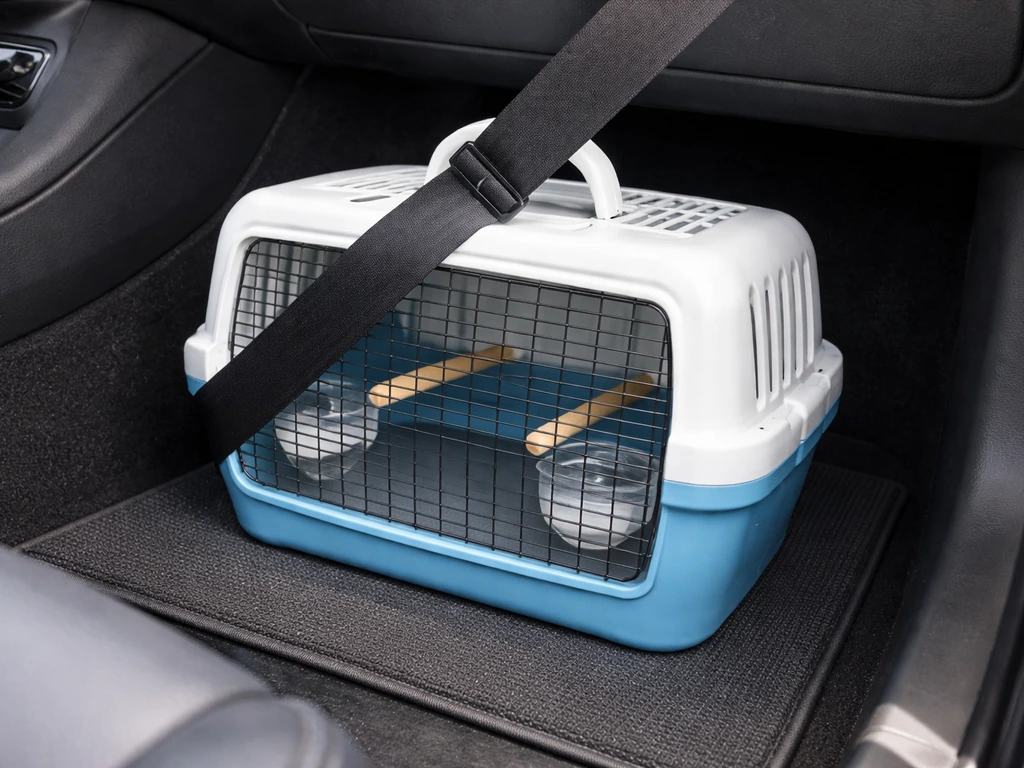
Secure the carrier so it cannot slide or tip in a sudden stop. A seatbelt looped through a handle, placement on a non-slip mat in the footwell, or a cargo area with side walls all work. Do not put the carrier in the trunk of a sedan where airflow is restricted.
On trips under two hours, most healthy pet birds can travel without in-carrier food and water as long as they were fed well before departure. On longer trips, stop every 90 minutes to two hours, offer water in a shallow dish or water-rich foods like apple slices, and give the bird a few minutes to settle before moving again. Do not open the carrier in the car unless the windows and doors are completely closed. For anxious birds, how to take your bird outside safely offers useful grounding techniques you can adapt for the car environment.
Flying and other transport: rules, documentation, and keeping your bird calm
Air travel with birds is one of the more regulated travel situations you'll encounter, and the requirements vary significantly by airline, species, and destination. If you're planning how to take a bird on a plane for the first time, get familiar with the specific airline's pet policy well in advance because policies differ considerably.
Some airlines do allow small birds in the cabin. As one example, Alaska Airlines permits certain household birds in-cabin for a fee of around $100 each way. Most airlines that allow birds in cargo or cabin require IATA-compliant carriers. The IATA Live Animals Regulations (LAR) are the global standard for commercial air transport of live animals and define container construction, ventilation requirements, and species-specific guidance. If your carrier doesn't meet IATA LAR specs, the airline can refuse the bird at check-in.
Documents you may need for air travel
- A current health certificate from an accredited veterinarian (required by most airlines and many states)
- Import Permit and Veterinary Health Certificate for international travel into the U.S.
- CITES documentation (Form 3-200-64 pet passport for personally owned CITES-listed species)
- Airline-specific pet reservation confirmation (book well in advance, as space is limited)
- Vaccination records if required by the destination country
Stress-proofing your bird for air travel takes more preparation than for a car trip. The carrier should already be familiar and associated with positive experiences. Cover it to reduce visual chaos at the airport. Board as early as possible to minimize time in the terminal environment. Once on board, tuck the carrier under the seat in front of you and leave the cover on. Avoid opening the carrier to check on the bird; the sound of your voice is more reassuring than visual contact in a noisy, unfamiliar place.
Other transport options
Trains and buses rarely have formal pet policies for birds, and most do not allow them at all. If you're using a rideshare or taxi, confirm with the driver before the bird gets in the car. For ferry crossings, check the operator's live animal policy. In all cases, keep the carrier covered and the bird as undisturbed as possible.
Setting up at your destination
Arriving at the destination is not the end of the task. How your bird settles in matters enormously for their recovery from travel stress and for longer stays.
Before you open the carrier, make sure the destination space is bird-safe: windows closed, ceiling fans off, no open toilets, no other pets loose in the room, and no toxic houseplants within reach. Then place the carrier in the new space, open the door, and let the bird choose when to come out. Don't rush this step. Give the bird 15 to 30 minutes to look around from inside the carrier before expecting them to explore. Have food and fresh water already set up so they're visible and accessible the moment the bird steps out.
For pet birds staying somewhere new for more than a day or two, set up their familiar perches, toys, and feeding stations in the new space to provide sensory continuity. If you can bring a piece of their familiar cage setup, even just their regular food dish, it helps. If you're taking your bird somewhere new and planning to spend time outdoors, review the safety principles covered in how to guide a bird outside before letting them near open doors or windows.
For wild birds being handed off to a rehabilitator, your job is basically done once you arrive. Hand over the bird, the box or carrier, and as much information as you have: where you found them, what you observed, and how long they've been in your care. Don't add supplemental food or water at this point; let the rehabilitator assess first.
What to do if something goes wrong
Even with solid preparation, emergencies happen. Here's how to handle the most common ones calmly and effectively.
The bird escapes
Stop the car or move to a safe space immediately. Do not open external doors. Close off as many rooms as possible to limit where the bird can go. Dim the lights if indoors. Approach slowly with a towel or their favorite perch, speaking quietly. Avoid chasing, which increases panic and injury risk. If you're outdoors, a bird that has flown into a tree may come down on their own if you stay nearby and call to them calmly. For flighted birds in an open outdoor area, contact a local avian rescue immediately.
Overheating
Signs of overheating include panting with the beak open, wings held away from the body, and obvious distress. Move the bird to a cooler environment immediately. Do not submerge the bird in water; instead, mist lightly with cool (not cold) water on the feet and lower legs, or apply a cool damp cloth to the feet. Improve air circulation around the carrier. If the bird does not improve within a few minutes or shows signs of severe lethargy or loss of balance, this is a veterinary emergency.
Injury and bleeding
If your bird is bleeding, the first step is to determine whether it's active or has already slowed. For a broken blood feather with active bleeding, apply gentle pressure with a clean cloth. Styptic powder can help on minor wounds. For deeper wounds, wrap loosely with roll gauze or vet wrap, materials that won't stick to feathers or plumage. Do not use household adhesives like standard tape directly on feathers. Transport to an avian vet in a secure carrier that allows air exchange. Signs of shock including open-mouth breathing, tail bobbing, drooping wings, and severe lethargy require urgent transport and warrant calling the vet while you're on the way so they can prepare. A bird that has been struggling with an injury for an extended time is at serious risk from the stress itself, so minimize further handling and get moving.
Extreme stress during transport
Some birds, especially wild birds or pet birds with limited carrier experience, go into acute stress during transport. Signs include constant thrashing, feather-damaging contact with carrier walls, and rapid breathing. For pet birds, covering the carrier completely and speaking calmly can help. If thrashing continues, stop the vehicle and sit quietly for several minutes before continuing. For wild birds, this is exactly why minimal handling and a dark, enclosed box are the best approach: less visual input means less panic. Never attempt to force-feed or administer anything orally to a bird in acute stress unless directed to by an avian veterinarian.
Pet bird vs wild bird transport: a quick comparison
| Factor | Pet Bird | Wild Bird (Temporary Transport) |
|---|---|---|
| Legal status | No special permit needed domestically; CITES docs for international | Good Samaritan provision only; must go directly to licensed rehabilitator |
| Container type | Hard-sided ventilated carrier; familiar perch included | Dark cardboard box with ventilation holes; no perch needed |
| Handling method | Step-up training, target stick, or gentle towel wrap | Towel wrap only; minimize contact |
| Feeding during transport | Familiar food and water for long trips | None; leave assessment to the rehabilitator |
| Destination setup | Familiar items, gradual acclimation to new space | Hand off to rehabilitator immediately |
| Stress management | Carrier conditioning, covering, calm voice | Dark enclosure, silence, no interaction |
| Vet documentation | Health cert for airline/interstate travel | None needed; go directly to rehabilitator |
The most important thing to take away from that comparison is that these two situations call for almost opposite instincts. With a pet bird, familiarity and positive conditioning reduce stress. With a wild bird, the most humane thing you can do is minimize all human contact and get them to someone with the training and permits to actually help.
FAQ
What should I pack in addition to the carrier when traveling with a bird?
Bring a small “travel kit” even for short drives, include a backup perch or towel, extra lining for the bottom of the carrier, styptic powder or equivalent for minor bleeding, nitrile gloves, and a pre-made note with your bird’s species, sex (if known), any meds, and an emergency contact. Keep it in the trunk or passenger area where you can reach it quickly without leaving the bird unattended in the car.
How can I tell if my bird’s carrier is the right size and safe before we leave?
Do a “carrier fit check” at home before travel day, especially for larger parrots. Make sure the bird can stand and turn around without hitting solid walls, and confirm toe and beak clearance by verifying that the gaps meet your species risk level. If the bird can get toes caught, switch the spacing or carrier type, do not rely on duct tape or temporary mods.
What’s the safest way to handle bathroom or meal stops during a car trip?
If you need to stop, aim for ventilation and calm handling, not comfort theater. Park out of direct sun, keep climate control running if available, and avoid opening the carrier to “check” on the bird. If you must access water, offer it through the carrier opening only when the car is stable and the bird cannot escape when you remove the dish.
Should I feed or water my bird during the trip, and what about long drives?
For most pet birds, skipping food is fine only for shorter trips as long as they were fed well beforehand. For longer trips, water is the priority. If you offer water, use a stable shallow dish or water-rich foods that don’t crumble into the carrier. Don’t introduce unfamiliar foods on travel day, they can upset digestion and increase stress.
Are there common carrier mistakes or DIY modifications that make travel less safe?
Never use “homemade” carrier fixes that reduce airflow, like covering vents with cloth or adding thick padding on the sides. Instead, control stimulation (covering to reduce visual chaos, dim lighting during transfer) and improve airflow with the carrier’s designed openings. If you are worried about fumes or dust, keep windows closed and use your vehicle’s ventilation system carefully, no aerosols.
What should I do if my bird refuses to eat or drink while traveling?
If your bird won’t eat or drink on the journey, treat it as a sign to reduce triggers rather than force feeding. Confirm temperature and carrier placement first, then give a few minutes of settling after any stop. If your bird remains lethargic, has labored breathing, or shows severe distress, contact an avian vet or emergency avian rescue.
Can I feed or water a wild bird I’m transporting to a rehabilitator?
For a wild bird, do not give supplemental feeding or water unless a permitted rehabilitator instructs you. Those details can vary by species and condition, and incorrect feeding can worsen aspiration or gut problems. Focus on minimizing handling, secure placement in the box, and fast handoff with notes on timing and observations.
What should I do if my bird escapes during loading or after arriving?
If a bird gets loose, do not attempt to chase in a panic. Close off rooms, dim lights if indoors, and use a towel or familiar perch as an approach tool from the side or behind rather than in front. Keep windows and doors closed, remove other pets, and call local animal control or an avian rescue for guidance if you cannot secure the bird quickly.
How do I prepare for very hot or very cold weather when traveling with a bird?
If you must travel with a bird in weather extremes, plan the route around predictable indoor climate control. In hot weather, even a short wait can overheat the car rapidly, so load only when you can keep temperature controlled. In cold weather, avoid direct blast air from vents and make sure the carrier has airflow but is not exposed to window drafts or freezing surfaces.
What are the key things to know about bird travel during airport connections?
If your air travel involves a connecting flight, treat the carrier as “stays-in-use” rather than “out-and-on.” Keep the carrier covered, board early when allowed, and do not open the carrier in the terminal to check on the bird. Also, confirm your airline’s rules for transfer times and whether the carrier can remain under a seat during boarding and deplaning.
What documents should I have ready for CITES-listed pet birds before international travel?
If your pet bird is CITES-listed, keep your documentation organized and accessible, ideally in a folder separate from the carrier. Ensure your documents match the exact species and number of birds, and remember validity timing can matter for multiple borders. If you’re unsure whether your species is listed, check before booking travel, not after departure.
How do I interpret normal settling behavior versus warning signs after arrival?
If you arrive and your bird looks unusually quiet or “fluffed up,” first check environmental safety, then give time. Keep other pets away, remove hazards, ensure windows are closed, and leave the bird in the carrier long enough to acclimate (for many birds, 15 to 30 minutes before encouraging movement out). If you see severe breathing difficulty, open-mouth respiration, or collapse, contact an avian vet immediately.
What emergency signs mean I should seek urgent avian care right away during travel?
If your bird has an emergency during transit, minimize variables. If it’s overheating, move to a cooler area, improve airflow, and mist lightly on feet and lower legs, do not soak. If there’s bleeding, address whether it is actively bleeding first, then secure the bird in an air-exchange carrier for urgent transport. Call an avian vet while you’re en route when symptoms are severe or worsening.