If you landed here searching for 'Item Asylum how to get bird up,' it's worth knowing that 'bird up' in Item Asylum is a specific in-game ceremony or badge mechanic, not a real-life bird-handling question. If you meant something closer to the video-game mechanic instead of hands-on training, you may prefer our guide on Item Asylum “bird up” basics as a related option Item Asylum how to get bird up. Players trigger it by combining particular items (community discussions reference things like Judge/Judgement, Bird, and Torch/Lamp in a group server context) to complete a named in-world activity with defined success or failure outcomes. That's a game guide topic, not what this site covers. What we do cover is the real-life version of 'getting a bird up': safely and humanely encouraging a bird to move to a higher perch, step onto your hand, or transfer positions using low-stress, consent-based training. If that's actually what you need, you're in exactly the right place.
Item Asylum How to Get Bird Up: Safe Step-Up Training

What 'get bird up' means in a real bird-handling context
In practical bird training, 'getting a bird up' means teaching or encouraging a bird to move upward: stepping onto a hand or perch from a lower surface, transferring from one perch to a higher one, or simply building the cooperative stepping behavior ('step up') that forms the foundation of almost all hands-on handling. It sounds simple, but for a fearful, untamed, or recently acquired bird, it requires a specific trust-building sequence rather than just reaching in and lifting. Getting this right matters whether you're working with a pet parrot, a backyard chicken, a rescue dove, or a wild bird you've found that needs interim care before a rehabilitator arrives.
Safety and humane handling basics before you start
Before any attempt to move or handle a bird, take a moment to read what the bird is telling you. A bird that is fluffed, sitting low on the cage floor, showing open-mouth breathing, bobbing its tail with each breath, or not tracking movement normally is not a training candidate right now. Those are signs of illness or shock, and training on a sick bird causes real harm. Put the bird in a quiet, warm space and contact an avian vet. For a wild bird showing these signs, containment in a well-ventilated cardboard box (not a wire cage) and a call to a licensed wildlife rehabilitator is the right move, not a handling session.
For a bird that looks healthy and alert, here are the non-negotiables before you begin any step-up or perch-transfer work:
- Work in a closed, bird-safe room with no ceiling fans running, no open windows, and no other pets present.
- Wash your hands before every session. Scented lotions, strong soaps, or food smells can trigger stress or attraction responses that confuse training.
- Never press your hand or finger directly into a bird's lower chest/keel to force the step-up. This removes the bird's choice and reliably increases biting and fear.
- Keep sessions short: three to five minutes is plenty, especially early on. Stop before the bird shows any stress signals, not after.
- Have your treat ready and accessible before you present your hand, so there's no fumbling that startles the bird mid-interaction.
- Wear a close-fitting long-sleeved shirt if you're working with a larger or easily frightened bird. Loose fabric looks unpredictable to birds.
- Never handle a bird that has just eaten a large meal, is mid-molt, or is showing any signs of respiratory distress.
Step-by-step: building trust and getting your bird to move 'up'
This sequence works for most pet birds and for some calm, human-socialized wild birds in temporary care. Do not rush the steps. Spending an extra day on Step 2 saves you a week of undoing fear at Step 4.
Step 1: Set up a calm training space
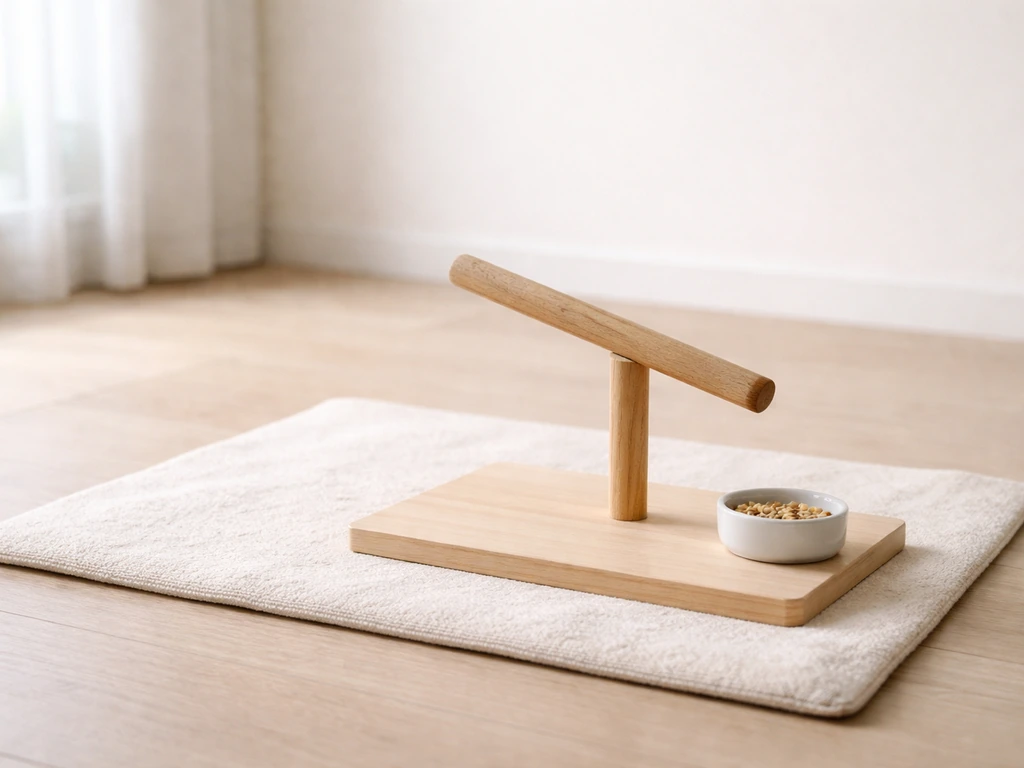
Choose a neutral space, ideally somewhere the bird hasn't learned to be territorial or defensive (not inside its primary cage, if possible). If your goal is how to make your bird not fly away, keep the same step-up principles and start with calm, trust-based transfers before asking for movement. A small perch on a table or a T-stand at about waist height works well. The bird should be able to see you clearly and not feel cornered. If the bird is still in its cage because it won't come out, that's fine for early sessions: you're just establishing presence and association right now.
Step 2: Condition the marker signal
Before asking for any movement, teach the bird that a click (from a clicker) or a short spoken word like 'yes' means a treat is coming immediately. This is the foundation of marker-based training. Click once, then immediately offer a small, high-value treat (a piece of millet, a bit of nut, whatever your bird finds irresistible). Repeat this ten to fifteen times across a few short sessions until the bird visibly brightens or orients toward you the moment it hears the marker. Now you have a communication tool that tells the bird precisely which behavior earned the reward, which speeds up everything that follows.
Step 3: Introduce a target
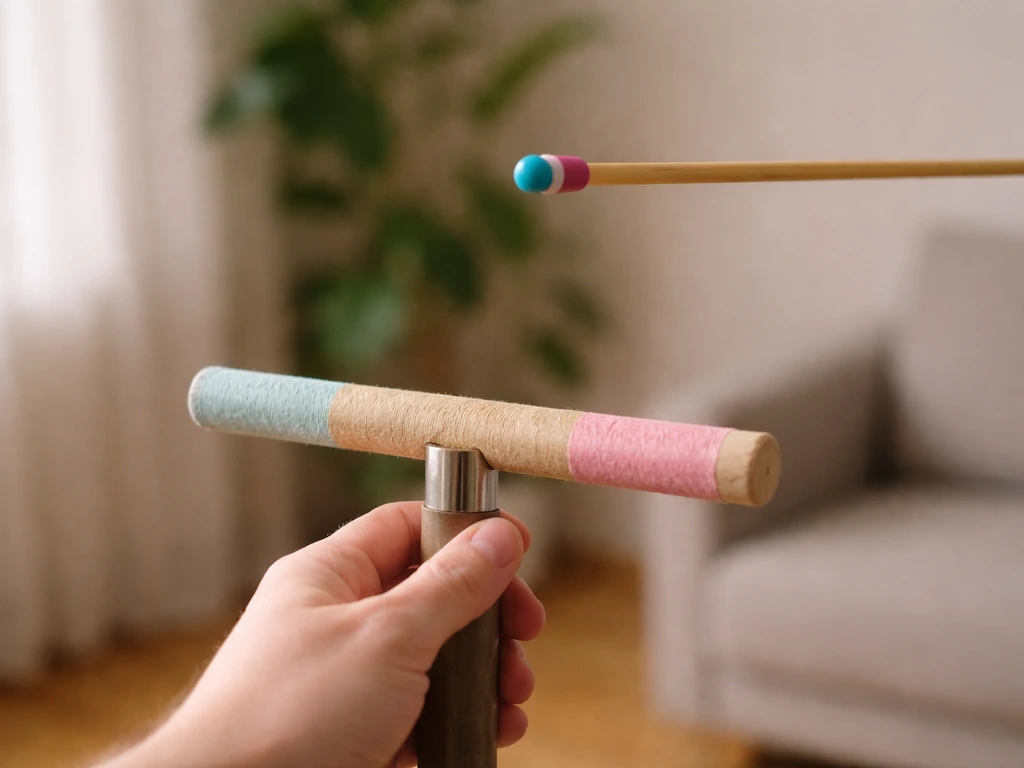
A target is any small, distinct object the bird learns to touch with its beak, foot, or body. A chopstick with a colored tip, a pen cap, or a commercial target stick all work. Hold the target near the bird (within easy reach), and the moment it investigates or touches it, click and treat. Over several sessions, you can move the target to guide the bird's movement: hold it slightly higher or farther along a perch to encourage the bird to walk or reach toward it. This is the gentlest way to shape 'up' behavior because the bird is choosing to follow the target, not being physically moved.
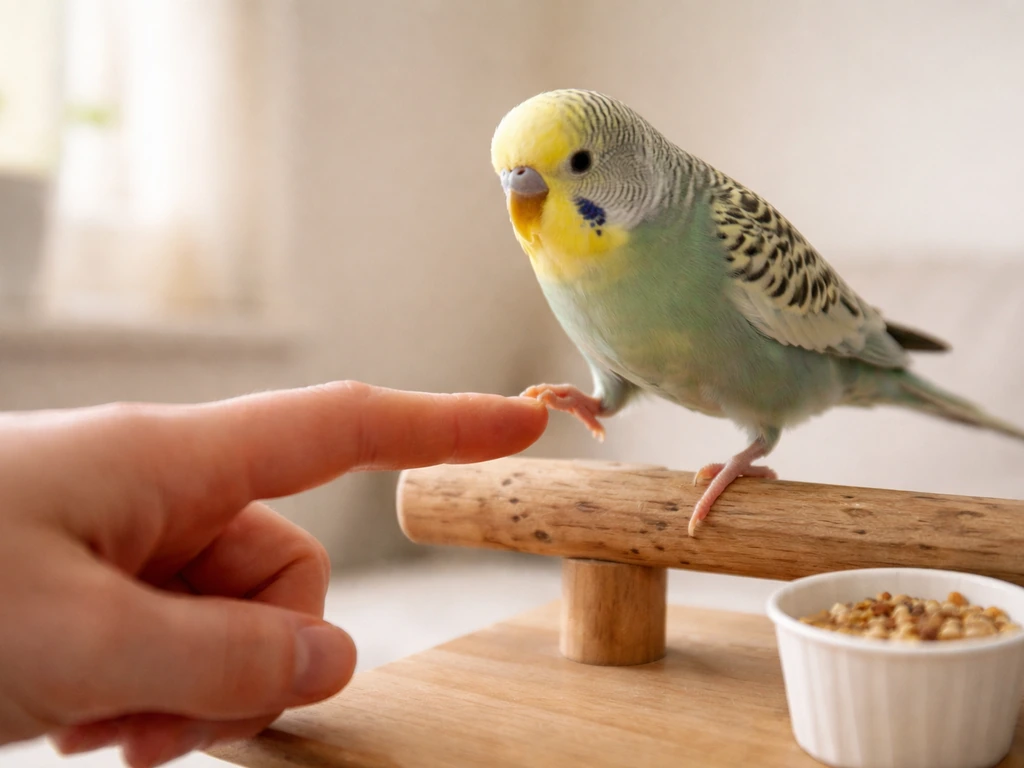
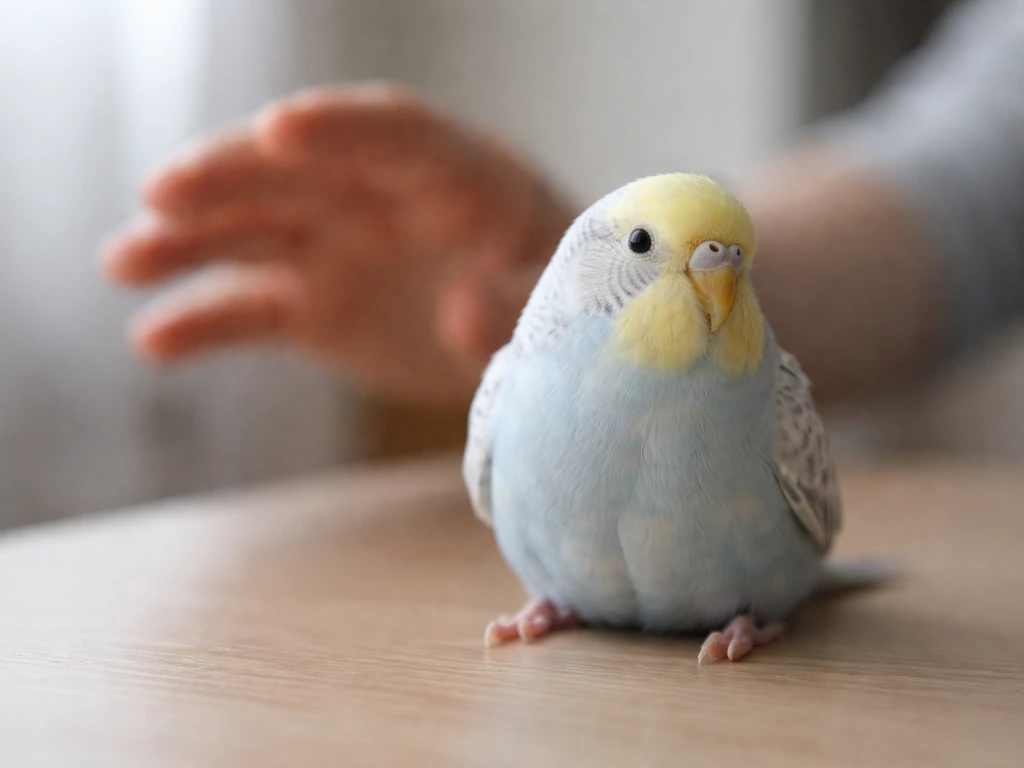
Step 4: Shape the step-up onto a hand or perch
Once the bird is reliably targeting, introduce your hand or a hand-held perch below the bird's feet at a slight upward angle. Place the target just beyond the hand so the bird needs to step onto it to reach the target. The moment one foot touches your hand or the perch, click and treat, even if the bird immediately steps back off. Vetstreet recommends withholding the treat until the bird actually blank" rel="noopener noreferrer">puts weight on your hand, not just leans toward it, even when it starts with only one foot. If you want a safe, repeatable way to free-fly your bird, focus on small step-up wins first and only increase difficulty as trust grows click and treat. You're marking that foot contact, not holding the bird in place. Gradually shape toward a full two-foot contact and then a full weight transfer. At no point should you close your hand around the bird or block its retreat. The bird is learning that stepping up is a rewarding choice it makes. BSAVA’s parrot training handout similarly frames step-up as a staged process where each successful stage is reinforced with praise or a food treat blank" rel="noopener noreferrer">stepping up is a rewarding choice it makes. Follow the steps above to learn how to make a bird easily step up and move to higher perches with trust-based, low-stress training.
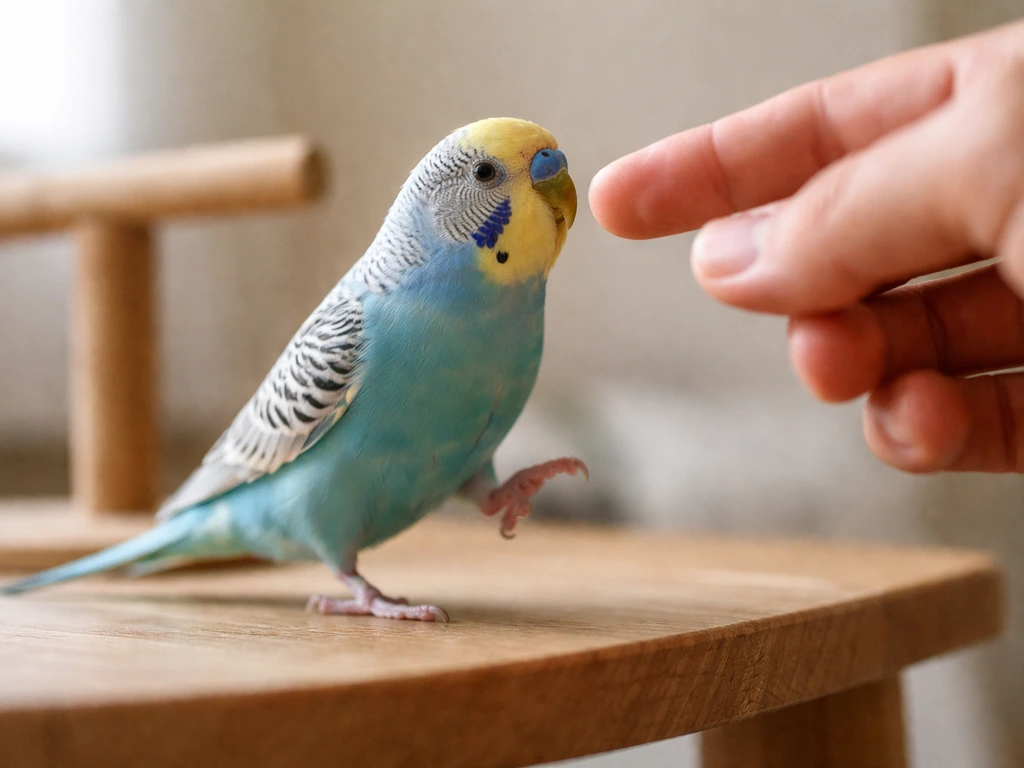
Step 5: Add a verbal cue
Once the bird is stepping up predictably, add a calm, consistent verbal cue just before you present your hand: something like 'up' said in a normal, steady voice. Say the cue once, present the hand, and mark and reward the response. Avoid repeating the cue over and over while waiting for a response; one clear cue, a brief pause for the bird to respond, and then either a reward for compliance or a reset (remove the hand, wait, try again) keeps communication clear.
Step 6: Practice transfers to higher perches
Once your bird steps up onto your hand reliably, begin transferring to progressively higher perches. Move slowly, keep the bird level or slightly inclined upward during transfer, and offer a reward after each successful transfer. Gentle height increases over multiple sessions build the bird's confidence about moving upward without associating it with threat or disorientation.
How to adjust for different bird types
Not all birds respond the same way to step-up training. The timeline and method shift significantly based on species, socialization history, and whether the bird is a pet or a wild bird in temporary care. The easiest bird to train is usually one that is calm, socialized, and already used to human presence, so start with birds that show low fear and easy handling species.
| Bird Type | Key Adjustment | Typical Timeline | Notes |
|---|---|---|---|
| Parrots (pet, socialized) | May have existing step-up history; reinforce with marker training if inconsistent | Days to a few weeks | Fear of hands still common even in socialized birds; always use shaping |
| Parrots (pet, fearful/new) | Start with hand-desensitization before any step-up; use target stick heavily | Several weeks | Never force; forcing sets progress back significantly |
| Doves and pigeons | Generally calmer; respond well to gentle, slow movements and routine | Days to 1-2 weeks | Minimal restraint needed; they often step up readily once trust is established |
| Cockatiels and budgies | Highly responsive to millet as reinforcer; small sessions are key | Days to 2 weeks | Tend to bite less than larger parrots; beak pressure is usually just warning |
| Chickens and domestic fowl | Ground-oriented; focus on 'step up onto perch' rather than hand training | 1-2 weeks | Crouch/treat luring toward a low perch is more natural for them |
| Wild birds (injured, in care) | Do NOT train; minimize all handling, use towel/gloves, contact rehabber immediately | N/A for training | Legal restrictions apply; see the legal section below |
| Wild birds (seemingly healthy fledgling) | Usually needs to be left alone; only intervene if confirmed orphaned or injured | N/A | Fledglings on the ground are normal; excessive handling causes real harm |
For parrots specifically, fear of hands is the single most common barrier to step-up training. Systematic desensitization means spending however long it takes getting the bird comfortable with a hand simply being present in the same space before ever asking it to step onto that hand. This isn't optional: skipping it and forcing step-up because you're impatient is how you create a bird that bites every time you reach toward it.
Troubleshooting: when things stall or go sideways
The bird freezes or flattens (fear response)
Freezing, feather-flattening against the body, wide eyes, and leaning away are clear fear signals. Stop the session immediately, remove your hand or the stimulus that triggered the response, and end on a neutral note. You moved too fast. Go back one full step in your shaping sequence. If the bird is showing this response at even minimal hand proximity, you need to spend more time on basic desensitization: hand visible but stationary, at a non-threatening distance, paired with treats tossed near (not by) the bird.
The bird refuses to step up but isn't showing fear
If the bird looks relaxed but simply won't step onto your hand, your reinforcer probably isn't motivating enough, or the behavior criteria are too big a jump. Try a higher-value treat, make sure the bird is in a slightly hungry state (not right after a full meal), and reduce the ask: reward even turning toward your hand, then reward leaning, then reward one toe touching, and build from there. Breaking it into smaller steps nearly always fixes a flat refusal.
Biting and lunging
Biting almost always means the bird warned you first and you didn't notice or didn't respond. A bite is a last resort, not a first choice. Watch for: raised feathers on the head or neck, pinning pupils (in parrots), a leaning-away posture, soft warning bites or beak pressure without breaking skin. If you see any of these, back off and reset. Do not pull your hand away sharply after a bite (this can be rewarding to the bird and can also cause injury), but do move it away slowly and end the session. Continuing to push after biting signals begins a cycle where biting becomes the bird's most reliable tool to stop unwanted interactions.
The bird steps up but immediately slips or falls
Slipping off a hand perch is usually about unstable footing. Make sure your hand or perch is steady, that you're not moving while the bird is transferring weight, and that your fingers or the perch diameter are appropriate for the bird's foot size. Small birds on very thick perches lose grip; large birds on too-thin surfaces are unstable. If slipping is happening often, switch to a hand-held dowel or t-perch during training until the bird's confidence builds.
Progress has completely stalled
If you've been working consistently for several weeks and the bird isn't moving forward at all, look at three things: session length (if you're going over five minutes, cut it), reinforcer value (try a completely different treat or even non-food reinforcers like brief playtime), and your own body language (are you tense, leaning forward, making direct eye contact? Birds read this as predatory behavior). Sometimes just shifting to a different time of day when the bird is naturally more active can restart progress.
Tracking progress and knowing when to change course
Keep a simple log: date, session length, which step you worked on, and how many correct responses you got out of how many attempts. You're looking for roughly 80% success before moving to the next step. If you're below that, stay at the current step. If you're at 80% or above consistently for two or three sessions in a row, it's time to add the next small challenge.
Watch for these signs that you need to change your approach rather than just keep repeating the same method:
- The bird was making progress and then suddenly regressed: check for environmental changes (new pet in the home, moved cage, schedule shift), molt, or early illness.
- Biting is increasing session by session rather than decreasing: you're likely progressing too fast or missing fear cues.
- The bird appears disinterested in treats across sessions: could indicate illness, hormonal cycle, or that the reinforcer needs to change.
- You've been working for more than two months with essentially no measurable progress: it's time to consult an avian behavior consultant or certified parrot trainer.
Stop the session entirely and contact an avian vet if the bird shows any of the following during or after training: open-mouth breathing, tail-bobbing, sitting puffed on the cage floor, blood, a drooping wing, a head tilt, or pale or discolored droppings. Birds hide illness instinctively and often show these signs only when they are already significantly compromised. Don't wait to see if it resolves.
Legal and welfare considerations for wild birds
If the bird you're trying to 'get up' is a wild bird rather than a pet, the rules change completely. In the United States, the vast majority of wild birds are protected under the federal Migratory Bird Treaty Act (MBTA). This means it is illegal to possess, transport, or house most wild birds without proper authorization, even if your intentions are genuinely good and the bird appears to need help. This isn't a technicality: it exists because well-meaning handling of wild birds is one of the leading causes of preventable injury and death in wildlife.
Licensed wildlife rehabilitators hold Federal Migratory Bird Rehabilitation Permits (and in many states, additional state-level permits) that legally authorize them to take in, transport, house, and treat injured or orphaned wild birds. If you find a wild bird that appears injured, cannot fly, is bleeding, has a drooping wing, or is otherwise clearly in distress, here is exactly what to do:
- Do not pick up the bird with bare hands if you can avoid it. Use a light towel or gloves.
- Place the bird in a well-ventilated cardboard box lined with a soft cloth. Do not use a wire cage, as birds can injure themselves trying to escape through the bars.
- Keep the box in a warm, quiet location away from pets, children, and noise. Do not offer food or water unless a rehabilitator specifically instructs you to.
- Contact a licensed wildlife rehabilitator immediately. Your state's wildlife agency website, the National Wildlife Rehabilitators Association (NWRA), or your local Humane Society can help you locate one.
- Do not attempt any training, step-up work, or bonding with a wild bird in your care. Handling increases stress, which can cause shock and death even in birds that initially appear stable.
If you live in a state like Michigan, you'll also need to be aware that state DNR permits are required in addition to federal authorization for anyone rehabilitating wild birds. Massachusetts and most other states have similar requirements. The rehabilitator handles all of this: your job is safe, calm containment and fast contact with the right professional.
For fledgling birds (young birds with some feathers, hopping on the ground, and calling loudly) the guidance is almost always to leave them alone. Fledglings on the ground are a normal part of their development, and their parents are almost certainly nearby. The main exception is if the bird is in immediate danger from a cat, dog, or traffic, in which case you can gently move it to a nearby shrub or low branch, but you should not take it indoors or begin any handling routine.
Whether you're working with a beloved pet parrot on its first step-up or navigating what to do with an injured bird you've found, the principle is the same: the bird's welfare comes before the goal. Take it slowly, read the signals the bird is giving you, and know when to hand things off to someone with more expertise. That instinct, more than any specific technique, is what makes the difference between a bird that thrives and one that doesn't.
FAQ
Can I do step-up training right after bringing the bird home or after a stressful event?
Yes, but only for a short, structured warm-up. Spend 1 to 2 minutes letting the bird approach or touch the target near the perch, then start the marker game. If the bird gets calmer after 1 to 2 tries, proceed to step-up; if it becomes more tense, stop and return to desensitization instead of pushing to move up.
How long should each step-up session be, and when should I stop?
For most sessions, keep attempts brief and end while the bird is still willing to engage. If you are consistently under about 80% correct, use fewer repetitions per session (for example, 5 to 10 successful reps), reduce the criteria, and restart from the last step the bird could do comfortably.
What if my bird refuses treats or seems too distracted to step up?
Avoid starting when a bird is hungry enough to panic or when food is the wrong motivator. A common setup is light hunger, then offer a small portion of the daily treat ration during training, not after. If the bird shows no interest in treats, switch reinforcers (different texture or small bites) before changing the training steps.
Should I repeat the cue word (like “up”) until the bird complies?
Make it a cue, not a repeated request. Say the cue once, pause 2 to 3 seconds, then either mark-reward if the bird offers the right movement or remove the hand and reset if it does not. Repeating the cue teaches the bird that the cue does not predict anything.
How do I handle frequent slipping or losing grip when the bird steps onto my hand?
Use environmental and perch adjustments first. If the bird slips, stabilize your hand (no shaking), choose the right perch diameter for the bird’s feet, and keep the perch surface dry and non-slip. For tiny feet, too-thick perches can reduce grip, so switch to a dowel or a t-perch that matches the bird’s natural resting stance.
Is it ever okay to keep training if the bird seems off or unusually quiet?
No. If the bird is fluffed, sitting low, tail-bobbing with breathing changes, or you notice drooping wing or abnormal droppings, you should not “train through it.” Move to a quiet warm area and contact an avian vet. Training can worsen stress and delay detection of serious illness.
What should I do if my bird shows fear right when my hand comes closer?
Reassess fear signals and timing before changing treats. If the bird freezes, leans away, flattens feathers, or shows wide eyes/pinpointing, stop the ask and return to stationary hand presence at a distance where the bird can stay relaxed. Only once fear drops should you reintroduce targeting and foot-step criteria.
My bird sometimes turns toward the hand but never steps fully. How do I progress without overwhelming it?
Go smaller, not bigger. Common improvements are rewarding turning toward the hand, then rewarding one toe touch, then two feet on contact, and only later weight transfer. If you skip these micro-steps, birds often refuse because the jump feels like forced movement.
What if my bird steps up briefly, then immediately steps back off?
Let the bird keep “control” of its body position. If stepping off happens, simply lower the reward schedule to what it can do consistently (for example, touch the target, then approach the hand) and build gradually. Shaking the hand, reaching after the bird, or chasing increases escape behavior and fear.
How should I respond if my bird bites during step-up training?
A single bite is often an information signal that you moved too fast or ignored earlier warnings. Back off the stimulus slowly, end on a neutral note, and return to the previous step where the bird could relax (often marker game and distant hand desensitization).
I found a wild bird that seems stressed, can I try step-up training to calm it until help arrives?
For wild birds, do not start training at all if you suspect illness or injury. Follow rapid contact with a licensed wildlife rehabilitator, and keep the bird in quiet safe containment (for many cases, a well-ventilated cardboard box) while you wait. “Gentle handling” is still risky and may be illegal without permits.
What is the correct approach if I find a fledgling on the ground?
For fledglings, the default is to leave them alone because parents are typically nearby and ground hopping is normal. Only intervene if there is immediate danger from cats, dogs, or traffic, and even then, you should place it in a nearby safe shrub or low branch rather than bringing it indoors.