Hand-rearing a baby bird means keeping it warm (between 85–95°F for hatchlings), feeding it a species-appropriate formula every 20–30 minutes during daylight hours, monitoring its weight daily, and keeping everything scrupulously clean. Done right, it works. Done wrong, it can kill the bird within hours from aspiration, chilling, or overfeeding. This guide walks you through the full process step by step, whether you're raising a pet parrot chick or providing emergency care for a found nestling while you arrange professional help.
How to Hand Rear a Bird Humanely Step by Step

Maya Harris
3 May 2026
When to hand-rear and when to call a professional
Hand-rearing is appropriate in two main situations: you're a breeder or experienced bird keeper raising a pet parrot chick whose parents have rejected it, or you've found a wild nestling in genuine danger and need to stabilize it temporarily. In either case, the bar should be high before you commit to full hand-rearing, because it is time-intensive, skill-dependent, and carries real welfare risks if done incorrectly.
For wild birds specifically, the first question is always whether the bird actually needs your help. blank" rel="noopener noreferrer">A feathered fledgling hopping on the ground is almost certainly learning to fly and should be left alone or at most moved to a nearby shrub. A naked hatchling on the ground, a bird that's been attacked by a cat, one with visible injuries, or one that's cold and lethargic is a different matter entirely. Those birds need a licensed wildlife rehabilitator, not a well-meaning amateur with a syringe. For the specific steps and safety checks behind how to raise a wild bird, see the wild-bird raising instructions next.
The Tufts Wildlife Clinic and the RSPCA are both explicit: if a wild bird is injured or in danger, contact a licensed rehabilitator as your primary action, not a last resort. Your role in that situation is to keep the bird warm, dark, and quiet while you make that call, not to start a long-term hand-rearing project. Wildlife rehabilitators have the training, facilities, and legal permits that most private individuals simply don't have.
Hand-rearing a pet bird (parrots, doves, finches) at home is more commonly appropriate, especially if you're an experienced keeper whose breeding pair has failed. Even then, if you've never done it before, consulting an avian vet before you start is genuinely worth the cost of a phone call.
- Appropriate for hand-rearing: rejected pet bird chick, breeder-managed parrot chick, temporary stabilization of a wild bird while awaiting rehabilitator contact
- Contact a wildlife rehabilitator immediately: any injured wild bird, suspected cat attack (even without visible wounds, saliva carries fatal bacteria), cold and unresponsive wild nestling, any wild bird you cannot place with a rehabilitator within 24 hours
- Leave it alone: feathered fledglings on the ground with parents nearby, birds that are alert and mobile
Safety, legality, and imprinting: what you need to know first
In the United States, most wild birds are protected under the Migratory Bird Treaty Act. Keeping a wild bird without a federal permit, even with the best intentions, is illegal. The same or similar laws apply in the UK, Australia, Canada, and most of Europe. This is not a technicality; it exists because improperly hand-reared wild birds rarely survive or thrive in the wild. If you're in the US and you've found a wild bird, your legal and ethical obligation is to contact a licensed wildlife rehabilitator. For pet bird species (parrots, pigeons, doves) there are no such restrictions, but check your local regulations.
Imprinting is the biggest behavioral risk in hand-rearing. Birds imprint on whoever feeds them during a critical developmental window, which means they can identify as human rather than as their own species. For a pet parrot, mild human imprinting is often fine and can even support bonding. For a wild bird, it's a welfare disaster: an imprinted bird can't integrate back into the wild, can't breed successfully with its own species, and often develops severe behavioral problems in captivity. This is why wildlife rehabilitators use puppets, conspecific contact, and minimal human imprinting protocols. If you're hand-rearing a wild bird temporarily, limit handling to what's strictly necessary for feeding and health checks.
Hygiene is non-negotiable. Baby birds have immature immune systems, and contaminated formula or dirty equipment kills chicks quickly. Wash and sanitize all feeding equipment before every session. Never reuse leftover formula. Wash your hands before and after every handling session. Keep the brooder clean by spot-checking droppings at every feeding and doing a full clean at least daily.
Setting up the brooder
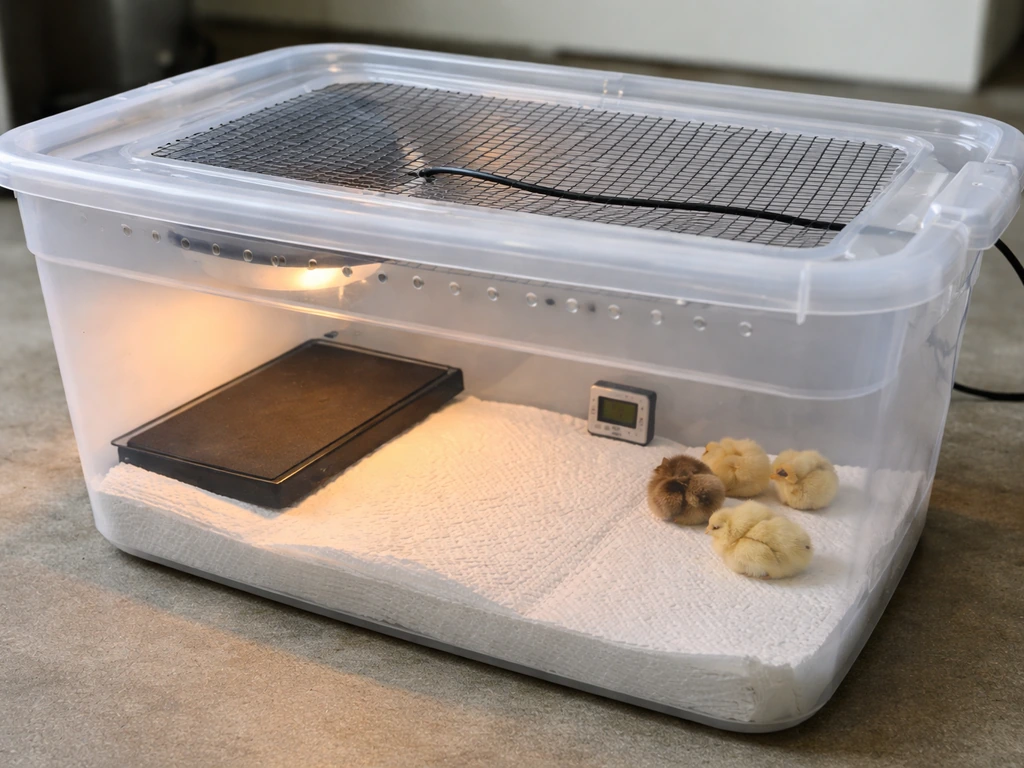
A brooder doesn't need to be expensive. A plastic storage tote, a small animal cage, or even a cardboard box lined with a towel works fine for short-term use. What matters is heat, humidity, ventilation, and cleanliness. Don't use a container so airtight that air can't circulate.
Temperature
This is the most critical variable. Hatchlings (naked, eyes closed) need 95–98°F (35–36°C). Nestlings with some pin feathers can tolerate 85–90°F (29–32°C). Fledglings with most feathers in can often manage closer to 75–80°F (24–27°C). Use a heat lamp, heating pad set to low placed under one half of the brooder (never the whole floor, so the bird can move away if too warm), or a commercial reptile/bird brooder. Always check temperature with a thermometer at the level where the bird sits, not at the top of the box. A chilled bird will not digest food and will die. A bird that's too hot will pant and hold its wings away from its body.
Humidity and ventilation
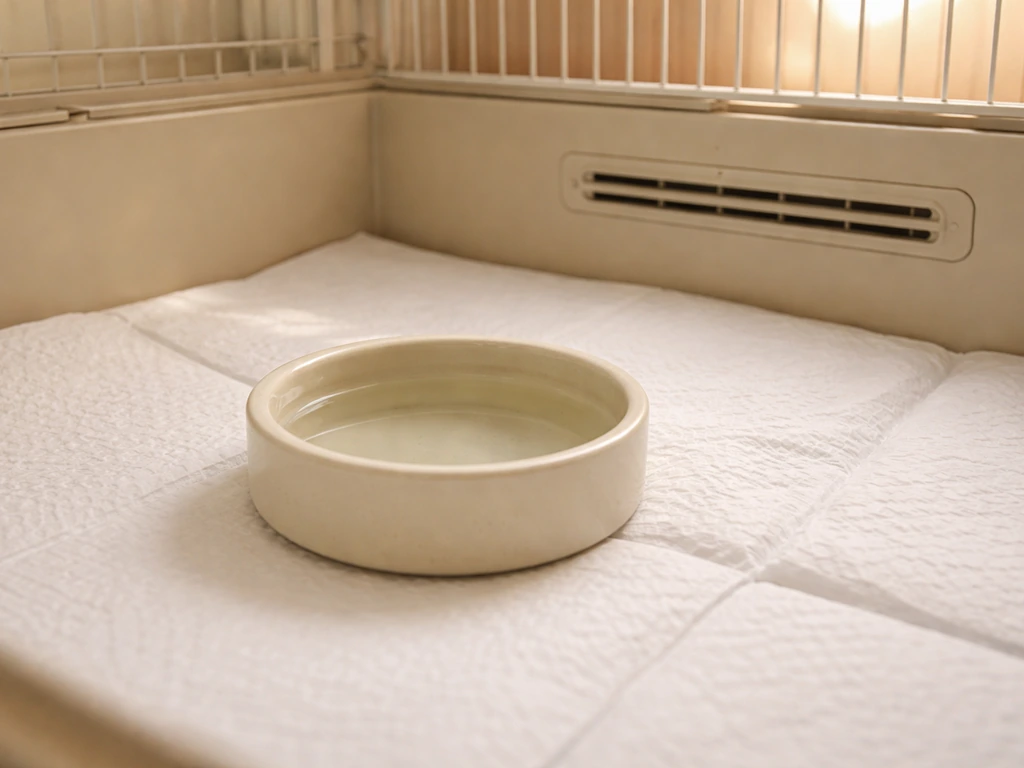
Aim for 50–70% relative humidity, especially for hatchlings. Very dry air dehydrates chicks rapidly and causes skin and respiratory problems. A shallow dish of warm water near (not inside) the brooder, or a light misting of the walls, helps maintain humidity. Make sure there are ventilation holes so fresh air can circulate; CO2 buildup in a sealed box is dangerous.
Bedding and nest shape
Line the bottom with paper towels rather than loose bedding like shavings, which can cause crop impaction if ingested. Create a shallow nest shape using a small bowl or cup lined with tissues or a folded cloth. This keeps the chick upright, which matters a lot for digestion. For small songbird nestlings, a repurposed plastic berry container lined with tissue works perfectly. Change bedding at every feeding or whenever soiled.
Choosing the right formula and setting a feeding schedule
Formula choice depends entirely on species. Using the wrong diet is one of the most common and most damaging mistakes in hand-rearing. A parrot chick fed on songbird insectivore formula will develop nutritional deficiencies. A nestling robin given parrot hand-feeding formula will fare no better.
| Species group | Recommended formula | Avoid |
|---|---|---|
| Parrots and parakeets (pet birds) | Commercial hand-feeding formula (Kaytee Exact, Zupreem, Roudybush) | Bread, milk, seeds alone |
| Songbirds and passerines (wild) | Insectivore mix (dry cat food soaked in water, mealworms, egg food) or rehabilitator-supplied formula | Parrot formula, milk, fruit alone |
| Pigeons and doves | Crop milk substitute: soaked pellets blended smooth, or commercial pigeon formula | Syringe-feeding liquids as sole diet |
| Raptors (wild, emergencies only) | Finely chopped day-old chick or mouse — contact a rehabilitator immediately | Any plant-based formula |
| Waterfowl ducklings/goslings (wild, temp care) | Waterfowl starter crumble mixed with water to paste | Bread, milk, adult seeds |
For parrot chicks, always follow the formula manufacturer's mixing instructions. Typically this means mixing formula powder with warm water to reach a smooth, lump-free consistency. The right temperature for formula is 105–108°F (40–42°C) measured with a thermometer, not by feel. Formula that's too cool causes crop stasis. Formula that's too hot causes severe crop burns that are often fatal.
Feeding frequency by age
| Age / developmental stage | Feeding frequency | Volume per feed (small to medium birds) |
|---|---|---|
| Hatchling (naked, eyes closed) | Every 20–30 minutes, 6am–10pm | 0.5–1ml, increase as crop empties |
| Nestling (pin feathers emerging) | Every 45–60 minutes, 6am–10pm | 1–3ml per feed |
| Nestling (feathers opening) | Every 1–2 hours, 6am–9pm | 3–5ml per feed |
| Fledgling (mostly feathered) | Every 3–4 hours, 6am–8pm | 5–10ml per feed, start offering solids alongside |
| Weaning stage | 2–3 times daily, reducing | Reducing formula, increasing solid food |
You do not need to feed at night. Parent birds don't, and night feeding disrupts normal development. Let the bird rest from roughly 10pm to 6am. The exception is an extremely weak or underweight hatchling in the first 48 hours, which may need a single night feed on veterinary advice.
How do you know the schedule is working? The main sign is steady weight gain. Weigh the chick before the first morning feed each day using a digital kitchen scale accurate to 1 gram. A healthy chick should gain weight daily.
A chick that loses weight two days in a row needs immediate veterinary attention. The crop (the pouch at the base of the throat) should empty fully between feeds, which usually takes 2–4 hours in healthy chicks.
Because Reddit users have described ongoing troubleshooting when a pigeon’s crop would not empty as expected during hand-feeding, crop-emptying delays are a practical sign to reassess technique and seek guidance if they persist The crop (the pouch at the base of the throat) should empty fully between feeds, which usually takes 2–4 hours in healthy chicks. .
Step-by-step hand-feeding technique
Before you pick up the syringe, check three things: the bird is warm (if it's cold to the touch, warm it first and do not feed), the crop from the last feed is empty or nearly so, and your formula is at the correct temperature (test on your wrist or use a thermometer). If you’re trying to learn how to hand feed a bird safely and correctly, follow the steps on warmth, formula temperature, and aspiration prevention closely.
- Warm the bird to the appropriate temperature range for its age. A cold bird cannot digest and may aspirate. Never feed a chilled bird.
- Prepare fresh formula for each session. Never reheat or reuse leftover formula. Mix to a smooth consistency with no lumps, and confirm temperature (105–108°F / 40–42°C).
- Position the bird upright, ideally sitting in a small nest cup held in your non-dominant hand. The bird should be stable and not able to throw its head back.
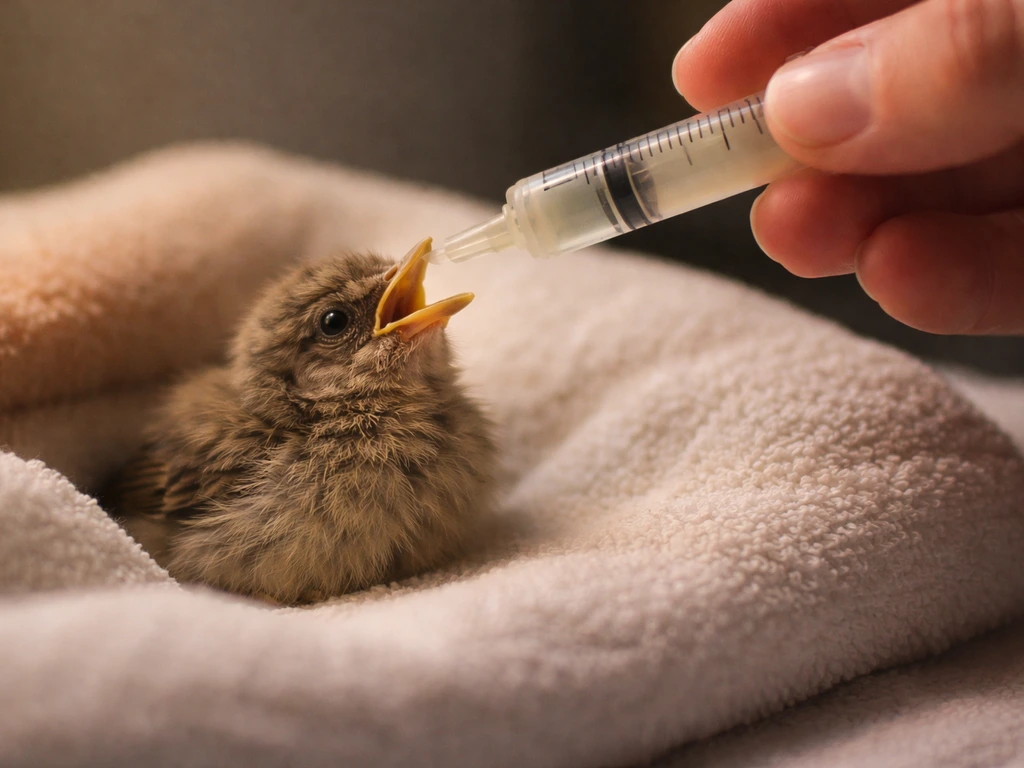
- For small birds and hatchlings, use a 1ml or 3ml syringe (no needle). For larger parrots, a curved feeding syringe or soft spoon works well. A teaspoon bent to a slight curve is a classic low-cost tool.
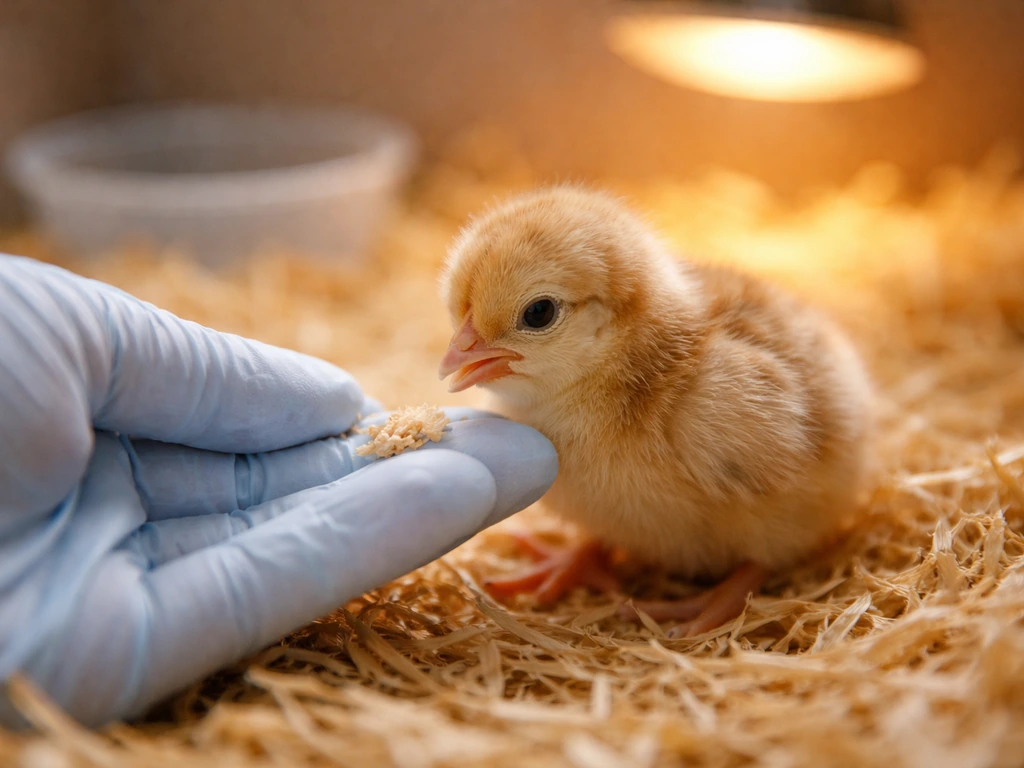
- Gently touch the side of the beak or the corner of the mouth to trigger the feeding response (gaping). Most chicks will open wide and bob their head. This is your cue to feed.
- Insert the syringe or spoon gently to the left side of the mouth (your left as you face the bird), aiming toward the right side of the throat. This directs food toward the esophagus and away from the trachea (windpipe), which opens on the left floor of the mouth.
- Deliver formula slowly, in small pulses, allowing the bird to swallow between each one. Watch the crop fill gradually at the base of the throat. Stop when the crop is full and rounded but not stretched tight.
- Wipe the beak gently with a damp cloth after feeding. Formula dried around the beak causes feather and skin damage over time.
- Return the chick to the warm brooder immediately after feeding.
The single most dangerous mistake in hand-feeding is aspiration, which happens when formula enters the trachea instead of the esophagus. Signs include clicking or gurgling breathing sounds, formula bubbling from the nostrils, or a sudden change in breathing during feeding. If this happens, stop feeding immediately, hold the bird with its head down for a few seconds to let the formula drain, and contact an avian vet immediately. Aspiration pneumonia develops fast and is often fatal without prompt treatment.
Never force-feed a bird that isn't gaping or showing interest. A bird that refuses to gape is telling you something is wrong. Check temperature, crop contents, and overall demeanor before trying again, and seek veterinary advice if refusal continues.
Monitoring health every day
Daily monitoring is what separates successful hand-rearing from a disaster you didn't see coming. Build a simple daily log: date, morning weight before first feed, number of feeds, formula temperature, crop status, droppings description, and any observations. This takes two minutes and will help you and your vet identify problems early.
What healthy looks like
- Weight: steady daily gain appropriate to species and age
- Crop: empties fully between feeds (2–4 hours); feels soft and smooth when full
- Droppings: green/brown solid component with white urate and some clear liquid; change in color or consistency can signal diet or health issues
- Behavior: alert, responsive, gaping enthusiastically at feeding time
- Skin and feathers: skin moist but not wet, feather sheaths developing on schedule
- Breathing: quiet, even, no clicking or wheezing
Common complications and what to do
| Problem | Signs | Immediate action |
|---|---|---|
| Chilling / too cold | Cold to touch, lethargic, won't gape, slow crop emptying | Warm the bird gradually before attempting any feed; check brooder temperature |
| Overheating | Panting, wings held away from body, restlessness | Reduce heat source; ensure bird can move to a cooler area |
| Dehydration | Skin tenting, sunken eyes, dark concentrated urates | Offer a few drops of warm (not cold) plain water or electrolyte solution; contact vet |
| Crop not emptying (crop stasis) | Crop still full or sour-smelling several hours after last feed | Skip next feed; warm bird; consult avian vet if not improved within a few hours |
| Aspiration | Gurgling breathing, formula from nostrils, sudden respiratory distress | Stop feeding, tip bird head-down briefly, call avian vet immediately |
| Weight loss over 2 days | Daily weigh-in shows consistent decline | Review formula concentration, feeding frequency, and temperature; contact vet |
| Yeast / candida in crop | Sour smell, white patches in mouth, thickened crop contents | Veterinary antifungal treatment required; increase hygiene protocol |
Hydration check: gently pinch the skin on the back of the neck or leg. In a well-hydrated bird, it snaps back immediately. If it tents and stays up, the bird is dehydrated. Mild dehydration can be addressed with a few drops of warm plain water or a diluted oral electrolyte solution between feeds. Moderate to severe dehydration needs veterinary intervention.
Weaning and transitioning to solid food
Weaning is not something you rush, but it's also not something you can skip. A bird kept on formula longer than necessary becomes formula-dependent and can develop nutritional deficiencies and behavioral problems. The process is gradual: start introducing appropriate solid foods alongside formula feeds once the bird is fully feathered and showing interest in its environment.
Age-based weaning milestones (parrots as primary example)
- Fully feathered and alert (typically 5–8 weeks for small parrots, 10–14 weeks for larger species): begin placing softened pellets, mashed fruit, or small seeds in the brooder so the bird can explore them
- Bird begins pecking at solid food: reduce formula to 3 times daily, keeping morning and evening feeds as the last to go
- Bird eating solid food consistently: reduce to 1–2 formula feeds daily, monitor weight closely to ensure no loss
- Bird's weight stable on solids: drop to one formula feed, then stop; weight should remain steady or increase
- Full weaning: bird eating independently, weight stable, no formula required
Never withhold formula to force weaning. A bird that's hungry enough will beg, but it may also lose weight rapidly, stress, and become ill. The goal is to make solid food attractive by offering it fresh, at room temperature, and in a variety of textures while gradually reducing formula as the bird's solid intake increases naturally. For species-specific weaning diets (songbirds, pigeons, raptors), follow rehabilitator or avian vet guidance, since the transition to adult food varies significantly by species.
Related to this process is the broader question of how to raise a bird from chick to independent adult, which involves socialization and environmental enrichment alongside diet. The weaning stage is also when most behavioral patterns for adult life begin to form, making the bonding work in the next section especially important right now.
Bonding, handling, and preventing behavioral problems
How you handle a hand-reared bird during the early weeks shapes its personality, confidence, and social behavior for the rest of its life. After you’ve ensured safety and legality, you can follow the same general step-by-step hand-feeding approach for how to raise a bird at home. If you are wondering how to hand raise a bird from day one, start by focusing on warmth, feeding technique, and calm, consistent handling. The goal is to raise a bird that is comfortable with humans, but not so dependent on one person that it becomes anxious, aggressive, or unable to cope when that person isn't around.
For pet birds (parrots, doves, pigeons)
Start with calm, consistent handling from the beginning. Talk to the bird quietly during feeds. Let it get used to different people from early on, not just one handler. Avoid reinforcing begging or screaming by rushing over every time the bird calls; instead, come on a schedule. Once the bird is feathered and mobile, provide environmental enrichment: perches at different heights, safe foraging opportunities, and supervised time outside the brooder. This prevents the fearfulness and feather-destructive behaviors that often develop in birds that were isolated or over-handled during development.
Step-up training (teaching the bird to step onto your finger on request) can begin as soon as the bird is fledged and confident on its feet. Apply gentle, consistent pressure to the lower abdomen just above the legs and say 'step up' clearly. Reward with a small food treat or calm praise. Keep sessions to 2–3 minutes to avoid stress. This foundation makes all future handling, training, and veterinary visits easier for both of you.
For wild birds in temporary care
The approach here is the opposite: minimize handling and human contact as much as possible. Feed with minimal eye contact and no talking directed at the bird. Cover the brooder between feeds with a cloth so the bird can't see people moving around the room. If you can hear other birds of the same species outside, place the brooder near a window (but not in direct sun) so the bird gets auditory exposure to conspecifics. The moment a licensed rehabilitator is available, transfer the bird. Every day of human imprinting makes eventual wild release harder.
Whether you're raising a pet parrot or stabilizing a wild nestling, the bonding and handling principles connect directly to how you'll eventually hand feed and tame the bird as it matures. The groundwork you lay now, in terms of calm, consistent, low-stress handling, is what makes the difference between a confident, well-adjusted bird and one that spends its life anxious and reactive. Get that part right and everything else that follows becomes easier.
FAQ
Can I feed a baby bird with whatever bird formula I have on hand?
Yes, but only for very limited, species-appropriate emergencies. If you cannot confirm the bird’s species and you don’t have the correct formula, the safest approach is to keep it warm, dark, and quiet, and contact an avian vet or licensed wildlife rehabilitator immediately. Using “broader” formulas (for parrots, finches, or other birds) can cause fatal nutritional and digestion problems even when the bird seems hungry.
What kind of feeding tool should I use, and how do I prevent aspiration with it?
A syringe, a narrow tubing feeder, or a feeding spoon are all commonly used, but the key is that the delivery tip must be small enough and the bird’s head position must prevent aspiration. If you see any breathing change, gurgling, clicking, or nostril bubbling during feeding, stop and switch to getting professional guidance right away. Don’t “speed up” by using larger volumes per feeding.
What should I do if the crop is still partially full at the next feeding time?
If the crop is not fully empty before the next scheduled feed, you’re likely feeding too soon, too much, or at an incorrect temperature. Do not try to “catch up” by skipping warmth checks or increasing frequency. Wait, keep the bird warm, and seek avian vet advice, because delayed emptying can lead to stasis and rapid deterioration.
Is it safe to warm the formula in the microwave or by feel, instead of using a thermometer?
You can, but temperature errors are common and dangerous. The formula should be 105–108°F (40–42°C) when measured with a thermometer. If the bird’s mouth is used to guide “by feel,” you can easily overheat or underheat and cause burns or slow digestion. Warm only what you’ll use, discard leftovers, and recheck temperature after mixing.
What if the bird is cold and refuses to eat right away?
Chilled birds often gape poorly and digest slowly, so feeding them when cold raises aspiration and crop problems. Warm the bird first using the brooder setup so it can move away from heat if needed, then wait until it is reliably warm before offering food. If the bird is cold, lethargic, or weak, veterinary guidance should be your next step.
If my hand-reared chick isn’t gaining weight, how long can I wait before calling a vet?
Weight loss for two days in a row is a hard stop for “keep going.” Even if the bird seems alert, continued loss can mean incorrect formula, incorrect temperature, aspiration injury, dehydration, or illness. Pause and contact an avian vet or rehabilitator urgently, and share your daily log (weight, feed count, crop status, temperature).
Can I tell if humidity and feeding are causing dehydration or the opposite problem?
Yes, dehydration and overhydration are both possible depending on humidity, feeding consistency, and brooder airflow. The practical check is the skin test you described, but also watch droppings and overall posture. If droppings become very watery, or the bird looks swollen, lethargic, or unusually fluffed with poor feeding, stop making changes in isolation and get professional advice.
What should I do if the bird won’t gape or keeps refusing the syringe?
If the chick cannot gape or repeatedly refuses feed, first reassess warmth, crop emptying status, and formula temperature, then stop escalating. For persistent refusal, don’t force feed, because refusal can reflect illness, aspiration risk, or crop dysfunction. Get avian vet guidance promptly, especially for hatchlings.
I think I’m underfeeding, can I just add more feeds to make up for it?
You generally should not increase feeding frequency beyond what your species-specific plan requires, because more feeds do not correct aspiration risk and can worsen crop stasis. If you suspect underfeeding, review formula temperature and volume per feed, confirm the bird’s age/stage, then contact a vet or rehabilitator for the correct schedule rather than guessing.
How do I wean without causing weight loss, especially if the bird won’t eat solids yet?
For weaning, the safest rule is gradual reduction only after the bird is fully feathered (or at the stage appropriate to the species) and actively interested in foods. Don’t remove formula to “encourage eating,” because the bird may lose weight quickly and become stressed. If the bird isn’t taking solids as expected, continue formula and get species-specific weaning guidance.
If it’s just for a few days, do I still need a permit to care for a wild baby bird?
For wild birds, don’t assume “temporary care” is enough to avoid legal issues. Many protected species require permits for possession, and a bird that you keep long enough to change its behavior or survival chances may increase your legal and welfare risk. If you’re in the US or similar regions, call a licensed wildlife rehabilitator first and follow their instructions on stabilization only.
What are the next steps after the bird is stable and warm, before I start long-term hand-rearing?
After the bird is stabilized, the transition plan depends on its type and ability. For wild birds, the next step is transfer as soon as a rehabilitator is available, and during that time you minimize handling and maximize warmth, darkness, and quiet. For pet birds, schedule an avian vet check and use a consistent, species-specific diet plan so you don’t switch foods abruptly during growth.