You can teach most pet birds to lay on their back on cue, but only if you build up to it gradually through trust, desensitization, and clear positive reinforcement. This is not a trick you push through. The goal is for your bird to offer the position willingly because it predicts good things, not because it has given up or is frozen in fear. Done right, it takes days to weeks depending on your bird's baseline confidence, and it becomes one of the most useful behaviors you can train for handling, grooming, and veterinary prep.
How to Teach Your Bird to Lay on Its Back Safely

Maya Harris
26 Apr 2026
What this behavior actually is (and what it isn't)
Laying on the back is what trainers call a cooperative husbandry behavior. The idea is that your bird voluntarily participates in a handling position using learned cues and a history of positive reinforcement, rather than being forced or restrained. This approach is sometimes called blank" rel="noopener noreferrer">cooperative care or consent-based training, and it draws on the same learning principles used in professional avian veterinary and research settings.
The distinction matters. A bird that has been flipped onto its back through repeated forced handling may appear calm, but that stillness is often a fear or tonic immobility response, not genuine cooperation. A trained bird, by contrast, will shift into the back position when you give the cue, remain relaxed, and step out of it if something feels wrong. That kind of voluntary participation is what you're building toward, and it's what makes this behavior genuinely safe and useful.
This behavior is closely related to tricks like playing dead and rolling over, which share many of the same foundational steps. The key difference is that laying on the back involves real handling contact and body support, which means the welfare stakes are higher and the trust-building process needs more care.
Safety and consent basics before you touch anything

Before you start any handling-based training, you need to know what your bird looks like when it is stressed, and you need to be willing to stop the moment you see those signs. This is non-negotiable. Training a bird that is over threshold does not just fail to work, it actively makes things worse by building negative associations.
Stress and fear signals to watch for
- Freezing or going rigid when you approach
- Leaning away, crouching low, or pressing against the back of the cage
- Feathers pulled tight and flat against the body
- Raised crest in cockatiels and cockatoos (as a threat or fear signal, not just curiosity)
- Lunging, biting, or open-beak threats
- Alarm calls, screaming, or rapid-fire contact calls
- Flapping or thrashing to escape
- Eyes pinning rapidly or a fixed wide stare
- Rocking the head side to side
Stop immediately if you see any of these
- Open-mouth breathing during or after handling
- Tail bobbing with each breath (a sign of respiratory effort)
- Panting or wings held noticeably away from the body
- Audible clicking, wheezing, or labored breathing
- Inability to grip your finger or stand steadily after you set the bird down
- Eyes closing during a session
- Limpness or sudden loss of muscle tone
Open-mouth breathing and tail bobbing together are veterinary red flags. If you see them during training, end the session, let the bird rest in a calm, cool environment, and contact an avian vet if the symptoms do not resolve quickly. Small birds especially can go from stressed to dangerously compromised faster than most people expect.
One more mechanical rule: never encircle the thorax with your hand in a way that compresses the chest. Follow restraint guidance that says not to restrict the chest, since birds have a bony trachea and neck support should not obstruct breathing DO NOT restrict the chest. Birds breathe differently from mammals, and external pressure on the ribcage restricts their ability to move air. When you do support a bird on its back, your hand cradles the body from underneath, not squeezes around it.
Build trust and handling tolerance first
You cannot skip this stage, even if your bird already steps up reliably. Stepping onto a hand is very different from tolerating being turned upside down. Desensitization means exposing your bird to progressively closer versions of the full behavior, always staying below the stress threshold where fear kicks in. Counterconditioning pairs each step with something the bird loves, usually a high-value treat, so the association shifts from neutral or negative to actively positive.
- Start by sitting near your bird with no agenda. Let it approach you on its terms. Reward any voluntary movement toward you with a small treat or praise.
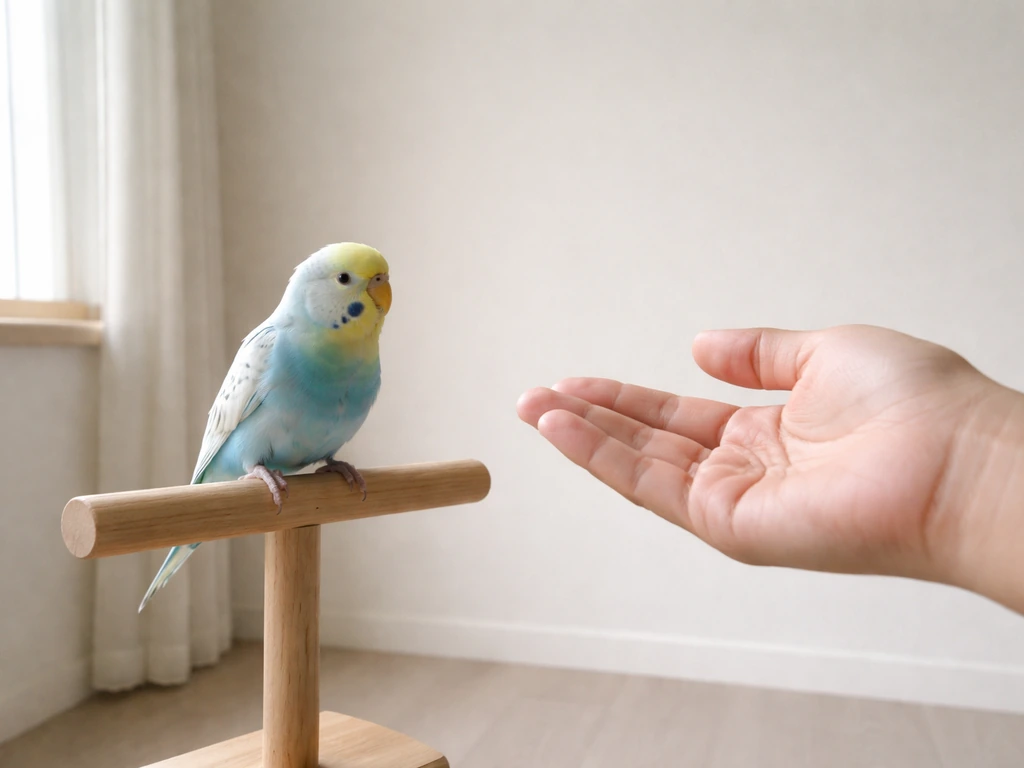
- Introduce hand presence. Hold your hand near (not over) the bird and reward calm behavior. Gradually bring your hand closer over multiple sessions until the bird ignores it entirely.
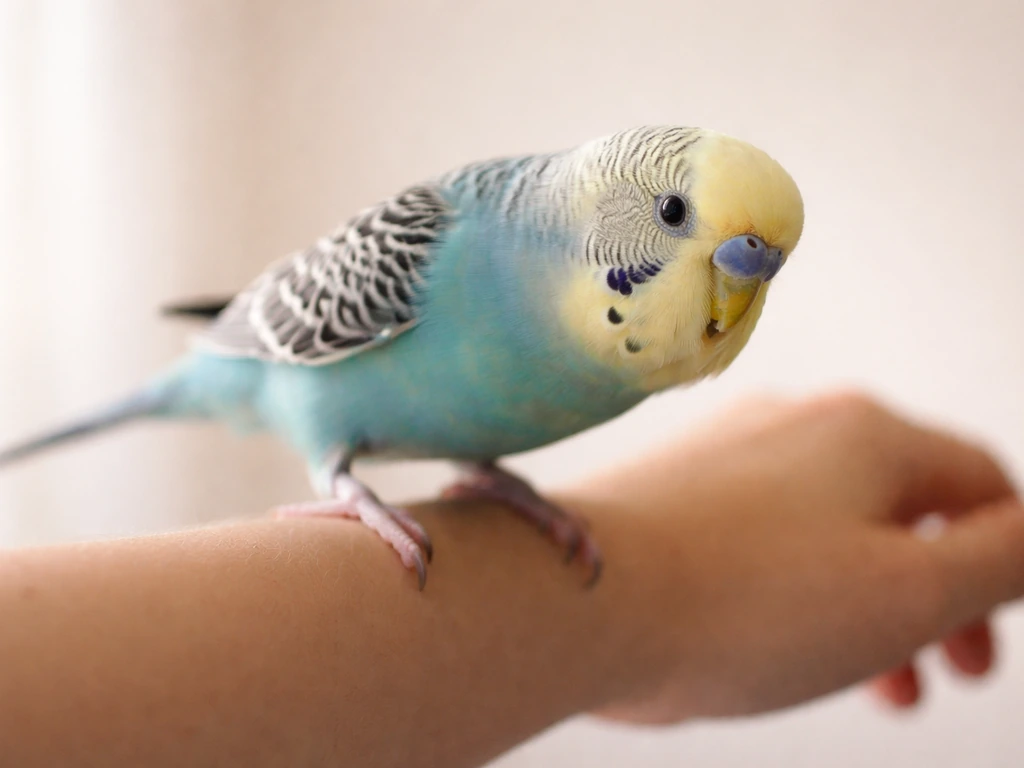
- Practice step-up on cue until it is clean and consistent. The bird should step up readily with no hesitation.
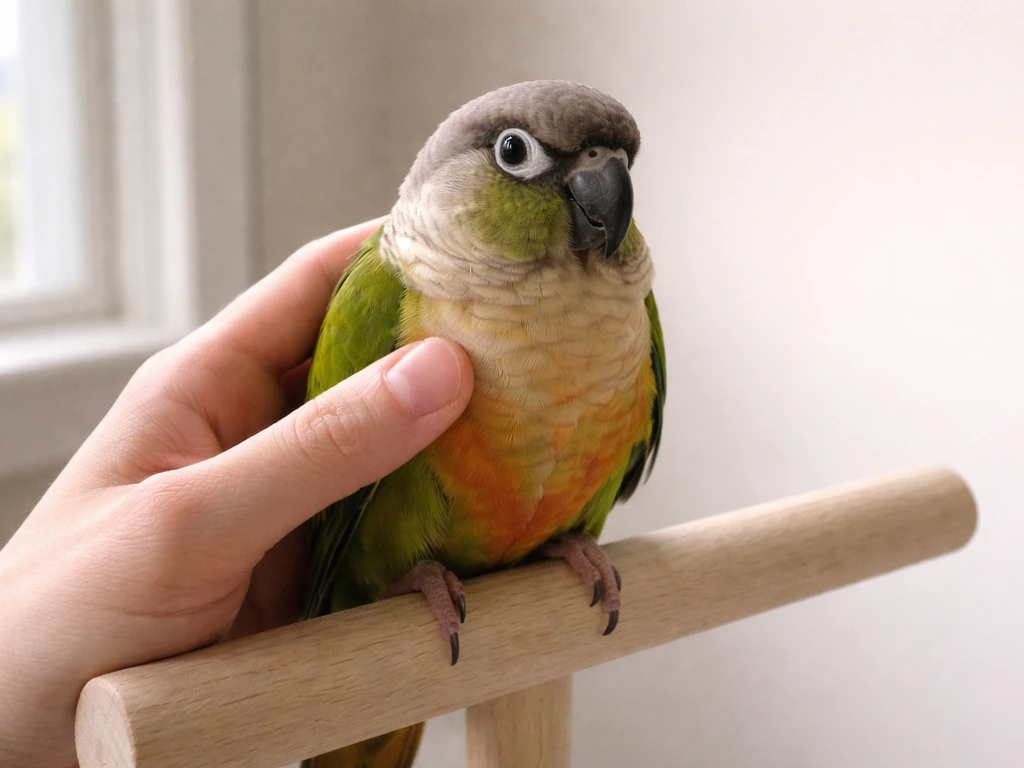
- Begin touching the belly and sides gently while the bird is perched. Use one finger at first. Reward immediately after each brief touch. If the bird steps away, let it. Try again in a few seconds.
- Progress to two-hand contact: one hand under the feet, one hand gently steadying the sides. Keep this short (a second or two) and always reward.
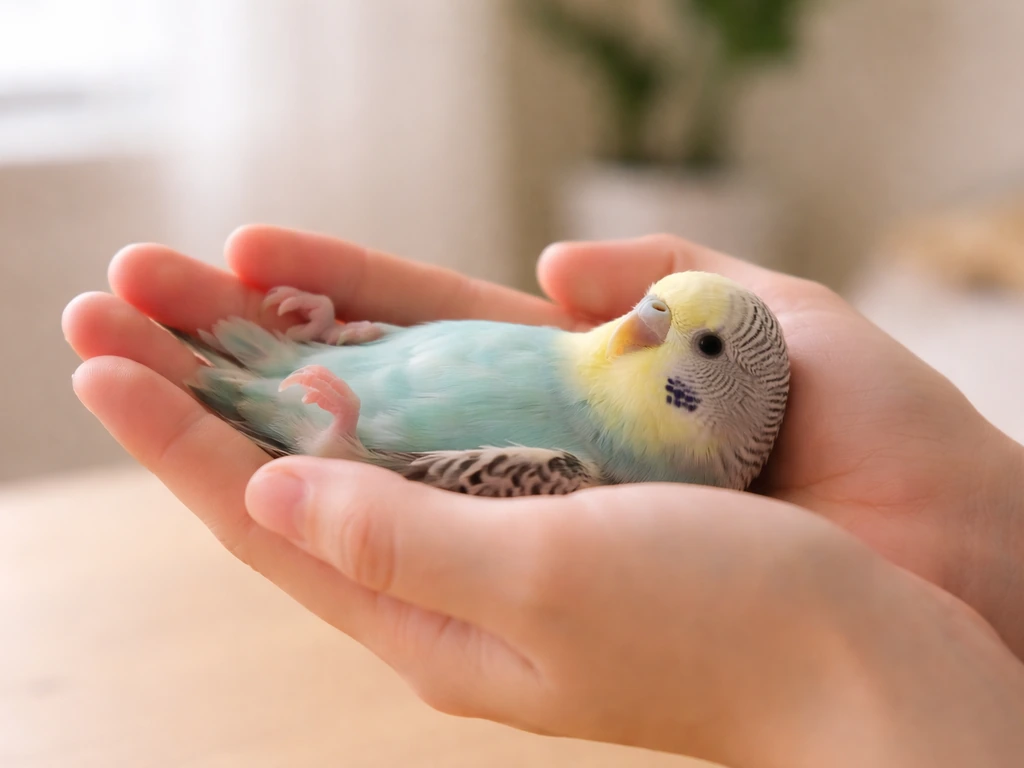
- Practice holding the bird in your cupped hands while it is still upright. Build duration gradually, a few seconds at a time, rewarding throughout.
- Only once the bird is fully relaxed in your cupped hands should you begin tilting toward the back position.
If your bird is not already target trained, this is a great time to add it. Target training means teaching the bird to touch a small stick or chopstick with its beak in exchange for a treat. It gives you a way to guide the bird's head and body position without physical pressure, which becomes very useful in the next stage.
Teaching the back position step by step
Use a marker signal (a clicker or a consistent word like 'yes') to precisely mark the moment the bird does the right thing. The treat should follow within a second or two of the marker. During early training, reward every single correct response. Continuous reinforcement is the fastest way to build new behaviors. Once your bird understands the back position reliably, you can build on that trust to work toward a playful routine, including how to make your bird dance. Once you can rely on the back position, you can shape it into a dance routine step by step teach a bird to dance.
- Hold your bird securely upright in your cupped hands, belly up slightly. Reward calm acceptance at this angle. Do not tilt yet.
- Very slowly begin tilting the bird 10 to 15 degrees backward. The moment the bird stays calm without struggling, mark and reward. Return to upright. Repeat until this angle is easy.
- Increase the tilt to about 30 to 45 degrees over the next few sessions. Same process: mark calm acceptance, reward, return upright. Never hold the tilt if the bird is struggling.
- Progress to a full reclined position (back roughly parallel to the floor). Your dominant hand cradles the back of the head and neck gently. Your other hand supports the lower body and feet. The bird's wings should rest naturally, not pinned.
- Add a verbal cue (like 'back' or 'bedtime') just before you begin the tilting motion. After several repetitions, the bird will start to anticipate and lean into the position when it hears the word.
- Build duration at the full position. Start with two seconds, then five, then ten. Mark and reward at the end of each hold. Work up to 30 to 60 seconds only once your bird looks genuinely relaxed, with soft eyes, smooth feathers, and regular breathing.
- Introduce a release cue (like 'up' or 'okay') so the bird learns the position has a clear beginning and end.
If you are using target training, you can use the target stick to guide the bird's nose upward and backward through the tilt, which keeps the bird mentally engaged and focused rather than anxious about what is happening to its body. Some birds find this much easier than a purely physical approach.
How to structure your sessions
Keep sessions short. A good target is 10 to 15 minutes per session, three times per week minimum, at the same time of day when your bird is alert and calm (usually mid-morning or a couple of hours after waking). Consistency matters more than intensity. Short, frequent, positive sessions build behavior faster than long, exhausting ones.
Start each session with something easy your bird already knows, like a step-up or a target touch. This warms up the bird's engagement and reminds it that training sessions are good. Then move into the back position work. End each session on a success, even if that means going back a step to something the bird can do well. Finish with a good reward and let the bird go at its own pace.
If your bird is not engaging after two or three minutes, stop. Boredom and frustration look similar in birds, and pushing through either one backfires. Come back later or the next day. The research with laboratory macaws showed successful cooperative husbandry behaviors trained in 10-minute twice-daily sessions over several weeks, which is a realistic expectation for most companion birds too.
Reinforcement timing tips
- Mark the exact moment of calm acceptance, not a second after the bird starts to wiggle
- Deliver the treat as quickly as possible after the marker
- Use the bird's absolute favorite treat for this behavior, not just whatever is convenient
- Vary the treat type occasionally to keep motivation high
- Never withhold the treat once you have marked the behavior, even if the bird then struggles
Common problems and how to fix them
The bird freezes instead of relaxing
Freezing is not calmness. It is often tonic immobility, which is a fear response. If your bird goes stiff and motionless when tilted, you have gone too far too fast. Return to upright, end the session, and go back several steps in your desensitization progression. You need more time at the earlier stages before increasing the tilt angle.
The bird flaps and struggles
This means the tilt angle or the duration is above the bird's current comfort level. Go back to the last angle where the bird was calm and rebuild from there. Do not try to hold the bird still through the flapping. The rule is: if the bird struggles, you have gone too fast, not that you need a firmer grip.
The bird bites during handling
Biting is communication. It means the bird is telling you to stop, and in consent-based training, you listen. Do not punish the bite. Reduce the intensity of what you were doing and reward any moment the bird is not biting. If biting is happening early in sessions before you even get to the tilt, focus entirely on hand desensitization before attempting any body contact work.
The bird was doing well and suddenly regressed
Regression is normal and usually caused by a change in environment, a stressful event, or sessions that got too long or too fast. Go back to a step the bird handles easily, rebuild your success rate over a few sessions, and then progress again more slowly. Do not skip steps just because the bird did them well before.
The bird seems overheated or is panting
Stop the session immediately. Move the bird to a cool, calm area with good airflow. Do not continue training until the bird's breathing has fully normalized and it looks alert and engaged again. If panting persists for more than a few minutes or is paired with tail bobbing or weakness, call an avian vet. Training environments should be comfortable room temperature, never hot or stuffy.
Adapting your approach by species and setting
Not every bird is the same, and your approach should reflect your specific bird's size, temperament, and background. Here is a general guide across the most common companion species and contexts.
| Species / Context | Typical Temperament | Key Adjustments |
|---|---|---|
| Budgerigar / Parakeet | Can be flighty and quick to startle; small body means heat and respiratory stress escalate fast | Keep sessions to 5 to 8 minutes maximum; use very small treat pieces; tilt very slowly; watch breathing closely throughout |
| Cockatiel | Moderately handleable; raises crest visibly when stressed | Crest position is a reliable stress gauge; go back a step anytime crest goes fully erect in a defensive posture; usually responds well to calm, consistent sessions |
| Lovebird | Feisty and quick to bite; can be very bonded to one person | May require longer desensitization before any back work; multiple short sessions daily often work better than fewer longer ones |
| Conure (small to mid-size) | High energy, curious, can be nippy but also very trainable | Leverage natural curiosity with target training; redirect biting before it becomes a habit; these birds often progress quickly once trust is established |
| African Grey / Amazon / Larger parrots | Intelligent, can develop long-lasting negative associations from a single bad experience | Invest heavily in the trust-building stage; never rush; these birds benefit enormously from target-guided positioning rather than physical tilting |
| Cockatoo | Highly social, can be over-stimulated or under-stimulated easily | Watch for over-excitement as well as fear; raised crest and fast feather-ruffling can mean either; match training energy to the bird's calm baseline |
| Rehab / Wildlife context | Unhandled or minimally socialized; may never be candidates for this behavior | Back positioning in rehab is primarily for emergency medical handling, not trained behavior; minimize all restraint, always work with a partner, and follow your jurisdiction's wildlife handling regulations |
If you are a rehabilitator or work with wild birds, be aware that consent-based training is typically not feasible for birds intended for release. In those cases, all handling should be minimal, purposeful, and done by trained staff following legal protocols. The techniques in this article are designed for birds with an established human relationship, and that context matters.
How to know it's actually working
The clearest sign of success is not that the bird tolerates the position but that it actively participates in it. A truly trained bird will shift its body weight cooperatively when you begin the tilt, stay loose and relaxed throughout, and look at you with calm eyes rather than scanning for an escape route. That is behavioral assent, and it is very different from passive submission.
Training milestones to track
- Bird steps up and accepts hand contact without hesitation (baseline trust established)
- Bird remains calm when cupped in both hands in an upright position for 30 seconds
- Bird accepts 15-degree tilt without struggling or freezing
- Bird accepts 45-degree tilt and holds it for 5 seconds with smooth feathers and regular breathing
- Bird accepts full back position for 10 seconds with a relaxed body and normal respiration
- Bird responds to the verbal cue alone by beginning to lean back cooperatively
- Bird holds the position for 30 to 60 seconds with calm, slow blinking and no struggling
- Bird performs the behavior with a second familiar person present
- Bird performs the behavior in a different room or location from where it was trained
That last milestone, generalizing the behavior to new locations and different handlers, is where the training becomes genuinely useful for veterinary visits or grooming. Practice in at least two or three different spots in your home before expecting the behavior to hold in a vet clinic environment. The more contexts your bird succeeds in, the more reliable the cue becomes.
Once your bird is solid on the back position, you have a strong foundation for other cooperative behaviors. Training spinning, rolling over, or even playing dead builds on the same trust and body-handling tolerance you have developed here. Training spinning, rolling over, or even playing dead is a natural next step once your bird is solid on the back position, using the same trust and body-handling tolerance you built here. Once your bird reliably plays dead and rolls over, you can channel that same cooperative training into fun novelty skills like playing basketball playing dead. Each new behavior you add tends to come faster than the one before it, because your bird is learning how to learn with you.
Keep sessions going even after the behavior is solid. Maintenance training a few times a week keeps the association positive and the behavior sharp. If you go weeks without practice and then suddenly need the position for a grooming or veterinary reason, you may find the bird needs a few refresher sessions to get back to peak reliability. That is normal and easy to fix with a short brush-up sequence.
FAQ
How long should it take before my bird can stay on its back for more than a second or two?
Expect a few short criteria checks first, for example, one to two seconds with loose body and normal breathing. Moving to longer durations usually takes additional days to weeks, because you are increasing either tilt angle or time without raising stress. If your bird shows any fear signs or goes stiff, stay at the last comfortable duration and rebuild from there.
What should I do if my bird suddenly regresses after it was doing well for days?
Treat it like the environment or your session variables changed. Shorten the session, return to the last step your bird did comfortably, and rebuild success over several sessions. Also check for recent stressors like loud noise, a new cage placement, illness, or changes in diet or sleep routine.
How do I know the difference between fear-related freezing and true relaxation during the tilt?
Watch for more than stillness. True cooperation typically includes soft posture, consistent breathing, and the bird stays responsive rather than going rigid and motionless. If the bird stiffens, becomes unresponsive, or stops flapping only because it is shutting down, end the session and go back several steps in desensitization.
Can I use a towel or gloves to protect myself while training, or is that unsafe?
Towels and gripping can easily become restraint, which undermines consent-based training. If you need safety, use distance and cues rather than compression, and keep handling minimal. If biting or panic is frequent, pause training and consult an avian behavior specialist or an avian vet for a tailored plan and safety strategy.
My bird steps up fine, but struggles when I try to tilt. Is that normal?
Yes, stepping up is not the same as tolerating body inversion. Many birds comply with feet-on-hand but will resist being tilted because it changes balance and breathing comfort. Revert to hand desensitization and introduce tilt in smaller increments, rewarding calm participation at each micro-step.
What if my bird won’t take treats during training or won’t switch into the back position for rewards?
That usually means the bird is over threshold or you are using treats that are not high enough value for this context. Reduce the session difficulty, go back to an easier step, and test treats when the bird is already calm. If the bird still refuses, stop and consider that stress or health issues may be interfering, then consult an avian vet.
Should I aim to teach the cue to every handler in the household right away?
Generalization is best introduced gradually. Once your bird is reliably cooperative with you, use the same cue and the same short ritual in new locations with one additional handler at a time. Keep sessions brief, avoid adding new variables, and do not assume the behavior will transfer immediately.
How do I handle the back position when I need it for grooming or a vet visit the same week?
Start a brief, focused prep plan: practice short, low-stress back cues on multiple days, in the exact locations where handling will happen, and with the same handler if possible. If the appointment is soon, prioritize reliability of the first part of the behavior (tilt entry and quick calm participation) over long duration.
Is there a safe way to practice with an untrained bird that is new to my home?
Do not begin inversion-based training until your bird has stable comfort with basic handling and predictable daily routines. Use target training and short, reward-heavy sessions first, and keep handling pressure to a minimum. If the bird is anxious or shows consistent stress signs, delay the tilt until you have built a stronger human relationship.
What are common mistakes people make when teaching this behavior?
The most frequent issues are pushing too fast (increasing tilt angle or time before the bird is ready), treating freezing as calm, and compressing the chest with the hand. Another common mistake is long sessions that look “progressive” but cause boredom or frustration. Keep sessions short, stop at the first signs of stress, and progress only at the bird’s comfort level.