Starting a bird means building a foundation of trust before anything else. Whether you just brought home a budgie, you're trying to bond with a fearful rescue parrot, or you've found an injured wild bird and need to stabilize it safely, the first steps are remarkably similar: go slow, read the bird's signals, keep the environment calm, and let the bird set the pace. You can make meaningful progress today without any fancy equipment, just patience, consistency, and the right approach.
How to Start a Bird: Humane Bonding and First Training Steps

Maya Harris
14 May 2026
First, figure out what kind of 'start' you're dealing with
The phrase 'starting a bird' covers a few very different situations, and the right path depends entirely on which one you're in. Getting clear on your actual goal before you do anything is the most important step.
- New pet bird (hand-raised or tame): Already somewhat comfortable with people. Your job is building on that foundation, establishing routines, and introducing training in short, positive sessions.
- Fearful or untamed pet bird: May have had little human contact, a stressful history, or a rough rehoming experience. You're essentially starting from zero with trust-building before any handling.
- Wild bird that needs stabilization: Found injured, sick, or grounded. This is a welfare-first, hands-off situation where your role is limited to safe containment and getting the bird to a licensed rehabilitator as quickly as possible.
- Fostering or rescue bird in transition: Somewhere between pet and wild depending on the species and history. Welfare assessment comes first, then slow habituation if the bird is destined for a home environment.
If you're still figuring out which bird is the right fit for your life before you even get started, that's a genuinely separate question worth thinking through carefully. If you want to be sure you choose the right bird for your lifestyle and setup, focus on matching temperament, care needs, and practical realities before you commit how to find the right bird for you. The process of picking the right species and sourcing a bird responsibly matters a lot for how smoothly this early period goes. Picking the right bird for your life is also part of how to pick a pet bird, so it pays to start with the basics before you rush into trust work Picking the right species and sourcing a bird responsibly.
Read the bird before you do anything else
Before you approach, touch, or train, spend time just watching. Merck Veterinary Manual recommends an observational examination as a first step when assessing pet birds and also notes routine veterinary considerations, such as not beginning certain training or conversion programs while the bird is under veterinary care. A bird's body language tells you exactly where you're starting from, and ignoring those signals is how people get bitten and set back weeks of trust-building in one bad session.
Signs a bird is relaxed and curious
- Feathers held smooth and close to the body (not puffed up in illness, not slicked tight in fear)
- Alert eyes, head tilting toward you with interest
- Relaxed posture, one foot occasionally tucked up
- Soft vocalizations, chirping, or quiet chattering
- Willingness to move toward you or toward offered food
Signs a bird is stressed, fearful, or telling you to back off
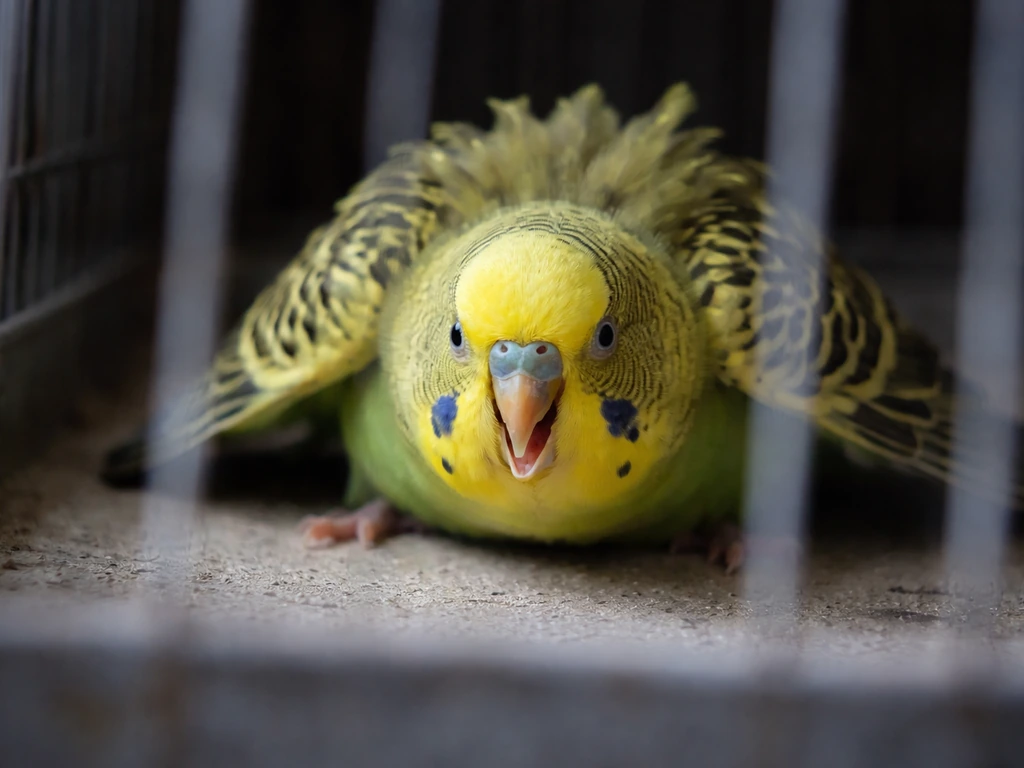
- Cowering, crouching, or pressing into a corner
- Trembling or thrashing against cage bars
- Wings held away from the body or raised head feathers
- Hissing, panting, or lunging toward your hand
- Feathers slicked flat and body elongated (freeze response)
- Rapid, shallow breathing
A bird that bites or lunges is protecting itself from something it perceives as a threat. That's not bad behavior, it's communication. Fearful birds can and do bite hard enough to break skin, so read these cues before you put your hand anywhere near the cage. If you see biting directed at the cage bars themselves, or the bird is injuring itself, that's a sign stress has escalated and needs to be addressed before you start any training routine.
One simple baseline check: sit quietly about a meter from the cage for 10 minutes and do nothing. Note whether the bird moves toward you, away from you, or ignores you. That tells you more than anything else about where you're starting.
Set up the environment before training begins
The environment does a lot of the work for you. A bird that feels safe in its space is dramatically easier to start with than one that's already anxious from its surroundings.
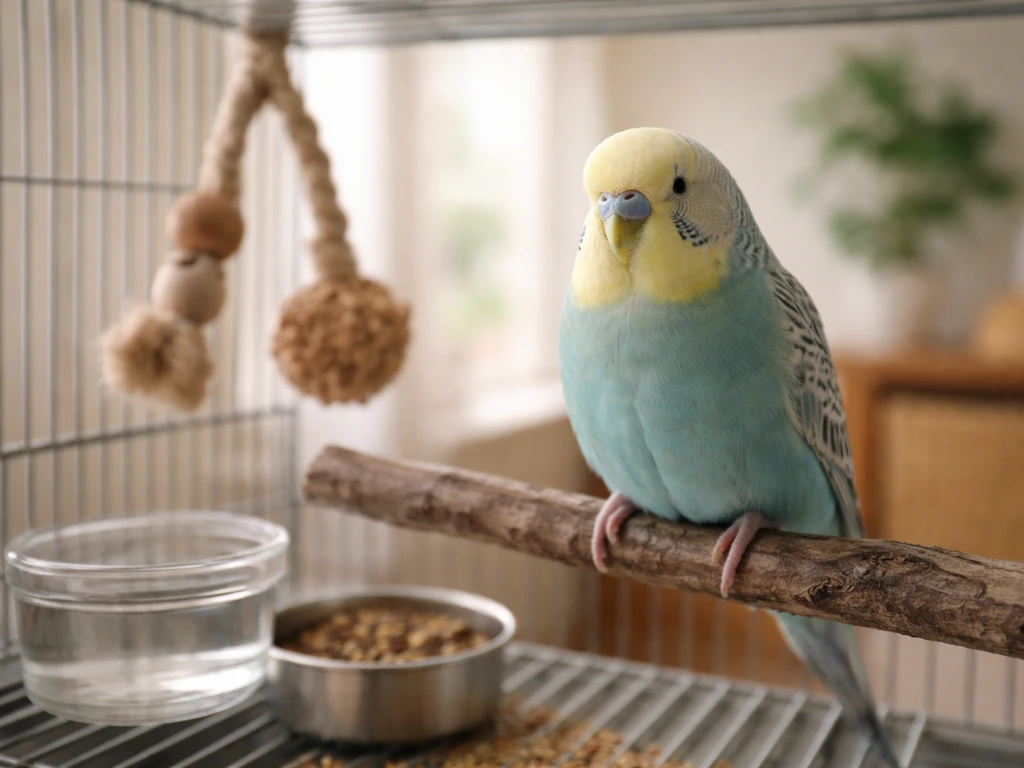
Cage and space basics
- Place the cage at roughly eye level, not on the floor (where the bird feels exposed to predators) and not so high it feels dominant or unreachable
- Position against a wall so the bird has at least one 'safe' side at its back
- Include a covered area or partial cage cover so the bird can retreat and feel hidden when it needs to
- Make sure bar spacing is appropriate for your species (budgies and small birds can get their heads stuck in bars spaced for larger parrots)
- Keep the cage away from the kitchen (Teflon/PTFE cookware fumes are acutely toxic to birds, even briefly), air fresheners, candles, and heavy foot traffic areas
Routine and lighting
Birds thrive on predictability. Set consistent wake-up and sleep times, ideally giving the bird no more than about 12 hours of light and covering the cage for at least 12 hours to promote natural sleep cycles. This kind of structured routine reduces ambient stress and makes training sessions more productive because the bird isn't already running on a cortisol deficit. If you have a bird that's already plucking or showing other stress behaviors, this light/dark structure is one of the first things to fix before expecting any training progress.
Pre-handling prep
- Close windows and doors before any out-of-cage time, every single time
- Cover mirrors and windows (birds can fly into reflective surfaces at speed)
- Remove or secure ceiling fans
- Have a dedicated training space that's small and low-distraction, not the middle of a busy room
- If you need to handle a bird that isn't comfortable with hands yet, a towel can be used as a low-stress option, but this is a skill that takes practice and should not be your first attempt at 'bonding'
Build trust before you build skills
This is the phase most beginners rush, and it's the one that matters most. Trust-building isn't a soft optional step before the 'real' training. If you want a simple, step-by-step approach to how to foster a bird, start with the trust-building phase described here and stay consistent day to day. It is the training, at least for the first days or weeks depending on the bird.
Approach and presence
Start by simply being in the room. Sit near the cage, talk softly, read a book aloud, eat a snack near the bird. Let the bird get used to your sounds, movements, and smell without any pressure to interact. Move slowly and deliberately near the cage. Quick movements and direct eye contact are both threatening to a prey animal, so move at an angle rather than straight toward the bird, and blink slowly to signal that you're not a threat.
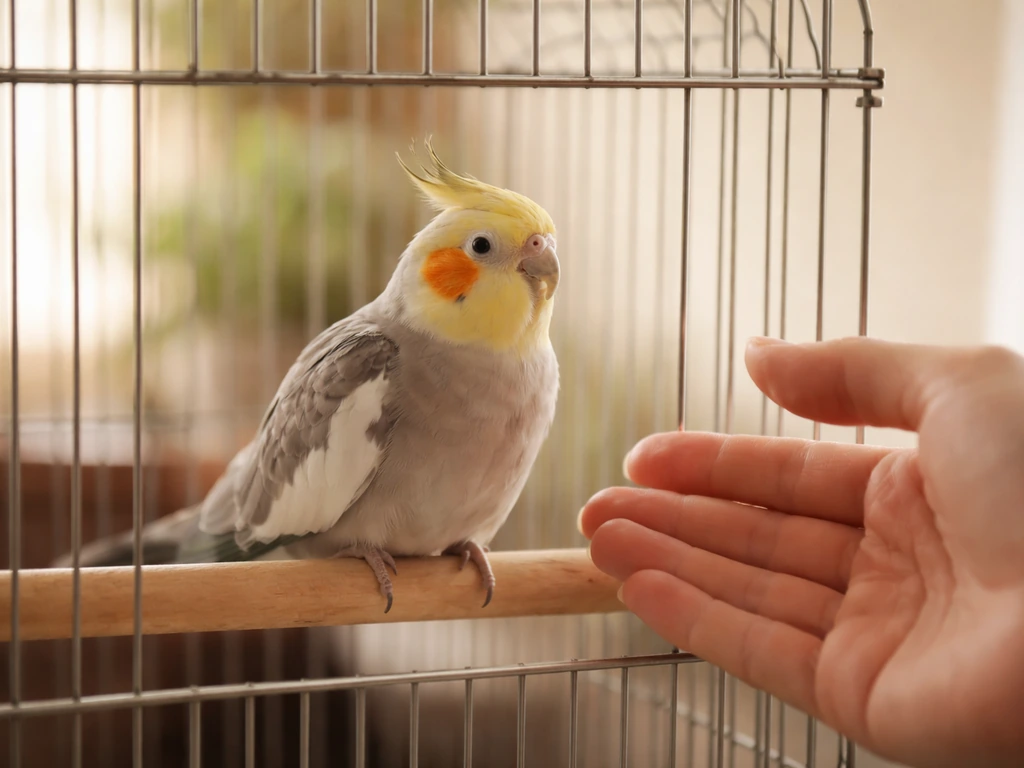
Introducing your hand
Once the bird seems comfortable with your presence nearby, start placing your hand near the outside of the cage without reaching in. Let it sit there. Then gradually move to placing your hand inside the cage, resting near the bottom or on a perch, with no agenda. The bird will investigate on its own timeline. Only progress to the next step when the bird shows no stress signals during this one.
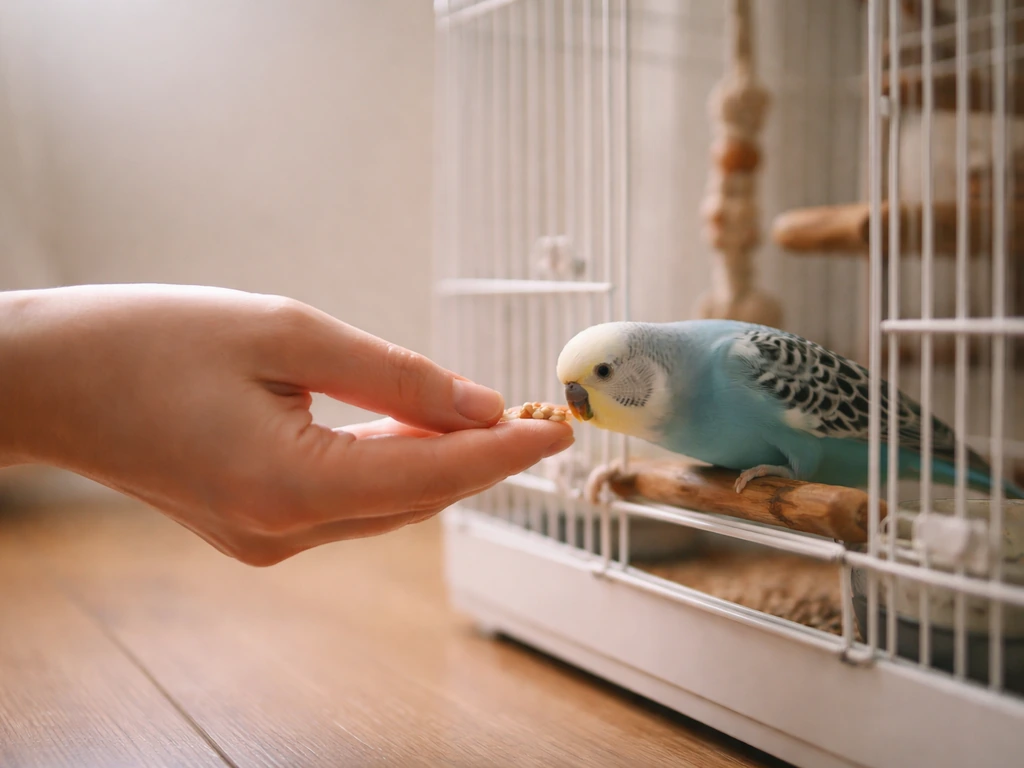
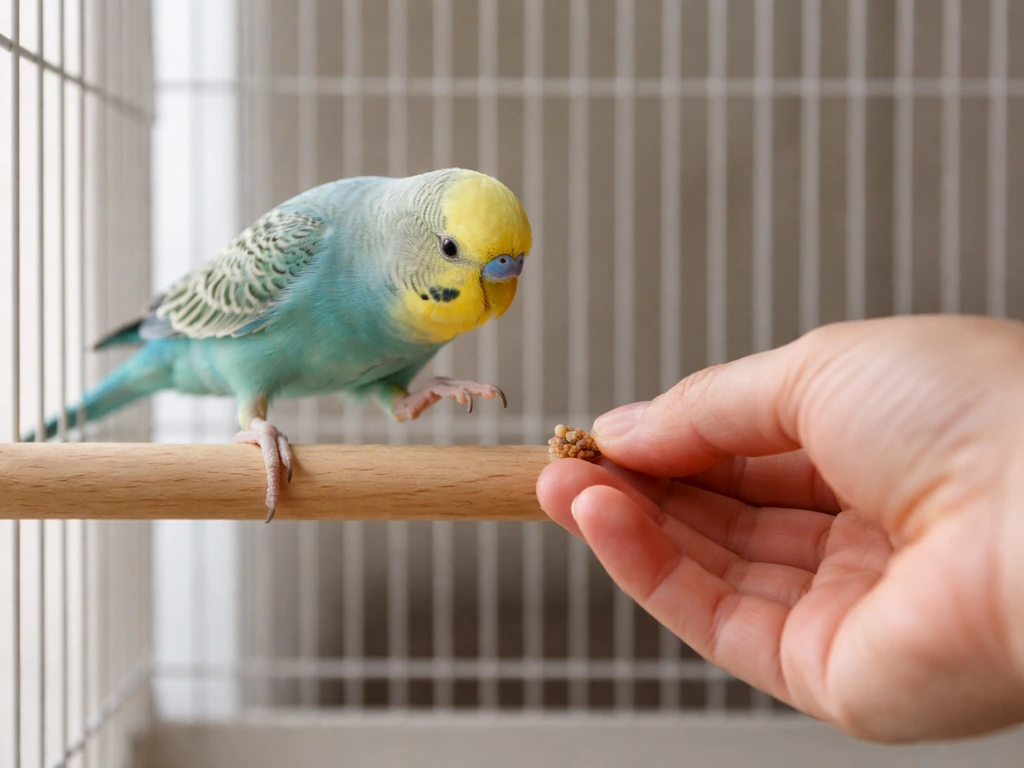
Treats and positive association
Find out what your bird loves. Most budgies and cockatiels go wild for millet. Parrots often have strong preferences for specific fruits, nuts, or seeds. The key is using something the bird doesn't get in its regular diet, so it stays valuable as a training reward. Offer treats from your fingers through the cage bars first, then inside the cage, then from your palm. The bird should be choosing to come to you, not being pushed toward you.
Step-up foundations
Once the bird is comfortable taking treats from your hand inside the cage, you can start working toward step-up. Position your hand or a short perch/dowel at the level of the bird's lower abdomen, just below the chest. Say 'step up' in a calm, consistent voice and wait. If the bird steps on, reward immediately. If it doesn't, don't push the hand into the bird. Just hold still and wait, then try again in the next session. Some birds do better starting with a perch or dowel before graduating to a bare hand, and that's a perfectly valid progression.
First training wins: target training and session structure
Once the bird is stepping up voluntarily and taking treats calmly, you're ready to introduce actual training. Target training is the best first skill for almost every bird because it's low-pressure, easy to reward clearly, and builds a communication bridge that makes every other skill easier to teach later.
How target training works
Target training teaches the bird to touch a specific object (usually a chopstick, a pen cap, or a commercial target stick) with its beak to earn a reward. You present the target, the bird investigates and touches it, you mark that moment with either a clicker click or a consistent word like 'yes,' and immediately deliver a treat. The click or marker word is what tells the bird exactly which action earned the reward. It's a fast, clean communication tool that removes ambiguity. Pick a target the bird won't encounter randomly in its cage or environment so it stays meaningful only in training sessions.
Session structure that actually works
- Keep sessions short, especially at the start. Most birds, including cockatiels and budgies, do best with 5 to 10 minute sessions. Even for larger parrots, 15 minutes is a good ceiling for early training.
- Train when the bird is alert and active, not right after eating or when it's sleepy
- End every session on a success, even if that means going back to something easy
- Do 2 to 3 short sessions per day rather than one long one
- Stop if the bird shows any stress signals, yawns repeatedly, or starts turning away
Progression from here
Once target training is solid, you can use the same marker-and-reward system to teach the bird to come to a specific perch on cue (the foundation of recall), to step onto a scale for weight monitoring, to accept nail files or towel contact for vet visits, and to accept handling of the wings and feet. Every one of these skills builds directly on the trust and communication you established in those first sessions. The bird is learning that interacting with you is safe and rewarding, and that's the foundation everything else rests on.
Safety, welfare, and the law (especially if you're dealing with a wild bird)
This section is non-negotiable reading if you've found a wild bird and are trying to figure out what to do with it.
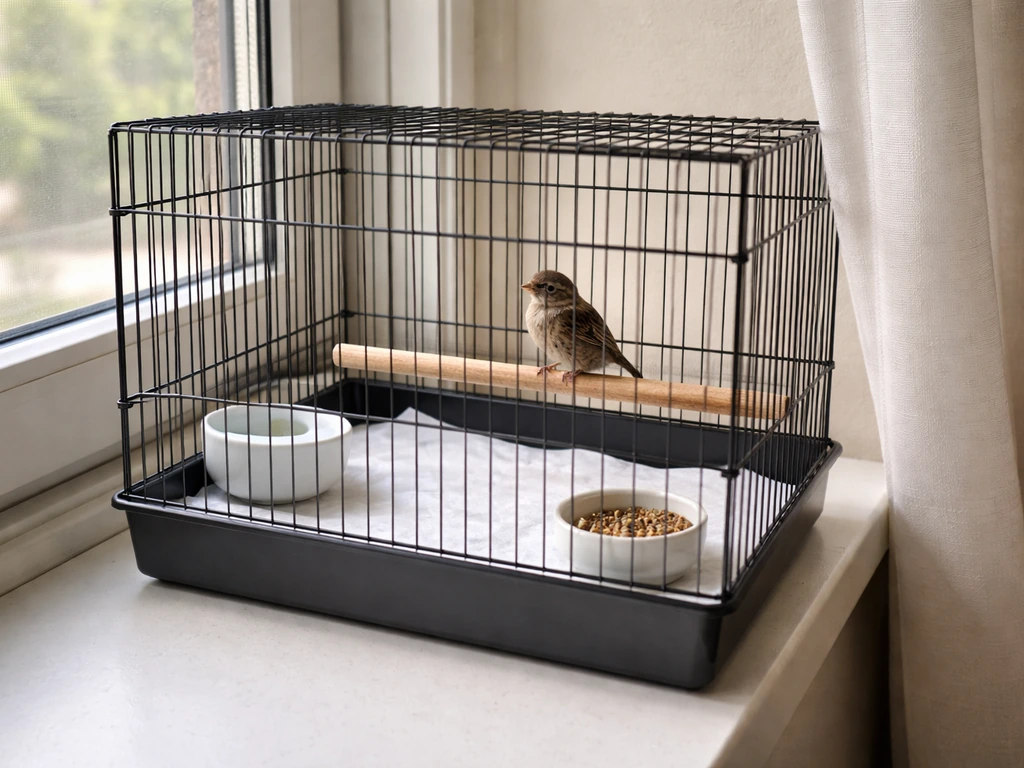
If you found an injured or sick wild bird
Your job is stabilization and handoff, not rehabilitation. Place the bird in a ventilated box or crate lined with a soft cloth, cover it lightly with another cloth to reduce visual stress, and put it somewhere warm, dark, and quiet away from pets and household activity. Do not feed it. Human food is inappropriate for wild birds and can cause serious harm, and even 'correct' foods fed improperly can be dangerous for an animal that's already stressed or injured. Contact a licensed wildlife rehabilitator immediately. Washington Department of Fish & Wildlife also explains that injured or sick wildlife needing treatment must be handled under licensed rehabilitation rules and the applicable guidelines and regulations licensed wildlife rehabilitator immediately. Your state wildlife agency can direct you to one.
It's also worth knowing that in the U.S., keeping a migratory wild bird in your possession without the correct state and federal permits is illegal, even if your intention is to help it. This applies to most songbirds, raptors, waterfowl, and many other species. If a bird seems grounded or injured, that alone is not necessarily a sign it needs intervention, baby fledglings in particular are often on the ground normally as part of their development and should be left alone unless they are featherless, have closed eyes, or are clearly injured.
Household safety for pet birds
- Teflon and other PTFE-coated cookware: fumes from overheated non-stick surfaces can kill a bird within minutes. Use stainless steel or cast iron in bird households.
- Scented candles, air fresheners, incense, and aerosols: all are respiratory hazards
- Open toilet lids, deep water bowls, and uncovered pots of water: drowning risk
- Ceiling fans: always off during any out-of-cage time
- Other pets: cats and dogs can cause injury or fatal stress even without direct contact
- Lead and zinc: found in old paint, some jewelry, cage hardware, and coins. Birds chew everything, so check materials.
Bite risk and safe handling

Even small birds like budgies can deliver a surprising pinch. Larger parrots can cause serious injury. Never punish a bird for biting. A bite is a signal that the bird's warning communications were missed or ignored. Back up in your training progression, figure out what triggered it, and slow down. If you're being bitten consistently during basic handling, that's information, not bad luck.
When things don't go to plan: troubleshooting early problems
| Problem | Likely cause | What to do |
|---|---|---|
| Bird refuses to step up | Not enough trust established yet, or hand position is off | Go back to treat-from-hand stage. Position hand at the bird's lower abdomen, not chest-height. Try using a perch/dowel before bare hand. |
| Bird bites every time you approach | Fear response, previous bad handling experience, or territorial cage behavior | Stop approaching the bird in the cage. Work on presence and treat-dropping through bars only. Move hand inside only when bird is calm. |
| Bird only sits on cage bars and won't move to perches | Stress, unfamiliar environment, or perch sizing/texture issue | Check perch diameter and texture for species. Make sure perches are stable. Give the bird more time to acclimate before training. |
| Screaming every time you leave the room | Separation anxiety, boredom, or learned response from inadvertent reinforcement | Do not return to the room while screaming is happening. Return only during quiet moments. Increase enrichment and foraging activities. |
| Bird is fine in the cage but panics when out | Out-of-cage space feels overwhelming or unsafe | Use a smaller, low-stimulus space for first out-of-cage sessions. Keep sessions short (5 minutes to start). Don't chase or corner. |
| Feather plucking or self-injury | Stress, inadequate routine, medical issue, or boredom | Consult an avian vet immediately to rule out medical causes. Review lighting schedule, diet, and enrichment. |
When to pause and get professional help
If a bird becomes suddenly aggressive or destructive in a way that seems out of character, that's a veterinary visit, not a training problem. Pain, hormonal changes, and illness all change bird behavior, and trying to train through a medical issue will make things worse. Similarly, if you've been working consistently for several weeks and the bird still can't tolerate your presence near the cage without showing extreme fear responses, a qualified avian behavior consultant or your avian vet can do a proper assessment and give you a more targeted plan. There's no shame in getting support early. It saves time and protects the bird's welfare.
For wild birds, the threshold for calling a rehabilitator is much lower. If you want a smoother routine, keep reading about how to be a good bird owner, especially around when to bring in help. If there's any doubt about whether the bird needs help, make the call first and let the professional assess. Do not attempt trapping, feeding, or extended home care on your own.
Species notes: how this looks different by bird
The core principles above apply across the board, but the timeline and some of the specifics shift depending on what you're working with.
| Species/type | Trust-building timeline | Key beginner notes |
|---|---|---|
| Budgerigar (budgie) | Days to a few weeks for a young, healthy bird | Often easier to start with millet spray held in hand. Very responsive to quiet voices and slow movements. Smaller bites but can still startle easily. |
| Cockatiel | 1 to 3 weeks typically for a tame bird, longer for fearful ones | Very food-motivated. Crest position is a key stress indicator (flat and back means fear or aggression). Generally forgiving beginners. |
| Conure | 1 to 4 weeks depending on history | Vocal, energetic, and nippy during early handling. Short sessions essential. Very treat-motivated. May step up easily but still bite during handling. |
| African grey / Amazon / Cockatoo | Weeks to months for untamed or rehomed birds | Highly intelligent and sensitive. Trauma history can create deep fear responses. Strongly recommend avian behavior consultation for fearful large parrots. |
| Canary / Finch (hands-off species) | Not applicable for handling training | These birds are not typically trained for handling. Enrichment, observation, and a well-set-up environment are the goals. Forcing handling causes significant stress. |
| Wild bird (any species) | Not applicable, stabilize and transfer only | Do not attempt taming or bonding. Contain safely, keep dark and quiet, contact a licensed rehabilitator immediately. |
Your starting plan for today
You don't need to do everything at once. Here's what a realistic first week actually looks like for a new or fearful pet bird. For example, if you're wondering how to get a kiwi bird, you'll still start with calming, trust-building, and careful observation before you attempt any handling or training. You can also use persuasive, science-based talking points and a trial period to help convince your parents to get you a bird.
- Day 1 to 2: Environment check. Confirm cage placement, remove hazards, set up a covered area, establish a light/dark schedule. Just sit near the cage and let the bird observe you. No training.
- Day 3 to 4: Presence and hand introduction. Sit near the cage daily. Place your hand on the outside of the cage without reaching in. Observe stress signals. Offer a high-value treat through the bars if the bird approaches.
- Day 5 to 7: Hand inside the cage. Only if the bird is calm. Place your hand inside, resting still near a perch. Let the bird investigate. Offer treats from your palm if the bird approaches.
- Week 2: Step-up practice. Begin positioning your hand for step-up only once the bird takes treats calmly from your hand inside the cage. Keep sessions under 10 minutes. Use a dowel/perch first if needed.
- Week 3 onwards: Introduce target training. Add a marker (clicker or word), introduce the target stick, and begin shaping the touch behavior. Progress to out-of-cage sessions only when step-up is reliable and calm.
Every bird moves at its own pace. The timeline above is a guide, not a deadline. A bird that's had a rough start may need double or triple the time at each stage, and that's completely fine. The relationship you build by going slowly at the beginning is the one that makes every future step easier. Start there, and you're already doing it right.
FAQ
Do I need a clicker, or can I use a word as the “marker”? How do I use it correctly?
Pick one single marker for all sessions, either a clicker or a specific word, and use it the same way every time. Mark only after the bird touches the target or offers the step you want, then deliver the treat immediately, within a second or two. If you mark and then wait, the bird learns the wrong behavior.
How do I know when my “start a bird” attempts are pushing too far, and what should I do instead?
Stop the session for the day if you see escalating stress, like rapid retreating, repeated biting attempts, frantic pacing, tail bobbing with tense posture, or self-injury. You can lower the difficulty by switching back to the previous step (for example, hand near the cage instead of inside) and restart with shorter sessions the next day.
What’s the best way to behave around the cage so I don’t accidentally scare my bird?
Many birds do not want direct eye contact during early bonding. Use angled body position, keep your face slightly off to the side, and blink slowly. If the bird shows stress when you talk, switch to softer volume and longer pauses, because some birds interpret loud or constant speech as a threat.
How can I tell if my treats are actually motivating enough, and what if they stop working?
Treat preferences can shift, especially during molting, and “favorite” items lose value if offered too often. Refresh your reward plan by rotating two to four low-frequency treats your bird typically does not get, and start each session by offering a very small amount to confirm the bird is still motivated.
How long should training sessions be when I’m starting a bird, and how often should I practice?
Aim for brief, frequent sessions rather than long ones, especially in the first week. A common mistake is repeating the cue many times when the bird is uncertain, which can teach avoidance. Instead, end on a small success (like a touch to the target) and resume later.
What should I do if my bird refuses step-up or seems fearful when my hand goes near its body?
For step-up, position your hand or dowel at the bird’s lower abdomen, just below the chest, and keep it still. If the bird leans away or flinches, don’t raise the hand higher or “reach” for the feet, go back to a lower difficulty step (treats from the fingers, then inside the cage) and retry when the bird is calm.
Do I have to handle the bird early to start training, or can I train without touching?
Yes, you can train without touching the bird, start with the bird choosing the interaction (treats from your hand, then target touches), and only progress to handling skills after the bird can do those steps calmly. If you need nail file, towel, or wing and foot contact, you still teach it as separate cues with rewards, so the bird learns it is safe.
If I get bitten while starting a bird, what’s the safest way to respond and prevent it from becoming a pattern?
When a bite happens, the immediate fix is to stop the current attempt and reduce the trigger you introduced (distance, angle, speed, or difficulty). Longer-term, adjust the environment for predictability and revisit earlier steps where the bird succeeded. Avoid repeated attempts to “prove” you can handle it, because that often strengthens the association between your approach and discomfort.
I found a wild bird, can I feed or hydrate it while I wait for help?
For wild birds, do not provide food or water unless a licensed rehabilitator instructs you to, because species-specific diet and hydration needs are critical. Also do not offer long home care, and keep the bird in a warm, dark, quiet ventilated container away from pets and household activity until help arrives.
How do I know whether a baby bird on the ground needs a rehabilitator right away?
Baby fledglings are often on the ground naturally, and the decision to contact help is different than for fully dependent nestlings. Call a wildlife rehabilitator if the bird is featherless or has closed eyes, shows signs of injury or bleeding, appears unable to stand or fly, or if you are unsure of the species and age.
What if I’m consistent for weeks, but my bird still cannot tolerate me near the cage?
If your bird has intense fear responses that do not improve over several weeks despite consistent routines, the next step is an avian vet or a bird behavior professional. Illness, pain, hormonal issues, or chronic stress can mimic “training resistance,” and the safest plan includes a medical screen before changing expectations.
Next Articles
How to Be a Good Bird Owner: Practical Daily Steps
Daily routines for how to be a good bird owner: housing, safe feeding, health checks, trust training, and behavior fixes
How to Foster a Bird: Humane Steps for Care and Bonding
Humane steps for fostering birds: assess wild vs pet, provide safe care, build trust, and handle rehab and setbacks.

How to Convince Your Parents to Get You a Bird
Turn your request into a welfare-first bird plan: handle parent concerns, costs, care setup, health, and readiness steps