You can take your bird outside safely by using a well-fitted harness or secure carrier, choosing a calm weather window between 65°F and 80°F (18°C to 27°C), acclimating your bird to outdoor sights and sounds before the first real outing, and keeping every session short and supervised. The key is building up gradually so the experience feels normal rather than overwhelming, because a panicked bird outdoors is a bird at serious risk.
How to Take Your Bird Outside Safely Step by Step

Maya Harris
17 May 2026
Before anything else: know your bird, your goal, and the basics of safety
The first question to answer honestly is: what kind of bird are you taking outside, and why? A confident adult cockatiel you've had for three years is a very different situation from a nervous rescue lovebird, a large flighted macaw, or a wild bird you're rehabilitating. Your goal matters too. Are you trying to give an indoor pet some fresh air and enrichment? Building outdoor training sessions? Transporting a rehab patient for release prep? Each of those scenarios has different gear, timing, and risk management needs.
Before the first outing, run through this safety check without skipping steps. A bird that has never been seen by an avian vet should get a wellness exam first. The CDC recommends routine veterinary care for pet birds to prevent disease spread, and it matters more outdoors where your bird will encounter new pathogens, insects, and environmental stressors. Find an avian-experienced vet in your area before you need one in an emergency. It's also worth checking the current high-pathogenic avian influenza (HPAI) status in your region, because the AAV specifically advises avoiding any contact between your pet bird and wild birds during an active outbreak.
One more thing to clarify before you go anywhere: if your bird is a wild or rehab patient, you almost certainly need permits. In the US, handling migratory bird species requires a Federal Migratory Bird Rehabilitation Permit under 50 CFR Part 10, and that federal permit is only valid when you're also compliant with state requirements, which can be more restrictive. Many states, like Washington, require keeping rehab birds in enclosures completely separate from domestic or exotic animals to prevent disease transmission. If you're unsure whether your bird is legally yours to handle or take outside, check with your state wildlife agency first.
Gear and transport setup
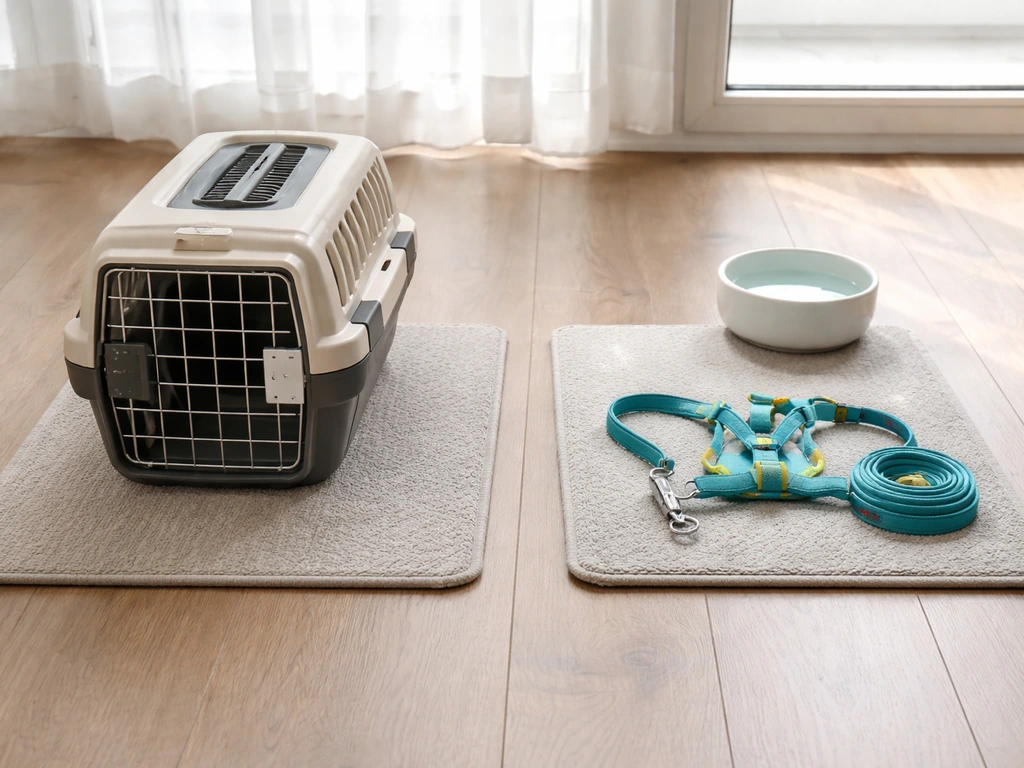
Getting the right gear in place before your first outdoor trip makes everything calmer and safer. There are three main options for taking a bird outside: a travel carrier, a harness, or a handheld perch setup. This guidance also helps if you need to know how to take a bird on a plane. Most beginners should start with a carrier and work toward a harness only once the bird is already comfortable with outdoor environments.
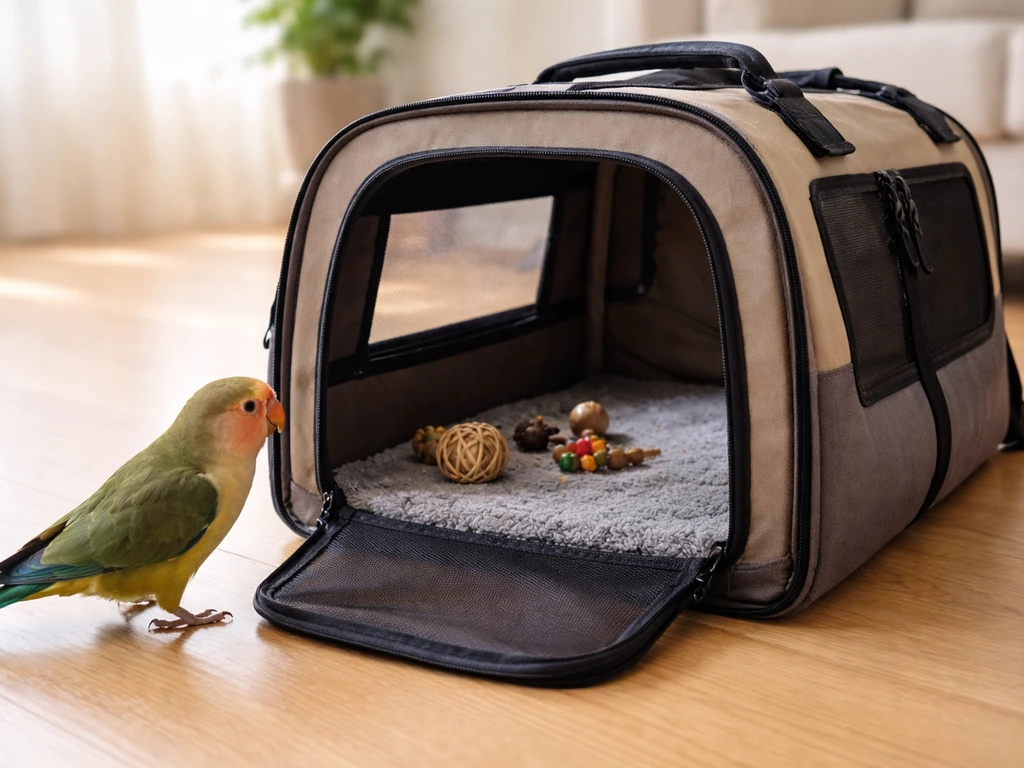
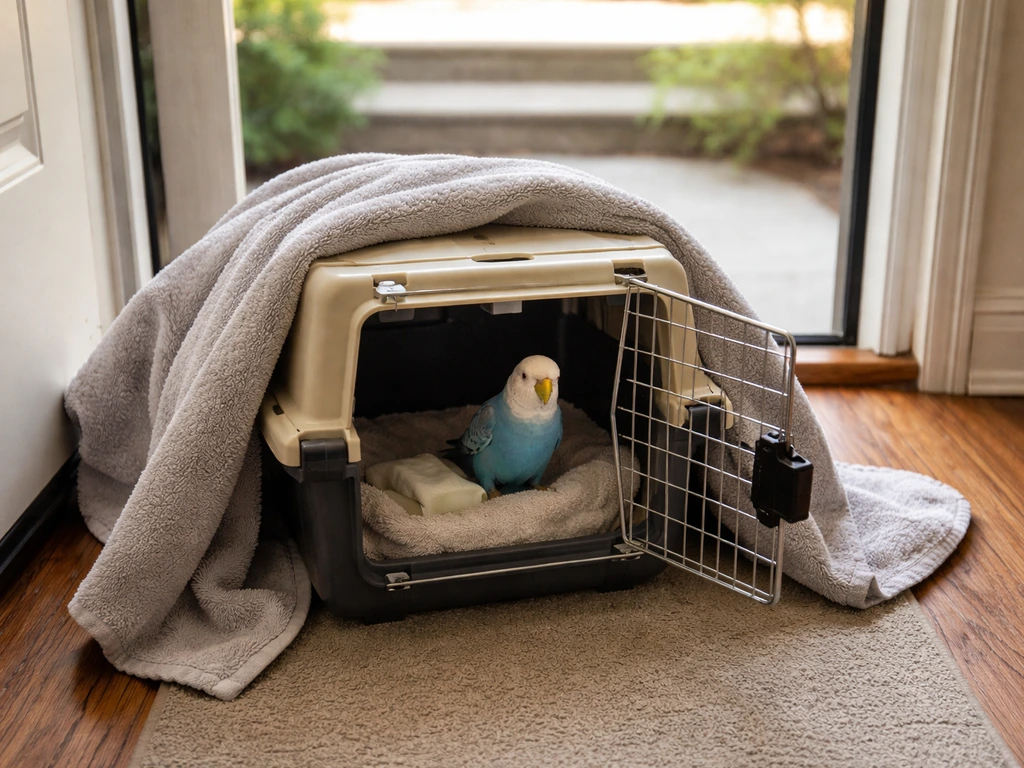
Carriers
A good travel carrier should offer strong ventilation, a secure latch, and enough room that your bird isn't crammed against the walls. HARI recommends covering at least half the carrier with a light cloth while still keeping ventilation clear. This creates a sheltered visual barrier that reduces stress without trapping heat. The RSPCA and The Raptor Trust both recommend using a pale-colored towel draped partly over the carrier for the same reason: it blocks visual stimuli that can trigger panic while still letting air circulate. For small pet birds, a dedicated travel cage with a clip-on food and water cup works well. For rehab birds or larger species, The Raptor Trust recommends a cardboard box large enough that the bird isn't tightly confined, with ventilation holes punched into the sides.
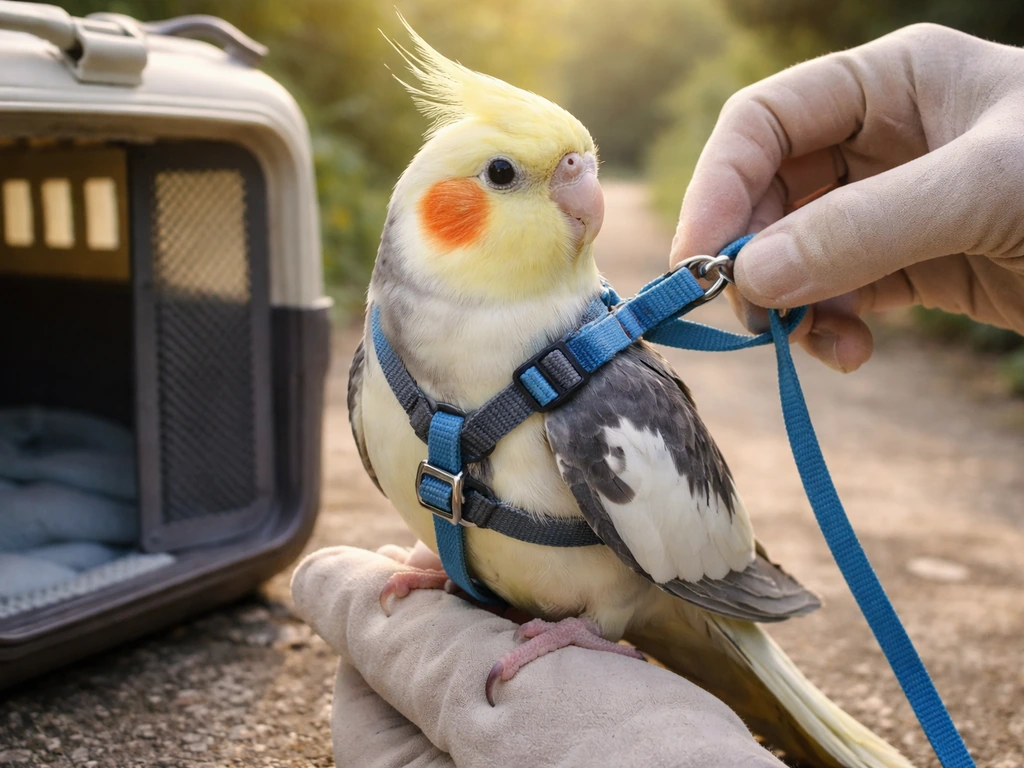
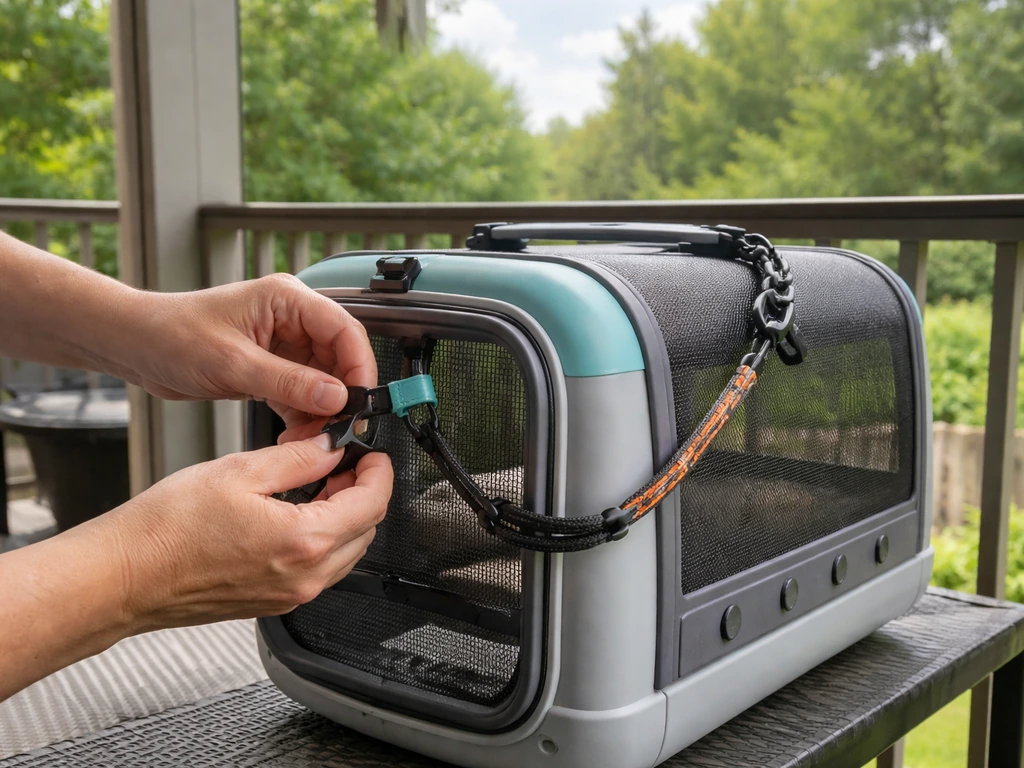
Harnesses
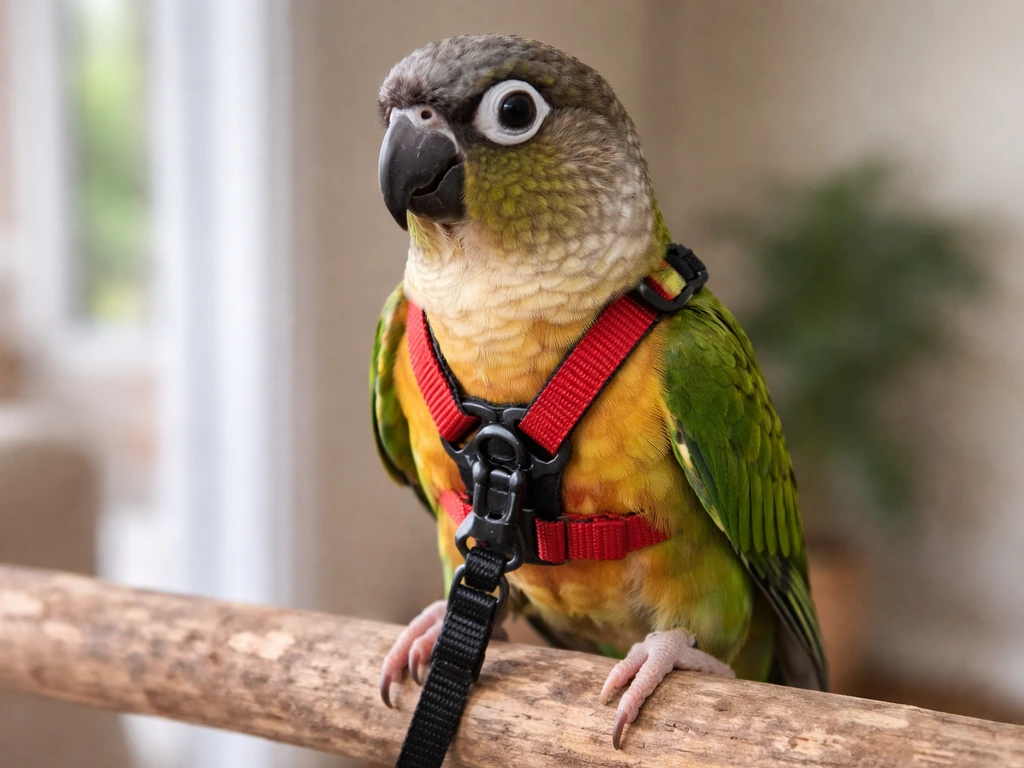
A harness gives your bird more physical freedom and can enrich the outing significantly. The Aviator is the most commonly recommended adjustable harness for parrots, and sizing matters a lot. A harness that's too loose is a disaster waiting to happen. That said, even a perfectly fitted harness is not escape-proof. The AAV is direct about this: no harness is escape-proof, so you should never treat it as a substitute for active supervision. Keep one hand close and stay alert. Harnesses are not appropriate for small birds like budgies, finches, or canaries, and should only be introduced to birds that have already been desensitized to handling and are comfortable stepping up reliably.
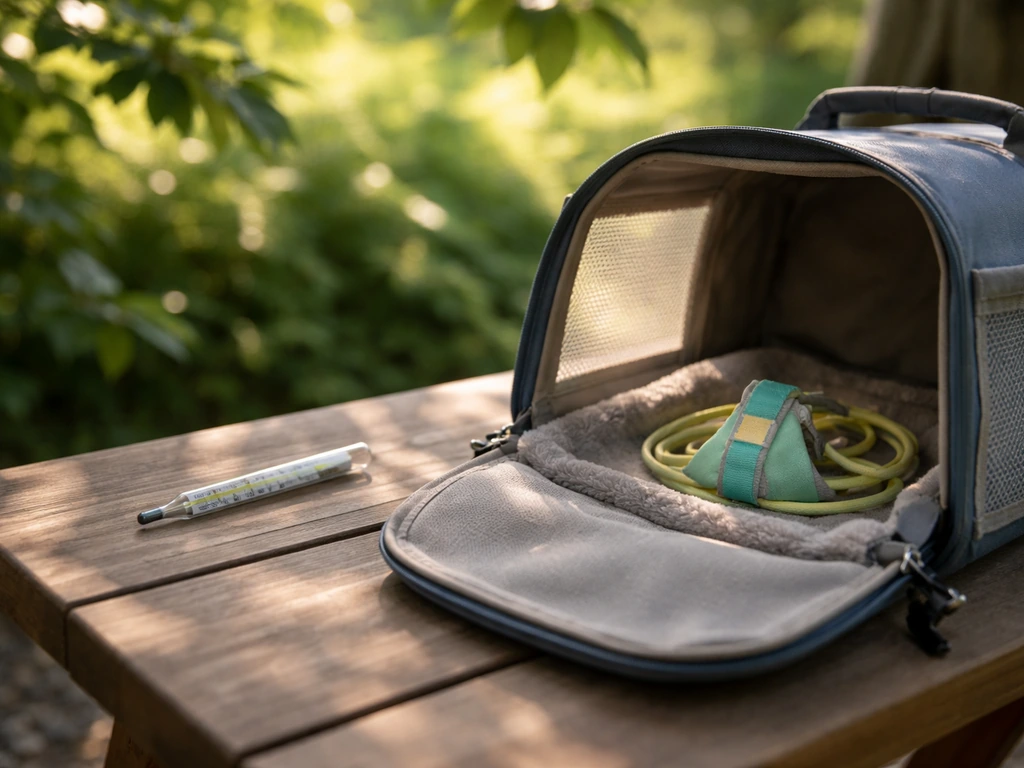
What to bring
- Carrier or harness (fitted and tested at home first)
- Light-colored towel to drape over the carrier
- Small water supply and a wet cloth for cooling if needed
- A few favorite treats for reinforcement
- Your phone with your avian vet's number saved
- A spare towel or cloth for emergency containment
- Any medication your bird is currently taking
Picking the right time and place
Temperature is the single most important environmental variable. Most pet birds are comfortable between 65°F and 80°F (18°C to 27°C). Above 80°F, watch carefully for early heat stress signs. Above 90°F (32°C), you are in heatstroke territory and should not have your bird outside at all. Mornings in late spring or early fall are usually ideal: cooler air, lower direct sun intensity, and quieter surroundings that are less likely to startle a bird on its first outing.
Wind is also a factor. A light breeze is fine, but direct, sustained airflow blowing into a carrier or onto a harnessed bird is stressful because the bird can't escape it. Check for gusts before heading out. Rain and thunderstorms are obvious no-go conditions, but also be cautious of sudden temperature drops or overcast-then-sudden-sun transitions that can disorient birds.
Choose a location that is quiet, fenced or enclosed if possible, away from heavy traffic, and free from nearby wild bird congregations. A private garden or backyard is ideal for early sessions. Avoid public parks with large waterfowl populations because of disease transmission risk. Scan for predator hazards: hawks and other raptors are a genuine threat to small and medium-sized pet birds outdoors. In suburban and rural areas, be aware of free-roaming cats and dogs. Also check the area for toxic plants (azalea, oleander, yew, and many common garden plants are toxic to birds) and any recent pesticide, herbicide, or fertilizer treatment on grass or plants.
Acclimating your bird gradually before the real outing
Skipping the acclimation phase is the most common mistake people make, and it's often why a first outdoor trip ends in panic. Birds need to get used to the carrier, the sounds they'll hear outside, and the sensation of being in a different environment. This process takes days to weeks depending on your bird's individual temperament, and rushing it causes setbacks that are much slower to fix.
Step 1: Make the carrier a comfortable space
Leave the carrier open in your bird's main space for several days with treats or favorite toys placed inside. Let the bird explore at its own pace. Once the bird goes in and out voluntarily, begin closing the door briefly, then gradually extending the time. The RSPCA recommends building comfort with the carrier door and transport setup incrementally rather than forcing entry. This is the phase most people skip, and it's genuinely the most important one.
Step 2: Introduce outdoor sounds from indoors
Play recordings of outdoor sounds (wind, distant traffic, birds, children) at low volume near your bird's space while you're doing normal activities together. Gradually increase the volume over several sessions. You can also open a screened window and let the bird observe and hear the outside world from a safe distance. This reduces the shock factor of the real outdoor environment enormously.
Step 3: Short carrier trips to just outside the door
Once the bird is calm in its carrier, carry it just outside your door for two to three minutes, then bring it back in. No drama, no fuss. Repeat this several times over a few days. Extend the duration slowly. Watch your bird's body language throughout. A calm bird shows relaxed feathers, normal posture, and normal vocalizations. A stressed bird will puff up, freeze, pant, or try to escape.
Your bird's first proper outdoor session, step by step
Once your bird has been through the acclimation steps above and is showing calm behavior in its carrier near the door, you're ready for the first real session. Keep this first trip short, 10 to 15 minutes maximum, and stay in a familiar area close to home.
- Do a quick pre-exit check: harness fit or carrier latch secured, towel draped, treats in your pocket, phone with vet number accessible.
- Move calmly and quietly as you carry the bird outside. Avoid sudden movements, loud voices, or running near the carrier.
- Choose a spot with shade available and position the carrier so your bird can see you but isn't exposed to direct sun or strong wind.
- Sit nearby and let the bird observe and listen. Do not rush to open the carrier or remove the bird from its harness on the first session.
- If your bird is harnessed and steps up onto your hand willingly, allow brief perching outside the carrier. Do not push for more than the bird offers.
- Talk to your bird calmly and offer a treat if it accepts. Keep your voice low and your movements slow.
- At any sign of stress (see troubleshooting section below), calmly return indoors immediately. Do not wait to see if the bird calms down outdoors.
- When the session ends, re-enter the home calmly and return the bird to its main enclosure with a positive reward.
For harnessed birds: practice the step-up cue at home until it's rock solid before you rely on it outdoors. If your bird won't step up reliably inside, do not take it outside on a harness. And remember, even a bird that steps up perfectly indoors can freeze or refuse when startled outside. Always have a backup plan, which means keeping a carrier within reach.
Managing risks while you're out there
Escape prevention
Escape is the most serious risk for a pet bird outdoors. Even clipped birds can get enough lift in a strong gust to clear a fence. Even harnessed birds can slip a poorly fitted harness if they panic and thrash. Keep a hand or a steadying finger near a harnessed bird at all times outdoors. Never attach a leash to a leg band or a ring collar as a backup, as these can cause leg or neck injuries during a panic flight. If you're using a carrier, check the latch each time before opening in an outdoor setting.
Predator awareness
You don't always see a raptor until it's too late. Hawks, falcons, and owls can come in fast and low. If you're outdoors with a small or medium bird, stay in an area with overhead cover, like a porch, pergola, or tree canopy. Be alert to your bird's behavior: birds often notice aerial predators before you do. A sudden freeze, a sharp alarm call, or frantic wing-flapping can signal a threat before you've spotted it.
Disease and hygiene
Keep your bird away from areas where wild birds congregate, including birdbaths, feeders, and ponds. Avoid letting your bird walk on the ground where wild birds have been. Wash your hands before and after handling your bird outdoors. Check for mites or other parasites after each outdoor session. The AAV advises staying informed about HPAI activity in your area and avoiding wild bird contact entirely during an outbreak.
Legal and ethical considerations for rehab birds
If you're a permitted rehabilitator taking a wild bird outside for flight conditioning or pre-release assessment, keep it separated from any domestic or exotic animals at all times, as required in most states. Never release a bird with an undiagnosed illness. The World Parrot Trust warns that releasing companion birds with unknown disease status can endanger wild populations. Any bird intended for release should be properly screened and quarantined before going outside in a setting where it could contact wild animals.
Troubleshooting common problems
| Problem | What it looks like | What to do |
|---|---|---|
| Fear/freezing | Bird goes completely still, feathers flat, eyes wide, won't move | Stay calm, speak softly, return indoors immediately, shorten next session |
| Refusal to step up | Bird backs away, won't put foot on hand, may lunge | Do not force it, use carrier instead, practice step-up inside before next outing |
| Overheating | Open beak, panting, wings held away from body | Move to shade immediately, offer water, head indoors, call vet if symptoms persist |
| Biting/lunging | Rapid head movements, feathers slicked down, biting at anything nearby | Back off, reduce stimulation, don't punish, go back inside and reassess |
| Silence/withdrawal | Bird goes very quiet, puffs up, stops engaging | Often early stress, go indoors, monitor closely as birds can mask illness |
| Unwanted vocalizations | Screaming, alarm calling, persistent distress sounds | Remove from stimulus causing alarm, do not reward by rushing over anxiously |
| Escaped harness | Bird slips out during panic flight | Stay calm, track the bird visually, do not chase, use a familiar call or treat sound to encourage return to your hand |
One important note on silence and withdrawal: Merck notes that birds are skilled at masking clinical signs until they are quite ill, which means a bird that just goes quiet and puffs up after an outdoor session may be more than just tired. If unusual behavior persists more than an hour after returning indoors, or if you notice labored breathing, discharge, or lack of interest in food, contact your avian vet rather than waiting to see if it passes.
If your bird is showing signs of heatstroke (panting hard, wings fully extended, unresponsive to you), move it to a cool, shaded area immediately. You can gently mist the feet and legs with cool, not cold, water. Get to an avian vet as fast as possible. An ill bird should be kept at around 80°F to 90°F (27°C to 32°C) during transport if it's already sick or in shock, according to Merck.
After the outing: building a consistent, positive routine
The first outdoor session is just the beginning. Consistency is what turns a stressful novelty into an enriching routine your bird actually looks forward to. Aim for regular, short sessions rather than occasional long ones. A 10-minute morning outing three times a week does more for your bird's confidence and bonding than a single 90-minute trip once a month.
After each outing, note what worked and what didn't. Did your bird seem energized or exhausted? Did a specific sound or movement trigger stress? Use that information to adjust the next session. Build on calm successes by gradually extending duration, introducing new locations at the same low intensity, or practicing specific training behaviors like step-up or target touch in the outdoor setting once the bird is fully comfortable.
Training goals will vary by species and individual temperament. Parrots and corvids often thrive with outdoor clicker training sessions once they're settled. Softbills, finches, and canaries do best simply observing from a safe, covered carrier without being handled. Flight conditioning for rehab raptors or songbirds follows a completely different structured protocol that goes beyond routine pet outings.
If you're planning to take outdoor adventures further, such as hiking, road trips, or air travel with your bird, those scenarios involve additional planning and gear considerations. Leading a bird on a harness through a busy environment is also a skill set worth developing separately. If you want to learn how to lead a bird safely, start with step-by-step acclimation and a plan for supervision and escape prevention leading a bird. The bonding and baseline outdoor comfort you build through these early short sessions is the foundation for all of it.
Know when to get help. If your bird consistently refuses outdoor sessions despite slow acclimation, shows persistent fear or aggression around the carrier, develops physical symptoms after outings, or if you're rehabilitating a wild bird and are unsure about its health or release readiness, an avian veterinarian or permitted wildlife rehabilitator is the right next call. Getting a professional involved early is always less costly than waiting until there's a crisis.
FAQ
Can I let my bird watch outside from a screened window before I take it out for real?
Yes, but only if the bird is already calm and voluntarily exploring its carrier in your usual indoor setup. Start with short “window watch” sessions (a few minutes) while you keep the room temperature comfortable and avoid direct sun hitting one side of the carrier. If your bird shows panic behaviors such as thrashing, repeated attempts to escape, or significant vocal distress, stop and resume acoustic acclimation indoors first.
What should I do if my bird becomes stressed during the first outdoor session?
For first outings, use a simple plan: set a timer for 10 to 15 minutes, keep your bird within arm’s reach, and leave immediately if the bird escalates (freeze, puffing, panting, frantic flapping). Bring the carrier or harness back indoors as soon as you notice “worsening stress,” even if the time limit hasn’t been reached.
Is it okay to let my bird perch on a shoulder or explore outdoors without being in a carrier or harness?
Avoid outdoor “loose time” entirely until you can reliably manage escape risk. Even birds that wear harnesses can slip or get enough lift in gusts to clear barriers, so walk-back and supervision mean keeping the bird contained in a carrier or properly steadied harness position. Also avoid letting the bird interact with any leaves, flowers, or grass directly unless you are sure they have not been treated with chemicals.
How do I decide if it’s too windy to take my bird outside?
Wind can be deceptive, a light breeze can become gusty quickly. If you see flags moving, feel gusts on your face, or notice shifting tree branches, treat it as too windy for a first trip and postpone. Re-check conditions every time you step outside, because gusts near fences and buildings can be worse than what you noticed at the sidewalk.
If my bird seems fine outdoors, when should I worry afterward?
Don’t assume “no reaction” means it is safe. Birds may mask illness, so monitor after you go back indoors for up to an hour, especially for changes like reduced interest in food, unusual quiet, labored breathing, or persistent puffy posture. If symptoms last more than an hour or include breathing problems or discharge, contact an avian vet rather than waiting.
Should I train step-up specifically for the harness before the first outing?
Yes, you can practice step-up and handling cues at home with the exact harness or perch setup you plan to use outdoors, but only after the bird is already stepping up reliably indoors without hesitation. Once outdoors, keep the session short and do not reward fear behaviors, reward calm stepping and steady posture. If your bird refuses step-up inside, do not take it outside on a harness.
What’s the best way to handle temperature swings while we’re outside?
Use a “cooling and warmth plan” instead of just checking temperature once. Bring the ability to move the bird to shade immediately, and avoid direct sun so you do not create a hot spot on one part of the carrier. If the forecast is borderline (near the upper comfort range), shorten sessions and choose morning or early evening so the bird is not exposed to peak light.
How careful do I need to be about germs when I’m outside with my bird?
Make a clear handoff routine: wash hands before and after, and avoid touching your face while you are managing the bird. If you are also around wild birds, feeders, ponds, or animal waste, change clothing or sanitize hands again before handling your bird. The goal is to prevent bringing pathogens from wild bird contact onto your pet bird’s feathers, beak, or feet.
Should I bring food and water, and when during an outing?
Plan for food and water differently depending on containment. If your bird is in a carrier, using a clip-on cup or having water available during short outings can prevent dehydration, but only if the bird is already comfortable with eating or drinking in that setup. For very nervous birds, prioritize calming acclimation over testing feeding behavior outdoors.
Can I start taking my bird to busy places right away to “get it used to it”?
Not for the first outdoor steps. Choose one location that is quiet and predictable, then add new variables only after multiple successful sessions. Public places can add exhaust fumes, unpredictable movement, and more raptors or predators, which can overwhelm a bird that is still learning what the outdoors means.
What should I do first if my bird shows heatstroke symptoms?
If you must move the bird due to heat or stress, transport it promptly to a shaded, stable environment and keep handling minimal. For heatstroke signs, treat it as an emergency: cool the feet and legs with cool water, keep it in shade, and contact an avian vet immediately. During transport, aim for a warm-but-not-overheating environment (around 80°F to 90°F) if the bird is already sick or in shock.
What backup plan should I have if my bird panics or won’t settle outside?
Keep a simple incident checklist: carrier latch checked, bird contained, you have a spare plan for immediate return indoors, and your vet contact ready. If the bird repeatedly panics or refuses after slow acclimation, that is a signal to pause and get an avian vet involved rather than forcing more outings. The “backup plan” should be operational, not theoretical.