You can teach a bird dog to point reliably using reward-based training, a clear progression from scent work to live situations, and a lot of patience. The short version: build hunt drive and scent interest first, shape the pointing position with positive reinforcement, then proof it gradually in the field. Skipping any of those steps is where most people run into trouble. This guide walks you through the whole thing from day one.
How to Train a Bird Dog to Point Step by Step

Maya Harris
14 Apr 2026
First, confirm you have the right dog and the right goal
Not every dog that gets called a 'bird dog' is a pointer. Pointing breeds include German Shorthaired Pointers, English Pointers, Vizslas, Brittanys, Weimaraners, and a handful of others. These dogs carry a genetic predisposition to locate game, freeze, and hold position. That instinct is your foundation. You are not creating it from scratch, you are shaping and reinforcing behavior that is already inside the dog. Flushing breeds like Spaniels and Labradors are wired differently and won't reliably develop a true pointing style no matter how much you drill it, so confirm your breed before investing months of work.
Age matters too. Most professional trainers start introducing bird scent and basic obedience between 8 and 16 weeks, but serious pointing work usually begins around 6 to 8 months when the dog has enough focus to hold a position. If your dog is still a pup, use this time for socialization, basic recall, and introducing bird scent gently. If your dog is over a year and has never been exposed to birds, don't panic. It takes more patience, but the instinct is usually still accessible.
The humane mindset matters here as much as the mechanics. Peer-reviewed research consistently shows that reward-based training produces better long-term results and healthier working dogs than methods relying on punishment or intimidation. AVSAB, in its 2021 Position Statement on Humane Dog Training, states that evidence indicates aversive methods carry significant welfare risks, and that reward-based methods are safer and more effective reward-based training produces better long-term results and healthier working dogs. The BSAVA has formally noted that aversive training creates fear and anxiety responses that undermine reliability. A dog that points because it wants to, because the behavior has been reinforced and feels rewarding, will hold longer, work harder, and be easier to handle than a dog that freezes because it's scared of what happens if it moves. Keep that principle front and center throughout this process.
Get your equipment and environment sorted before training starts
You don't need a truck full of gear to start, but a few specific items will make a meaningful difference. Here's what to have ready before your first session:
- A 20- to 30-foot check cord (also called a long line): lightweight nylon or biothane, nothing too heavy for a young dog
- A well-fitted flat collar or harness: avoid anything that corrects on pressure, at least for early work
- Scent sources: fresh bird wings (quail, pheasant, or chukar work well), frozen and thawed, sealed in a bag between sessions
- A bird cage or bird bag: if you are working with planted live birds, you need a safe way to contain them
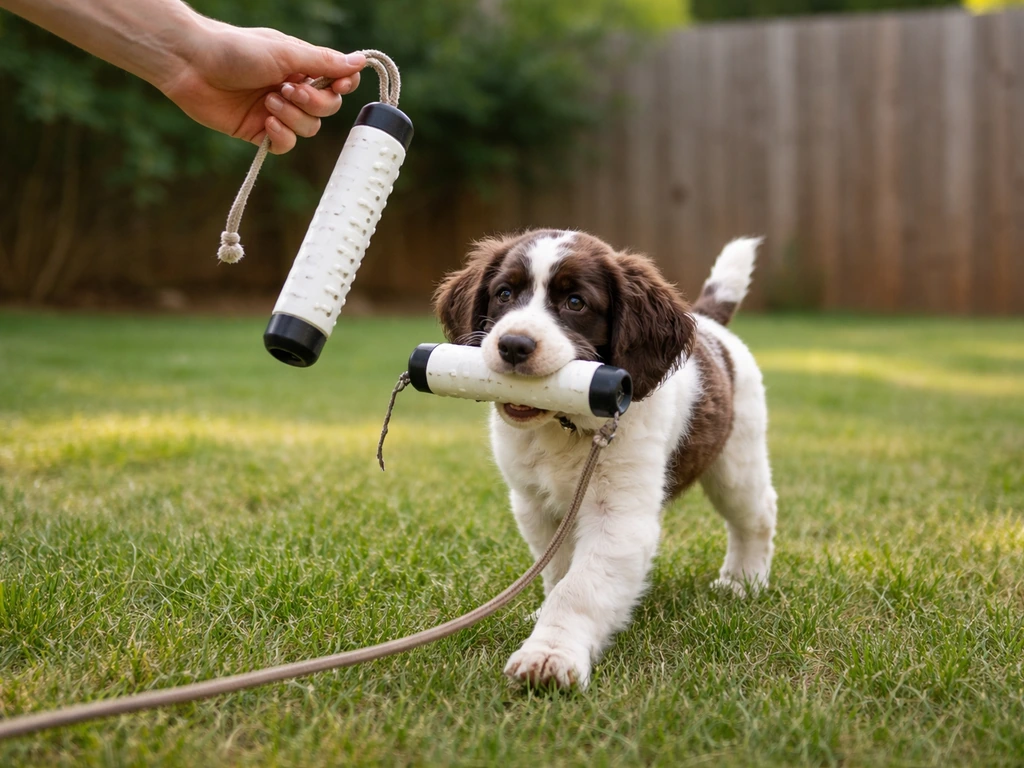
- High-value treats: small, soft, and fast to deliver (freeze-dried liver or chicken works well in the field)
- A clicker or marker word: 'yes' said the same way every time is perfectly fine if you don't have a clicker
For environment, start small. A backyard, a quiet field, or a low-distraction grassy area is ideal for the first several weeks. You want the dog to find the scent source reliably before you add the complexity of cover, wind, other dogs, or guns. Save the big open field for later. The training environment should make success easy at each stage, and you gradually raise the difficulty as the behavior becomes solid.
Safety note: if you are using live birds, check your local regulations. Some states require permits for holding game birds like quail or chukar. Pigeons are a legal and practical alternative for early scent and pointing work, widely available and easy to manage. If live birds are not an option yet, bird wings and commercially available bird scent sprays are good starting tools. They won't fully replicate the excitement of a live bird, but they build the scent association you need.
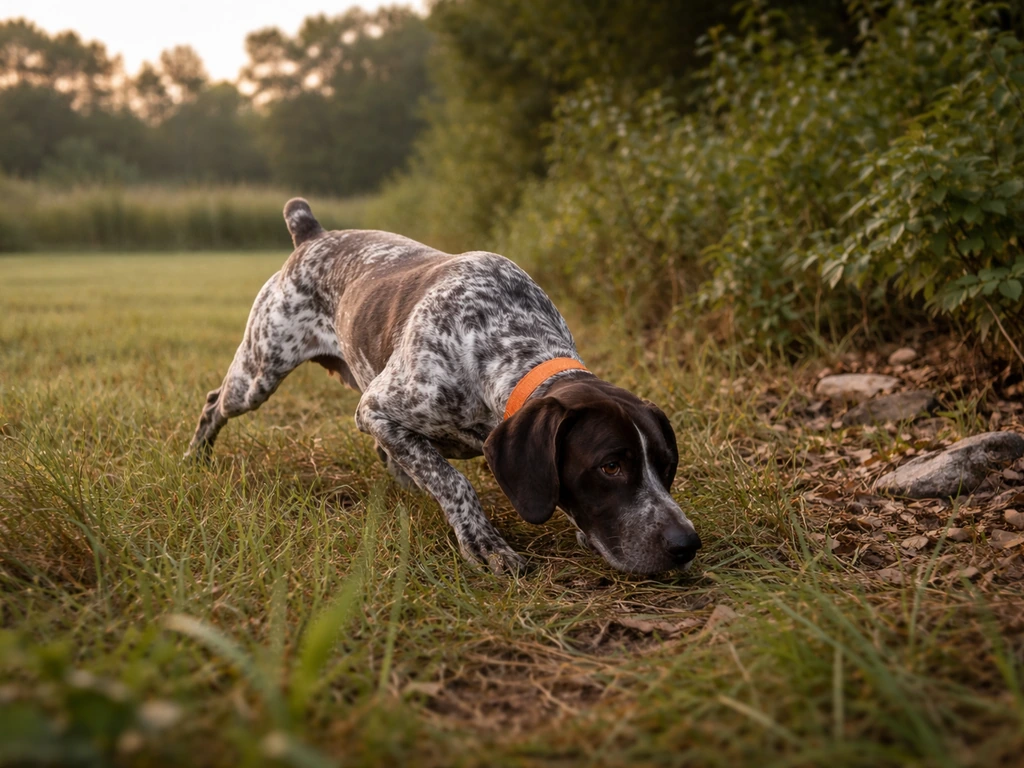
Build scent work and the 'find' behavior before anything else
This is the step most beginners skip, and it's the most important one. A reliable point starts with a dog that genuinely wants to find bird scent and that knows what 'finding' feels like. You are building hunt drive and scent confidence before you ever ask for a point.
- Start with scent introduction: let the dog sniff a bird wing or a bird-scented object freely, with no commands and no pressure. The goal is a positive emotional response: excitement, tail wagging, focused nosing. Reward any interest with praise and a treat.
- Hide the wing: once the dog is enthusiastic about the scent, place the wing just out of sight behind a low bush or in tall grass. Let the dog work the air to find it. When they locate it, celebrate with big praise and a treat. Do this 3 to 5 times per session.
- Add a verbal cue: once the dog is consistently hunting the hidden wing, introduce a word like 'find' or 'hunt' right as they start moving toward the scent. You're pairing the word with the behavior, not commanding it cold.
- Build duration on the find: before you introduce the pointing position, you want the dog locking onto the scent source and holding attention there naturally for a few seconds. Don't rush this. Two to three weeks of consistent scent games builds a strong foundation.
What you're watching for is a dog that actively uses its nose, moves with purpose toward the scent, and shows clear excitement when it locates the source. If your dog seems uninterested, try a fresher scent source, work when the dog is slightly hungry, or try a different location with better airflow. Wind direction matters enormously because dogs point into the wind. Positioning your scent source upwind of the dog from the start teaches them to work the wind naturally.
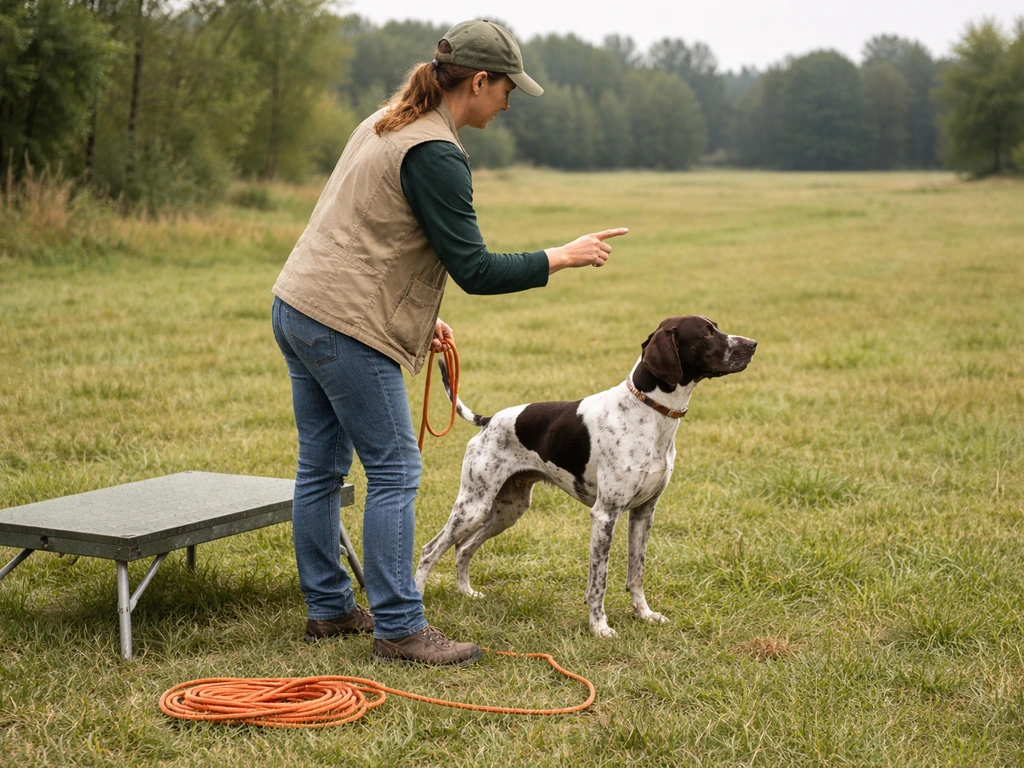
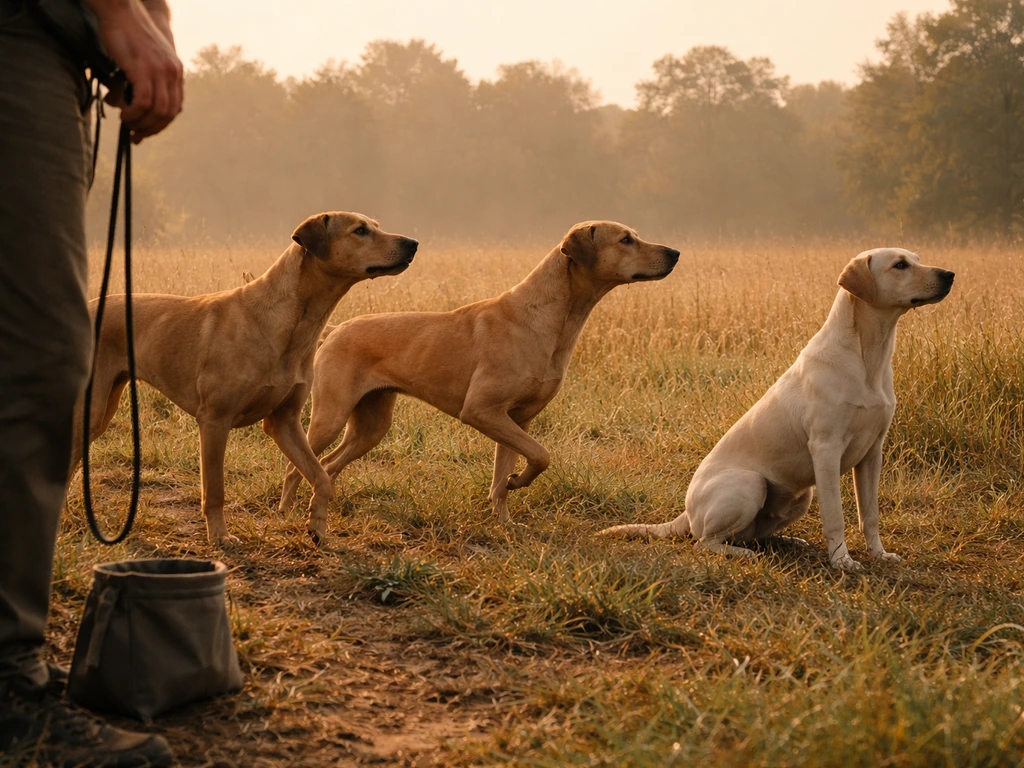
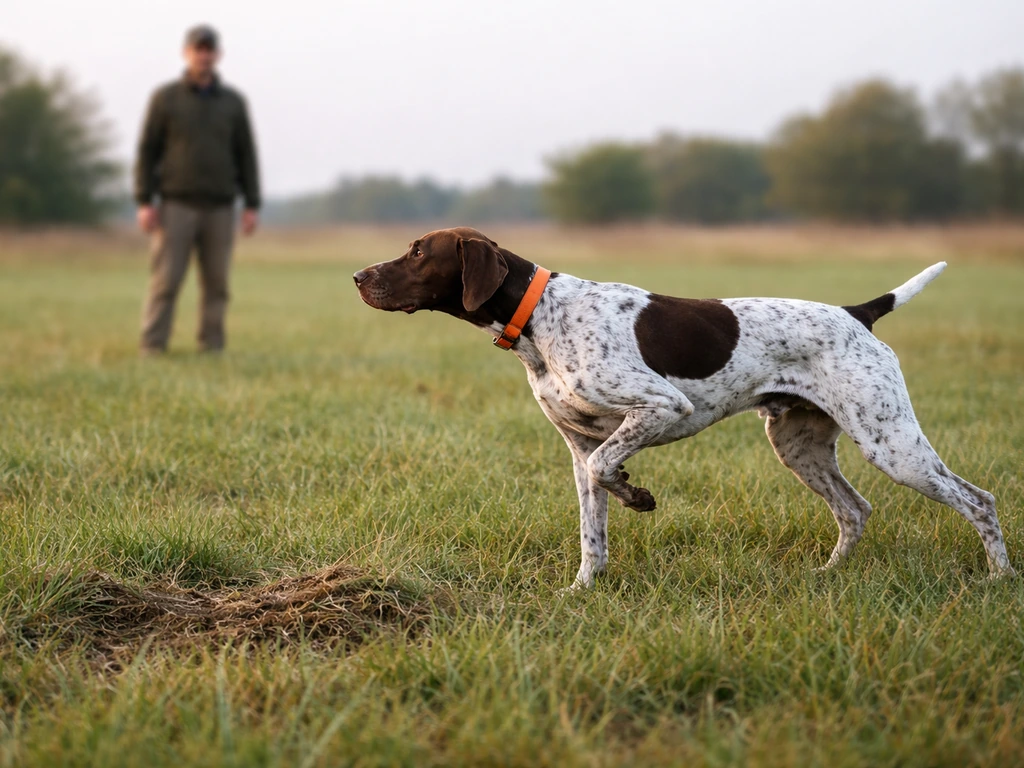
Teaching the actual point: step-by-step criteria
The pointing position is a still body, weight slightly forward, head and eyes locked on the target, often with one front leg raised. Your job is to capture and reinforce this naturally occurring freeze rather than push or physically place the dog into it. Forcing a dog into position before they are offering it voluntarily creates resistance and breaks down the behavior under pressure.
- Let the natural point happen: once your dog is reliably finding the scent source, they will often pause before committing. That pause is the beginning of a point. The moment you see the body go still and the nose lock forward, mark it (click or say 'yes') and reward quietly from behind without rushing in.
- Reinforce duration: after marking the pause, wait one extra second before rewarding. Then two seconds. Then three. You are building duration by making the freeze slightly longer each repetition before the reward arrives. Go slowly here.
- Add your verbal cue: when the dog is holding the freeze reliably for 5 to 8 seconds, add a cue word like 'point' or 'steady' right as they lock in. Again, you're labeling what they're already doing.
- Introduce the check cord: the long line is not for correction. It's a safety tool. Let it drag on the ground so you can gently stop forward movement if the dog starts creeping toward the scent source before you release them. A light, calm hand on the cord is all you need.
- Practice releasing deliberately: the dog should only break the point when you give a release word like 'okay' or 'go.' If they break on their own, quietly reposition them and restart. No anger, no punishment, just a reset.
One principle worth repeating from experienced trainers in versatile dog circles: never force a dog into a point using a check cord or any pressure tool before the dog is offering natural points on their own. Applying mechanical pressure into birds before establishing even a brief voluntary point can have lasting negative effects on pointing style and intensity. Let the point happen first, then use the cord to support it.
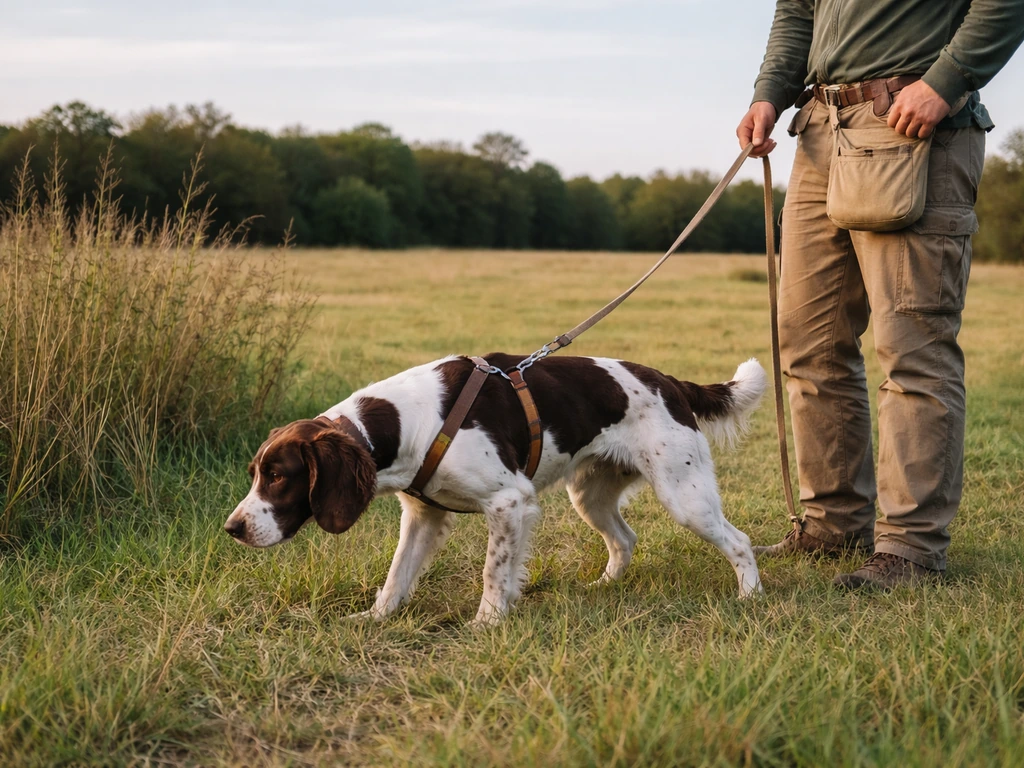
Moving to live birds and field situations
Once the dog is holding a point on wing or planted scent for 10 to 15 seconds consistently in the yard, it's time to raise the difficulty. Progress through these stages in order, and don't move to the next one until the current one is solid:
- Planted wings in light cover: move from open grass to low brush. The dog has to work a bit harder to find the scent, which builds confidence and nose use.
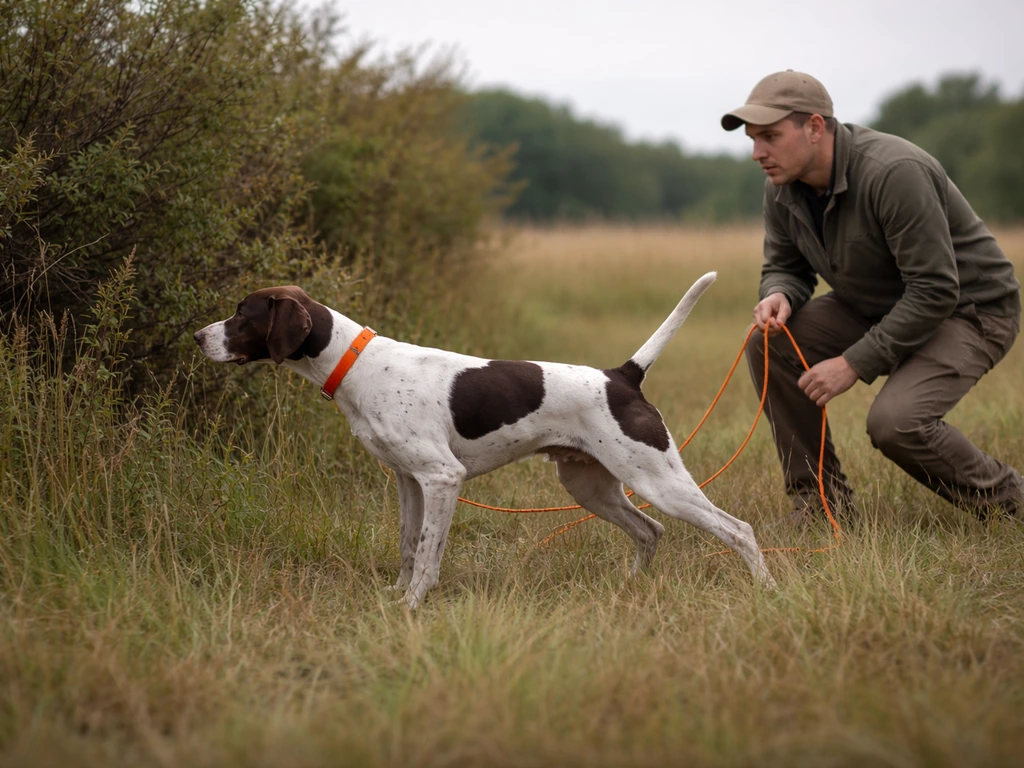
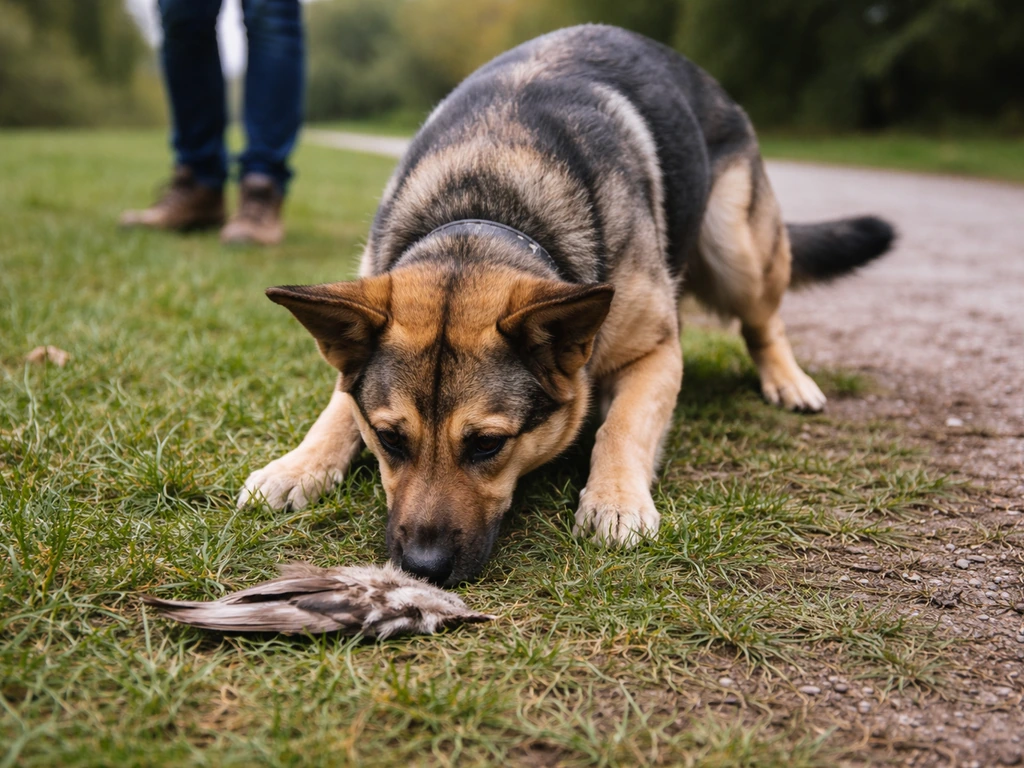
- Planted live birds in a contained area: pigeons or quail in a field spot work well. The dog will smell, hear, and eventually see movement. Keep sessions short (10 to 15 minutes maximum) to prevent overexcitement and blowups.
- Birds that flush: this is the big test. When the bird flushes, the dog's instinct is to chase. Work on a check cord and use a calm verbal cue (some trainers use a specific word like 'whoa' or 'steady') right as the bird lifts. The cord prevents the chase physically while the cue teaches the dog to stop on command. The goal is that the dog holds position through the flush, which is called 'steady to flush.'
- Multiple hides and longer hunts: add a second or third planted bird, increase cover, and work in new locations. This generalizes the behavior so the dog doesn't just point in your backyard.
- Introduce distractions gradually: other dogs nearby, wind changes, different terrain, and eventually the sound of a blank gun. Each new distraction is introduced at low intensity and only after the dog is confident at the current level.
Keep your sessions short and end on a win. A 15-minute session with three successful points is far more valuable than a 45-minute session that ends in frustration. Bird dog training tips from experienced handlers consistently emphasize that frequent short sessions build field reliability faster than occasional marathon outings.
Timing, reward, and how to keep the dog steady
Your timing as a handler is one of the most important training variables. A reward that arrives two seconds late marks the wrong behavior. A cue given too early teaches the dog to anticipate and blow through the behavior. Here's how to get the timing right:
- Mark the moment of stillness, not the moment before or after: the click or 'yes' happens the instant all four feet stop and the body goes rigid toward the bird
- Deliver rewards from behind the dog or to the side: reaching over the dog or coming in from the front causes them to break position to greet you
- Use calm, low-key praise during the point: big excited praise will break the point every time; save the enthusiasm for after the release
- Vary your reward timing: sometimes reward after 3 seconds, sometimes after 10; unpredictable timing builds longer holds
- Release before rewarding: always give the release word before the treat, so the dog learns that the reward comes after the point ends correctly, not during
The check cord is your primary handling tool during field work. Keep it loose unless the dog begins to creep or lunge. A gentle, consistent pressure when the dog starts to break is enough. Never jerk or yank because that kind of abrupt correction breaks pointing intensity and can introduce anxiety around birds. Minnesota NAVHDA trainers note that maintaining pointing intensity requires reducing pressure during the pointing and steady-to-flush transition, not increasing it. The goal is a calm, confident dog that holds because it knows good things come from staying still.
If you want to dig deeper into the full foundation of how to train a bird dog beyond the point itself, including obedience, recall, and field manners, it's worth working those pieces in parallel rather than in isolation.
When things go wrong: fixing common pointing problems
Most pointing problems come from moving too fast through the progression, from inconsistent handler timing, or from the dog not having a strong enough scent foundation. Here's a breakdown of the most common issues and how to address them:
| Problem | Likely Cause | Fix |
|---|---|---|
| Dog won't point at all | Low bird drive or insufficient scent exposure | Go back to scent games with fresh wings; increase session frequency; try a more exciting scent source like a freshly thawed bird |
| Point lasts only 1-2 seconds | Duration hasn't been built yet; dog is self-releasing | Shape duration incrementally; only mark and reward after 2 seconds, then 4, then 6; never reward a self-break |
| Dog breaks point and chases | Bird excitement overwhelms training history; steady-to-flush not installed | Return to planted, caged birds the dog can't chase; use check cord at flush; add the 'whoa' cue earlier in the process |
| Dog creeps forward during the point | Dog is moving toward reward source or trying to flush the bird itself | Keep rewards coming from behind; use a light check cord touch when creeping begins; reinforce stillness more heavily |
| Popping: dog bobs in and out of point | Conflicted behavior from inconsistent reinforcement or early pressure | Simplify the scenario; remove pressure; go back to yard work with wings and build a clean, calm point again |
| Fear or avoidance around birds | Introduced birds too quickly or at too high an intensity | Back way up; use bird scent only, then a wing at distance; let the dog approach on its own terms with zero pressure |
Chasing is the one that frustrates people the most. The instinct to chase a flushing bird is deeply wired, and fighting it with punishment almost always backfires. A dog that gets punished for chasing may stop chasing but will also start blinking birds (deliberately ignoring scent to avoid the consequence). That's a much harder problem to fix. Instead, prevent the chase from happening in the first place by using the check cord consistently at every flush until 'steady' is solid. For additional strategies on managing that prey drive in everyday contexts, how to train a dog to leave a bird alone covers the impulse-control side of the equation in practical detail.
Your next-steps practice plan
Here's a practical weekly structure for a dog that is just starting out or that needs to be rebuilt from basic scent work:
| Week | Focus | Session Length | Success Marker |
|---|---|---|---|
| 1-2 | Scent introduction and 'find' games with wings | 10-15 min daily | Dog consistently locates hidden wing using nose |
| 3-4 | Natural point shaping in the yard; capturing and marking brief freezes | 10-15 min, 5-6 days/week | Dog holds still for 5+ seconds before self-releasing |
| 5-6 | Duration building and release cue; add check cord | 15 min, 5 days/week | Dog waits for release word before moving |
| 7-8 | Planted birds in light cover; point in new locations | 15-20 min, 4 days/week | Point transfers to cover and new environments |
| 9-10 | Introduce flush; steady-to-flush work on check cord | 20 min, 3-4 days/week | Dog holds through flush 7 out of 10 repetitions |
| 11-12 | Multiple birds, varied cover, distraction proofing | 20-30 min, 3 days/week | Reliable point and steady behavior in field conditions |
Measure progress by counting how many repetitions out of 10 end with the dog holding through the flush and waiting for your release. The AKC recommends teaching a release word so the dog clearly understands when the stay is over, and rewarding the dog appropriately after it maintains position until release. When you hit 8 out of 10 in a given environment, you're ready to raise difficulty. Drop back to easier conditions anytime the success rate falls below 6 out of 10.
If you are also working on the hunting side of this, not just the point, read up on how to train a dog to bird hunt to integrate quartering, range, and retrieve work alongside your pointing progression. These skills reinforce each other when developed together.
When to bring in a professional trainer
There's no shame in getting help, and with a working dog, getting it right early is far less expensive than fixing problems later. Consider reaching out to a professional bird dog trainer if:
- Your dog shows no bird interest after 4 to 6 weeks of consistent scent exposure
- Chasing behavior is so intense that the check cord alone isn't managing it
- You are seeing fear, shutdown, or avoidance responses around birds
- The dog was previously trained with aversive methods and is showing anxiety or blinking
- You want to progress to hunt tests, field trials, or NAVHDA evaluations where precision really matters
Look for trainers who use clear, force-free or minimally aversive methods and who are willing to explain their reasoning. Ask to watch a session before committing. A good trainer will show you how to maintain and build on the work they do, not just take your dog for a few weeks and hand it back. The goal is a dog you can handle and continue training yourself, with the trainer as a coach rather than a substitute.
The whole process takes longer than most people expect, usually 6 to 12 months from basic scent work to reliable field pointing. That's normal. A dog that has been through a thoughtful, reward-based progression will point with intensity, hold under pressure, and work with you as a partner. That's worth the time it takes to build it right.
FAQ
My dog freezes in place but won’t look or hold their intensity. Is that still “pointing,” and what should I do next?
A freeze that lacks scent focus and sustained intensity usually means the dog is shutting down instead of locking on. Go back one step and rebuild the scent picture, use fresher scent, and only progress when the dog voluntarily increases body stillness and nose engagement for 10 to 15 seconds before the bird is presented.
How do I know whether my dog is “pointing naturally” versus just being pushed into position by handling?
In healthy pointing, the dog offers the stillness on their own, even if you step back slightly, and maintains posture through the flush transition with minimal correction. If the dog only points when you tighten a check cord or repeatedly guide the position, the foundation is not yet voluntary, and you should slow down and reduce pressure and repetition.
What if my dog creeps, then stops, or starts to creep only at the moment the bird moves?
That pattern often shows timing or intensity breakdown at the flush. Keep sessions short, maintain consistent check-cord support at flushes until “steady” is reliable, and make sure the dog is already holding solid on wing or planted scent before you increase complexity.
Do I need to use live birds to learn pointing, or can I switch to pigeons and wings permanently?
You can build pointing strongly with pigeons, wing substitutes, and scent-based sessions, especially early on. However, introduce real flight and real bird timing gradually (after you have voluntary points) so the dog learns the full sequence, hunt to point to steady-to-flush, under realistic movement.
Should I use a formal cue like “point” or should I wait until pointing is already reliable?
Wait until the dog is already offering natural points consistently, then pair the cue with the stillness you want. Giving a cue too early teaches anticipation and can cause the dog to rush past the behavior, so start with cue-free sessions and add the cue only when success is already high.
How do I handle wind and scent direction when I’m training alone without a gunner or helper?
If you can choose placement, set the bird scent upwind of your dog so they naturally work the wind into the source. When training solo, make your sessions smaller and slower, and keep the dog close enough that you can reset the scent and dog position quickly after each attempt.
My dog is too excited and won’t settle into a point, even though they find scent. How can I reduce the bounce without punishment?
First, shorten sessions and raise success rates by using cleaner conditions (less cover, fresher scent, and better airflow). Then reinforce micro-successes, reward the earliest stillness the dog offers, and only ask for longer holds once the dog can consistently stop on their own for brief periods.
What’s the best way to prevent chasing if my dog only chases sometimes, for example when cover is heavy?
Treat it as a progression problem, not a personality flaw. Increase difficulty only after the dog reliably holds and waits through flushes in easier settings. In heavier cover, reduce variables (fewer flushes, closer scent, tighter control with a loose check cord) until “steady” holds consistently.
How do I measure progress in a way that helps me decide to advance or back up?
Use a simple success threshold: track how many repetitions out of 10 end with the dog holding through flush and waiting for your release. Advance only when you reach your target success rate in that same environment, and drop back to easier conditions immediately when performance falls below the lower threshold.
My dog points great in the yard but falls apart in the field. What is the most common cause and the first fix?
The most common cause is moving too fast through the progression or changing multiple variables at once (cover, distance, wind, and distractions). First fix it by returning to a simpler environment where they already point voluntarily, then reintroduce one variable at a time while keeping handler timing consistent.
When should I get professional help, and what should I ask to avoid training that harms pointing style?
Get help if your dog’s pointing intensity drops, you see fear around birds, chasing becomes worse, or you can’t progress despite consistent fundamentals. Ask to observe a full session, confirm they avoid forcing points with mechanical pressure before voluntary pointing is present, and look for a trainer who will coach you so you can continue work yourself.