Training a bird dog is absolutely doable for a beginner, but it works best when you follow a clear progression: build obedience first, teach retrieving to hand second, then introduce bird-relevant skills like scent work, flushing, and shot awareness. Skip steps and you will almost always have to go back and fix problems later. Follow the sequence below and you will have a solid, confident bird dog without using force or harsh corrections.
How to Train a Bird Dog: Puppy to Retrieve to Birds

Maya Harris
2 Apr 2026
Getting started with bird dog training basics
Before any specific drills, you need a consistent communication system between you and your dog. The most effective tool is a training marker, which is a clicker or a short word like "yes" that you use at the exact moment your dog does something right. The AKC notes that marker training "takes the pressure off the trainer" because the dog learns quickly that the marker means a reward is coming, making the criteria crystal clear. Pair every marker with a high-value treat in the first few sessions until your dog reliably looks for the reward after hearing it.
Keep your early sessions short. Three to ten minutes per session, two to four times a day, is far more productive than one long exhausting session. The High Desert Companions training framework puts it simply: reward the target behavior within one to two seconds, keep sessions to three to five minutes, and always end on success. If your dog is confused or starting to disengage, stop the drill, do one easy thing they already know, mark and reward it, then quit for that session. You will get more done in four short sessions than in one hour of frustrated repetition.
For a first-time trainer, you also need two pieces of gear before anything else: a long check cord (15 to 30 feet) and a quality slip lead or flat collar. The check cord lets you guide or interrupt behavior at a distance without chasing your dog, which is critical for the early bird work stages. You do not need expensive electronic collars at the beginning, and for puppies you should not use them at all.
One of the most underrated fundamentals is bonding time outside of training. Play with your dog, let them explore with you on walks, and let them figure out that staying near you is rewarding. A dog that genuinely enjoys your company will be far easier to train through distraction than one that only tolerates you. This is especially true for the hunting breeds like pointers, spaniels, and retrievers that are wired to work independently.
Choosing the right puppy, start age, and readiness cues
Most professional trainers recommend starting basic obedience with a bird dog puppy at 8 to 12 weeks old, right when the pup comes home. At this age the puppy's brain is highly receptive and you can shape simple behaviors like sit, name recognition, and come with almost no pressure. What you should not do at this age is formal heel work, long forced retrieves, or any kind of correction-based training. Short, fun, game-like sessions are all that is needed.
For bird-specific work, most trainers start introducing scent and early retrieving games around 10 to 16 weeks. Full bird introduction on live or planted birds is typically saved for 4 to 6 months, once the puppy has solid recall and at least a basic sit-stay. The biggest mistake new trainers make is rushing the bird introduction because they are excited, and then ending up with a dog that chases wildly and has no control around birds.
Readiness cues to look for before advancing to each new stage:
- Reliably responds to their name and comes when called in low-distraction environments
- Can hold a sit for at least 10 seconds with you standing right in front of them
- Shows interest in picking up and carrying objects during play (a natural retrieve instinct)
- Recovers quickly from mild startles (a hand clap, a dropped object) without shutting down
- Engages with you during training rather than constantly wandering off
If your puppy is not showing most of these cues by 4 to 5 months, focus more time on bonding and basic obedience before moving to bird work. Pushing an unready dog almost always creates avoidance behaviors that take months to undo.
Teaching core obedience for bird dogs
A bird dog needs the same foundational commands every well-trained dog needs, but a few of them are especially critical in the field: come (recall), sit or whoa, stay, and heel. These commands are the safety net that lets you manage a dog around live birds, around other hunters, and in complex terrain. Without them, bird work is dangerous and unproductive.
- Name recognition and attention: Say the dog's name once, mark and reward when they look at you. Practice this until it is automatic before adding any other cue.
- Sit: Lure the dog into position with a treat above their nose, mark the moment their rear hits the ground, reward immediately. Add the verbal cue only after they understand the motion.
- Stay: Build duration in tiny steps. Start at two seconds, then five, then ten. Always release with the same word ("okay" or "free") before the dog breaks on their own.
- Come (recall): This is your most important command. Make coming to you the best thing that ever happens to your dog. Never call them to you for something unpleasant. Use a long check cord to guide them if they ignore you, but never punish them when they arrive.
- Heel: Teach a loose-leash walk first. Mark and reward the dog for being at your side. This does not have to be a formal competition heel, just a dog that does not pull and stays reasonably close.
For bird dogs specifically, the "whoa" command (stopping and holding position on command) is often taught separately from sit because in the field you want the dog to freeze in whatever stance they are in, not drop their rear to the ground and potentially flush a bird. You can introduce whoa by simply stopping while walking, using a flat palm signal, marking and rewarding any pause or stillness. Build it slowly over several weeks.
Practice all obedience in as many different locations as you can. A dog that only sits reliably in your kitchen will fall apart the moment they smell a pheasant. Gradually increase distraction: backyard first, then a park, then a field. Bird dog training tips that skip this generalization step are one of the main reasons dogs seem trained at home but uncontrollable in the field.
Retrieving training step by step
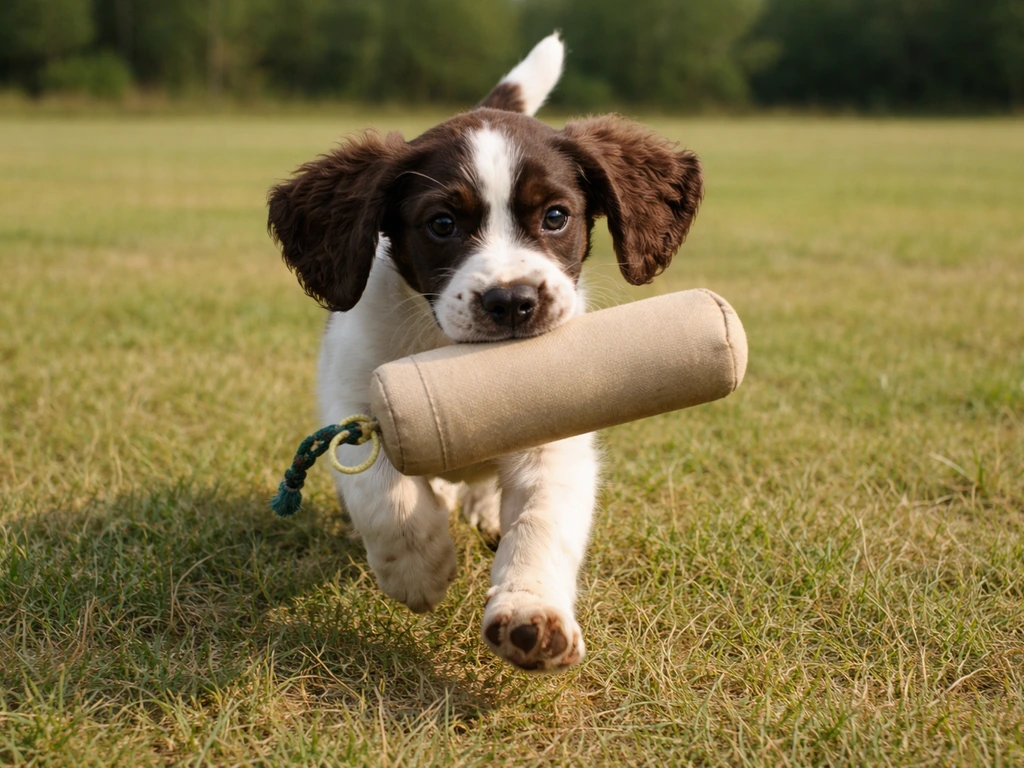
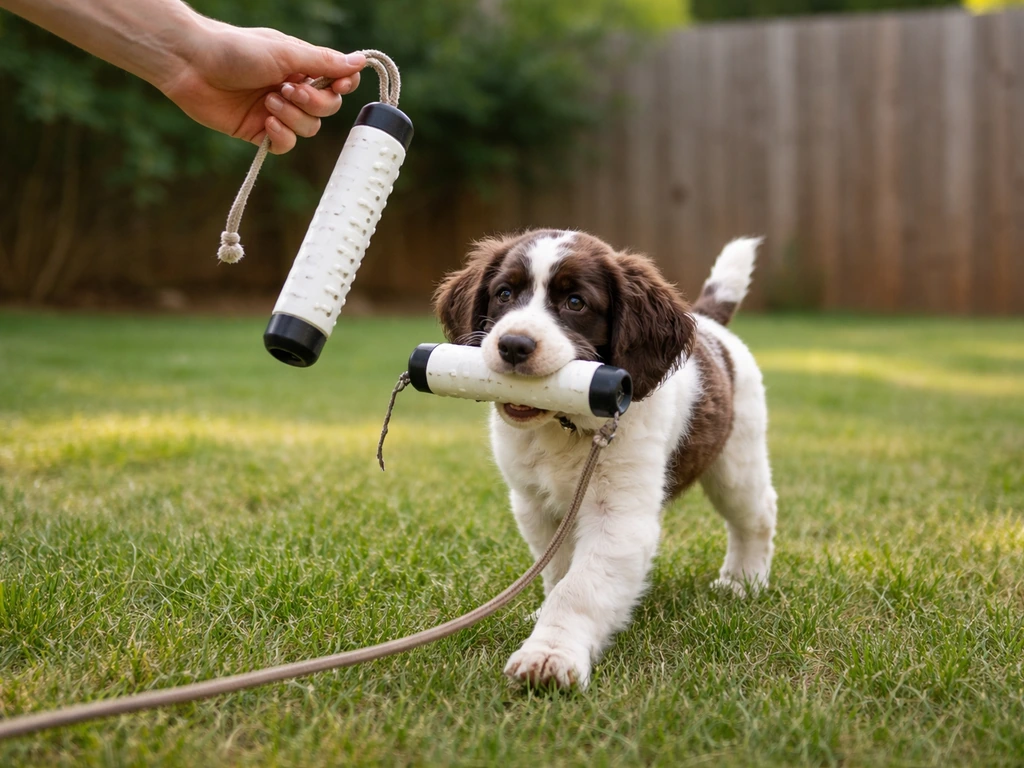
Retrieving to the handler is arguably the single most important mechanical skill a bird dog needs. A dog that chases the bird and does not bring it back is only doing half the job. The goal is a clean, enthusiastic retrieve that ends with the bird delivered to your hand, not dropped two feet away or chewed up. Here is the progression that works.
Step 1: Build the chase and carry instinct
Start with a soft bumper or a canvas dummy, not a ball. Roll it along the ground in front of the puppy and let them chase it. The moment they pick it up, crouch down, turn away slightly, and call them toward you enthusiastically. Do not run at them. Mark and reward the moment they bring the bumper anywhere near you, even if they drop it at your feet. At this stage you are just building the idea that picking up an object and coming back to you is the most rewarding game on earth.
Step 2: Add a short toss and a recall
Once the puppy is reliably chasing and carrying, toss the bumper a short distance (5 to 10 feet), let the dog get it, and call them back with your recall cue. Use a hallway or a narrow corridor outdoors to prevent the dog from going wide. Gradually extend the distance over multiple sessions. If the dog drops the bumper before reaching you, go back to shorter tosses and higher-value rewards.
Step 3: Teach the delivery to hand
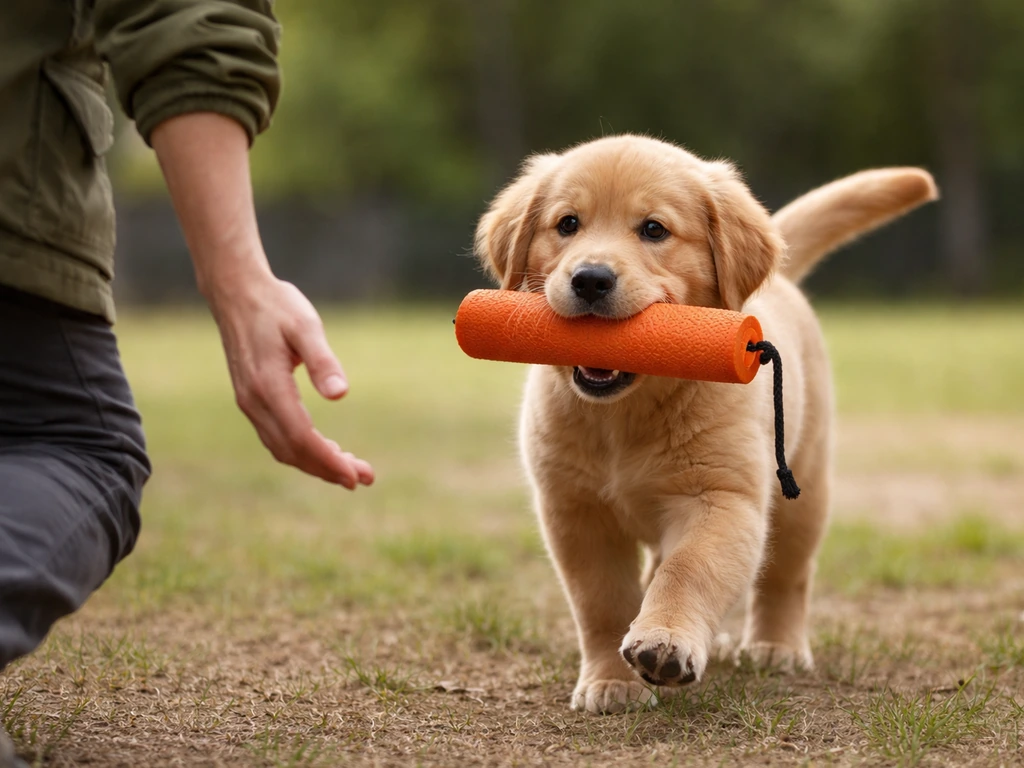
This is where many trainers get sloppy. You want the dog to hold the bumper until you take it, not spit it out the moment they arrive. Shape this by rewarding the dog only when they are holding the bumper while you gently reach for it. If they drop it before you touch it, no mark, no treat. Simply reset and try again. Be patient here. Once the dog understands hold, you can add a release cue like "give" or "drop" before taking the bumper.
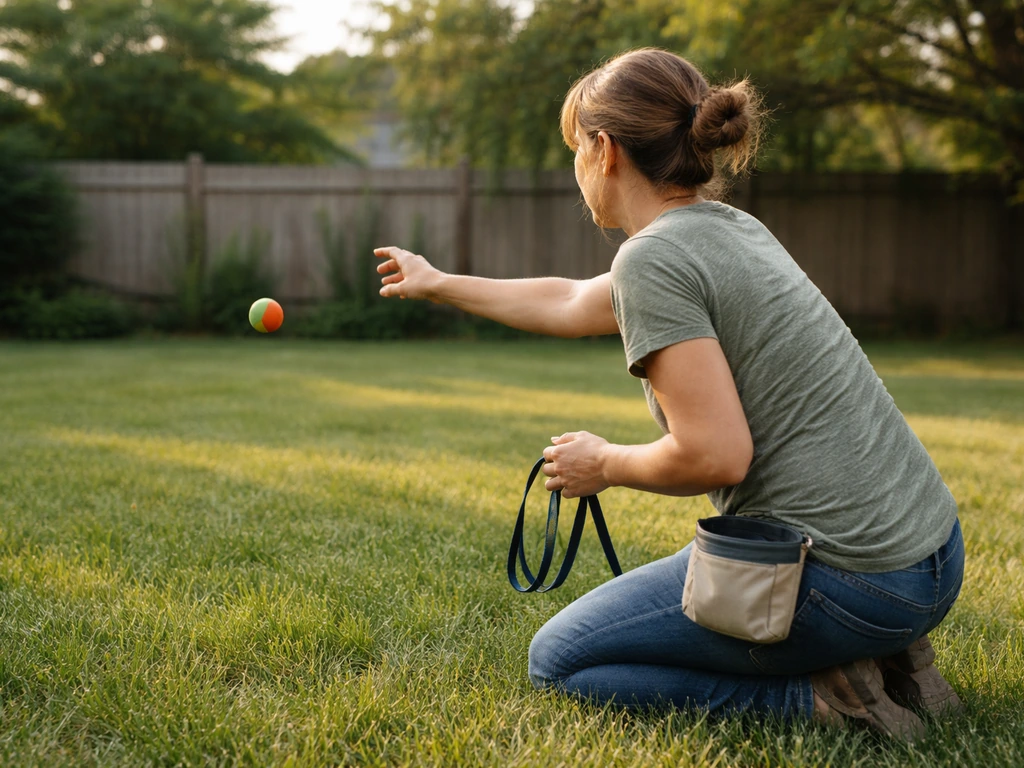
Step 4: Marking and longer retrieves
A marking retrieve means the dog watches the bumper fall and retrieves it from memory. Toss the bumper while the dog is watching, let it land, then send with your release cue. Gradually increase distance to 20, then 40, then 80 yards as the dog gets confident. Introduce water retrieves the same way: start shallow with a short toss, reward every success, and build distance slowly. If the dog hesitates at water, never force them in. Let them wade on their own terms and reward any voluntary entry.
If you are working toward hunting scenarios, how to train dog to bird hunt goes deeper into field-specific retrieve setups, including handling marks across cover and working with a hunting partner. That context is worth reading once your dog has a reliable close retrieve.
Progressing to bird work: scent, flushing, and shot awareness
Once your dog has solid obedience and a reliable retrieve to hand, you can start introducing bird-relevant skills. This stage is where training becomes really exciting, but it is also where rushing causes the most damage. Go slower than you think you need to.
Introducing scent
Start with wing scent before using live birds. Clip a pigeon or pheasant wing to a fishing rod and drag it through short grass. Let your dog track the scent trail and find the wing. This is safe, controlled, and builds the nose-to-ground (or nose-to-wind) instinct without any risk of the dog chasing a bird out of control. Do this in short sessions, three to five minutes, and end the moment the dog successfully locates the wing.
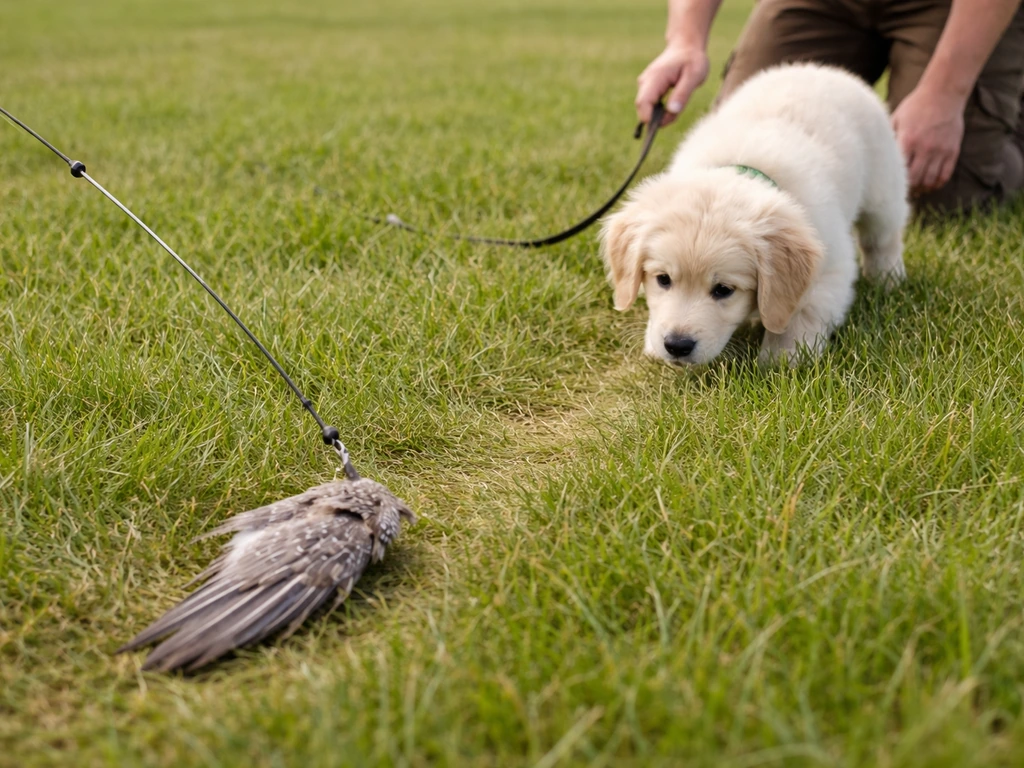
First live bird introduction
Use a dizzy or dizzied pigeon (gently tucked to make it calm) placed in light cover for the first introductions. Keep your dog on a check cord. Let them scent-track to the bird but do not let them flush it yet. You want to see excitement and focus, not a wild chase. If the dog is calm and intense, you are in great shape. If they immediately lunge and try to grab, shorten the check cord and slow down. This first introduction should feel like discovery, not a chase. For pointing breeds, this is often when you will see the first natural point emerge.
To build a reliable, stylish point specifically, how to train a bird dog to point gives a dedicated progression for encouraging and steadying the point behavior without force.
Flush and shot introduction
After several calm bird-finding sessions, you can introduce a flush. Let the bird fly on its own or toss it up. Watch your dog's reaction: do they honor the flush by pausing, or do they break and chase? Reinforce any moment of steadiness with praise. Do not fire a gun at this stage yet.
Shot conditioning happens separately. Start with a cap gun at a distance (30 to 40 yards) while your dog is doing something enjoyable, like eating or playing fetch. If they do not react negatively, move closer over multiple sessions. A gunshot should become a conditioned signal that says "something good is about to happen." If your dog shows any fear of the shot (freezing, tucking tail, refusing to work), stop and go back to the cap gun at greater distance. Flooding a gun-shy dog with repeated loud shots is one of the most damaging things you can do and is completely unnecessary.
Troubleshooting common problems and setting humane goals
Even with a solid plan, you will hit walls. Here are the most common issues and what to do about each one.
| Problem | Likely Cause | Fix |
|---|---|---|
| Dog won't retrieve (drops immediately) | Insufficient drive-building, or reward arrived too late | Go back to short chase games in a hallway; reward any carry, even two steps |
| Dog retrieves but won't deliver to hand | Dog learned spitting it out still gets rewarded | Only mark and reward when dog holds until you reach for it; add a "hold" cue |
| Dog chases instead of pointing | Too much excitement, too little steadiness work | Use check cord to interrupt chases; reward every moment of stillness near the bird |
| Dog is distracted and won't focus | Sessions are too long, environment too exciting, or obedience not solid enough | Shorten sessions to 3 minutes; go back to a lower-distraction environment |
| Dog refuses at bird introduction | Rushed intro, bird was too close or too active, or dog had a bad first experience | Use a calm, dizzied bird at greater distance; let the dog approach on their own timeline |
| Gun shyness | Shot introduced too early or too loudly | Restart conditioning from 40+ yards with a cap gun; pair sound with food only |
The Humane Society of Missouri makes an important point about training sessions that applies here: if your dog is not succeeding, stop or switch activities rather than pushing through. Ending a session in frustration (yours or the dog's) erodes trust and makes the next session harder. Every session should end with at least one thing the dog did right, marked and rewarded. That is not a soft approach, that is how learning actually works.
Setting humane goals means accepting that every dog has a different learning pace. A dog that is ready for live birds at five months is not better than one that is ready at eight months. What matters is that each step is solid before you advance. If you feel pressure to rush because hunting season is coming, remind yourself that one solid hunting season three years from now beats several confused, stressful ones next fall.
One specific scenario worth planning for: you may eventually need your dog to behave calmly around birds they are not supposed to chase, such as domestic poultry or songbirds near the field. Teaching a clear "leave it" behavior and knowing how to train a dog to leave a bird alone gives you a practical protocol for those situations so your bird dog learns context: chase that bird on cue, ignore this one always.
Finally, track your progress. Keep a simple training log: date, location, what you worked on, how the dog responded, and what you will do next session. It takes two minutes and it will prevent you from repeating drills the dog already understands, or from skipping steps because you misremember how the last session went. A written record also helps you spot patterns in problems, like realizing your dog always struggles on windy days or in tall grass.
Training a bird dog the right way is a months-long process, but it is also one of the most rewarding things you can do with a dog. When you see that first natural point hold for a solid fifteen seconds, or watch your dog power through cover and come back with a clean delivery to hand, the investment pays off completely. Be patient, stay positive, reward generously, and let the dog tell you when they are ready for the next step.
FAQ
How do I know my marker training is working before I start bird work?
Use a marker you can consistently repeat the exact same way, then reward with one specific “reinforcement format” (for example, small treat hand-delivered within 1 to 2 seconds). Before you introduce birds, test that your dog looks for the treat after the marker even when the environment is mildly distracting (yard, driveway). If your dog only responds indoors, increase environment difficulty slowly rather than switching to louder cues.
What should I do if my bird dog keeps spitting the bumper before I take it?
If your dog is dropping the bumper before you touch it, do not increase distance or difficulty yet. Shorten the retrieve, raise reward value, and reward only the exact moment the dog is holding when your hand reaches for the bumper. Also check comfort factors, tightness of slip lead, and whether the bumper is too large or has an unpleasant texture for your dog.
How do I teach “hold” and “give” without accidentally teaching my dog to spit out early?
Pick your release word and timing, then use it the same way every time. For holding, you should reward hesitation to release by waiting, reaching in, and marking only while the bumper is still retained. Once holding is reliable, add the release cue just before you would normally take the bumper, then practice release without sending on every rep to reduce impulsive chasing.
What if I don’t have a narrow corridor to practice retrieves to me?
If you can’t find a hallway or narrow corridor, create one using stable barriers (fences, parked vehicles, or a line of tall cones) so the path stays straight. Another option is to do recalls from shorter tosses in open areas, with your body blocking the wide route. The goal is preventing the dog from rehearsing going wide, not forcing straight-line running through anger or chasing.
Can I use a ball instead of a bumper for early retrieving training?
A common mistake is using balls for early retrieves, because balls often make dogs chew and sprint back with less “deliver” behavior. Stick with soft bumpers or canvas dummies and practice “delivery” by rewarding the dog for being near you, then for returning and holding, then for taking the bumper cleanly to your hand.
My dog gets too excited during first bird introductions, what’s the correct reset?
For a first bird intro, keep the dog on the check cord and aim for calm intensity. If the dog lunges or tries to grab, shorten the cord, reduce cover complexity, and slow down to wing scent or a prior scent step where the dog can succeed. Do not keep repeating the same setup while the dog is over-aroused, because each failed attempt teaches the wrong emotional pattern.
How do I handle it if my dog points sometimes, but keeps breaking early?
If your dog points naturally, reward the stillness briefly and increase duration gradually rather than “freezing” them with pressure. If your dog shows creeping or busting, slow down the environment, shorten distances, and rely on reward timing. You can also slow the bird-finding part until the dog is consistently focused, then build steadiness during the bird sessions.
What’s the best way to teach whoa without confusing it with sit-stay?
Teach “whoa” as a pause and freeze in whatever stance they currently have, then add duration only after the initial hold is reliable. Practice stopping while walking in low distraction areas, mark and reward the exact moment of stillness, then slowly add time. Avoid combining whoa with new bird inputs before the dog understands the command independent of birds.
How do I generalize “come,” “sit,” and “stay” so my bird dog listens in the field?
Generalize obedience by rotating location and distraction type, not just distance. For example, practice recall in backyard, then on a short grass patch, then near a park path with people far away. If the dog fails in a new environment, go back to a closer or easier version of the same cue and reward faster, because failure at high difficulty can create avoidance.
My dog seems fine most days, but struggles in wind or tall grass. How should I adjust training?
Use a simple decision rule for readiness: only advance when the dog performs reliably with calm body language in the same distraction category, not just once. If windy days or tall grass reliably reduce performance, treat those as a separate training environment and spend extra reps there before moving to birds or longer marked retrieves.
How do I train “leave it” so my dog ignores unwanted birds but still chases on cue?
For “leave it” around birds, separate cues by context: use “chase on cue” for the birds you want them to pursue, and “leave it” for birds they must ignore. Practice leave it with non-bird items first (food on the ground), then progress to controlled bird-related scenarios at a distance with the dog on a check cord, rewarding quiet restraint and looking away. Consistency matters more than how quickly you increase difficulty.
What should I do if my dog shows fear during shot conditioning?
If you ever use handheld handling or approach corrections, keep it separate from marker timing and use the least intrusive method first. For the gun, the article emphasizes cap gun at a distance while the dog is already doing something good. If your dog shows fear signs, increase distance immediately and return to the last setup where the dog stayed comfortable, then progress gradually again over multiple sessions.
What should I track in my training log to spot patterns faster?
Use a written or phone log, but also add one quick numeric rating (for example, 0 to 5) for focus and for success on each step. That helps you notice patterns like “windy day equals lower focus,” “after lunch equals more focus,” or “training right after long walk equals better steadiness,” which you can’t easily see from notes alone.
Next Article
How to Teach a Bird to Fetch Step by Step Guide
Humane, step-by-step training to teach your bird to fetch safely, with targets, rewards, troubleshooting, and gradual re