You can teach most tame pet birds to roll over using a lure-and-shape method with positive reinforcement. The process takes most birds anywhere from a few days to a few weeks depending on their confidence, baseline handling comfort, and how often you train. You start by getting the bird comfortable lying on its back or side, then use a treat lure to guide the full rolling motion, add a marker (clicker or verbal), and gradually fade the lure until the bird responds to a hand signal or verbal cue alone. Done right, it is one of the more impressive tricks in a bird's repertoire and a genuinely fun bonding exercise.
How to Teach Your Bird to Roll Over: Step-by-Step Guide

Maya Harris
5 May 2026
Training setup and welfare basics
Before you ask your bird to do anything unusual, the training environment needs to feel safe and predictable. Pick a quiet room with no other pets, minimal foot traffic, and low background noise. Sudden movements or loud sounds stress birds significantly and can set back weeks of progress in a single session, so treat the training space like a low-stimulation zone.
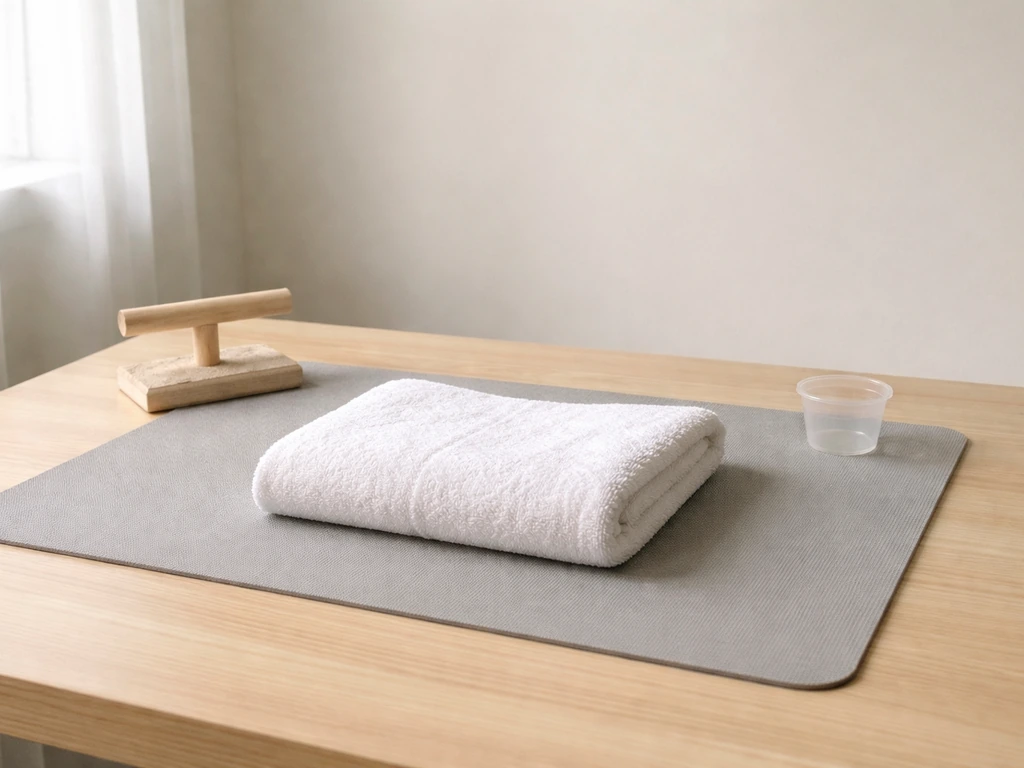
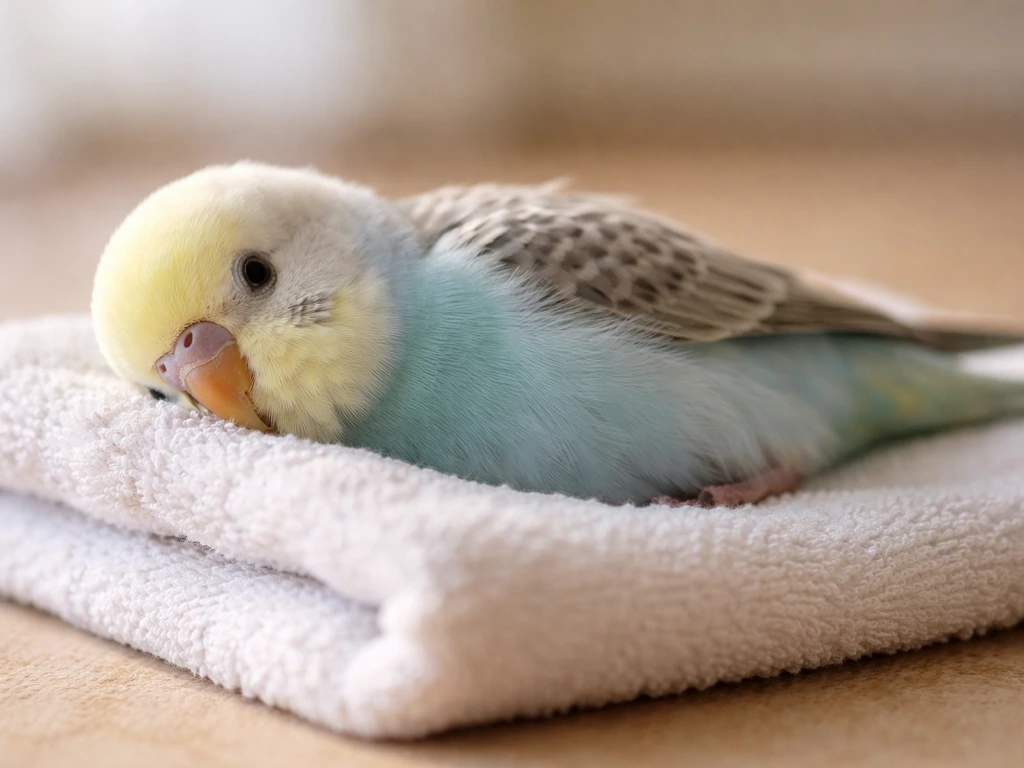
You need a flat, non-slip surface for roll-over work. A folded towel on a table works well. The texture gives the bird grip and cushions the motion, which matters once you start guiding a full roll. Avoid glass, tile, or any slippery surface since the bird will feel unstable and resist lying down entirely.
Keep sessions short: two to five minutes maximum for beginners, never more than ten minutes even for experienced birds. Birds lose motivation and focus quickly, and short, frequent sessions produce faster results than long, exhausting ones. Two to three sessions per day with breaks in between is the sweet spot for most species.
- Train at least 30 minutes before or after a full meal so treats are motivating but the bird is not starving
- Use the bird's highest-value treat for new or challenging behaviors (pinches of nutriberry, a tiny piece of fruit, a sunflower seed, whatever your bird goes wild for)
- Have a clicker or choose a consistent verbal marker like a sharp 'yes' or 'good' and commit to one marker only
- Keep a small notebook or phone note to log what happened each session (number of reps, which step, any issues)
- End every session on a success, even if that means backing up to an easier step
Positive reinforcement is the only method worth using here. Punishment is not effective for parrots and aversive handling will destroy trust far faster than you can rebuild it. If the bird refuses, flies off, or looks uncomfortable, the session is over and you return to an easier step next time. That is not failure; that is good training.
Choosing the right bird and baseline behaviors
Roll over is an intermediate-to-advanced trick. It requires a bird that already trusts you enough to be gently handled, will eat treats from your hand reliably, and ideally already knows at least one or two simpler behaviors. If your bird does not have those foundations, start there first. Trying to teach roll over to a bird that panics when touched is going to be frustrating for both of you.
The baseline skills your bird should have before you start:
- Steps up onto your hand or finger calmly on a 'UP' or 'step up' cue
- Accepts gentle physical contact on the chest, wings, and belly without flying away or biting
- Takes treats from your fingers consistently and without snatching aggressively
- Tolerates being gently repositioned on a flat surface without panicking
- Has some understanding of a clicker or marker (at minimum, has eaten treats paired with the marker a few times)
For wild or rehabilitated birds, roll over is generally not appropriate unless the animal is a permanent non-releasable resident being trained for educational presentations under proper permits. For those birds, all baseline handling work should be completed and documented before any trick training begins, and welfare must be evaluated by a licensed rehabilitator before proceeding.
Among common pet species, cockatiels, budgerigars, African greys, Amazon parrots, and cockatoos tend to learn this trick well. Cockatiels and budgies are often surprisingly willing once trust is established. Larger parrots like African greys and Amazons are capable but more deliberate, and they need more confidence in the flat-surface handling before rolling feels natural to them. Lovebirds and conures can learn it too but may take more patience because of their high-energy temperaments.
Step-by-step roll-over shaping with treats and cues
Shaping means building the full behavior in small, achievable steps rather than waiting for the whole thing to happen at once. If you want more context on exactly how to teach your bird to lay on its back, use this roll-over shaping approach as a foundation. Each step below is one 'approximation' toward the finished roll over. Do not move to the next step until the bird is doing the current one reliably and without hesitation, which usually means five to eight clean repetitions in a row.
Step 1: Get comfortable on the flat surface
Place your bird gently on the towel-covered surface. Use your finger-perch or cup them lightly in both hands and set them down. As soon as they stand on the surface calmly without trying to fly off, mark and reward. Repeat until the bird lands, stands still, and looks at you expectantly. This alone might take a full session or two for nervous birds, and that is completely normal.
Step 2: Lure to a lateral lean
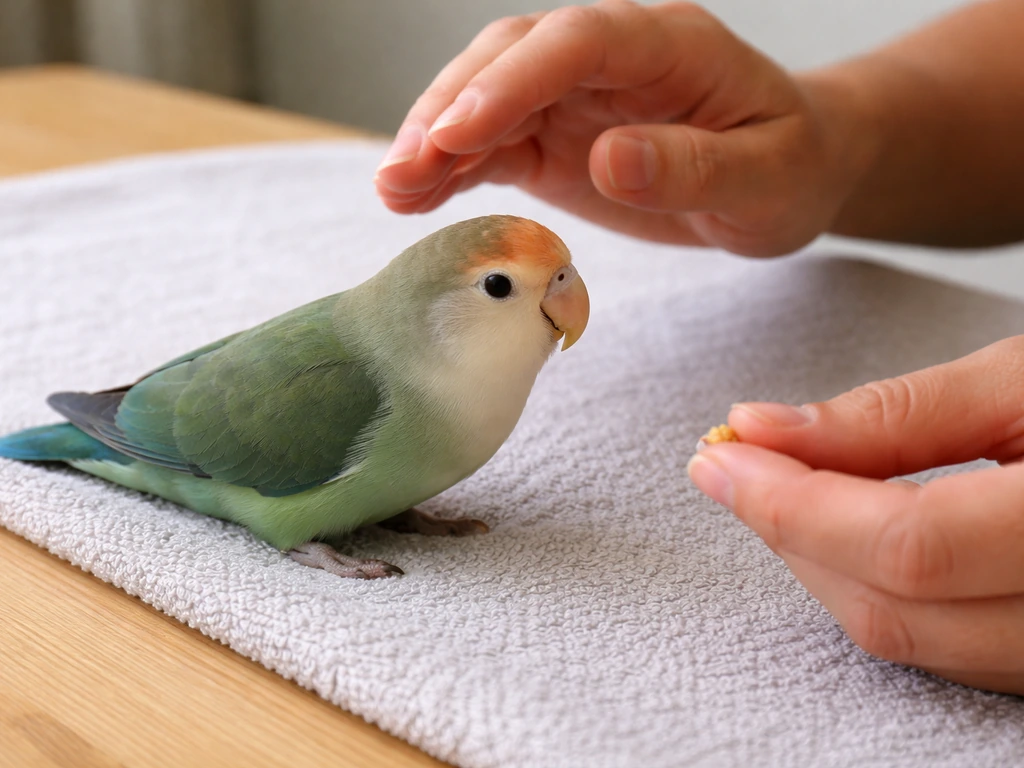
Hold a treat just to one side of the bird's head, level with their shoulder. Move it slowly in a small arc toward their flank. Most birds will shift their weight and lean sideways following the treat. The moment you see their body tilt off-center, mark and reward. You are not asking for lying down yet; you are just rewarding any lateral lean. Keep the treat movement slow and smooth since fast movements cause the bird to back up rather than follow.
Step 3: Lure to a side-lying position
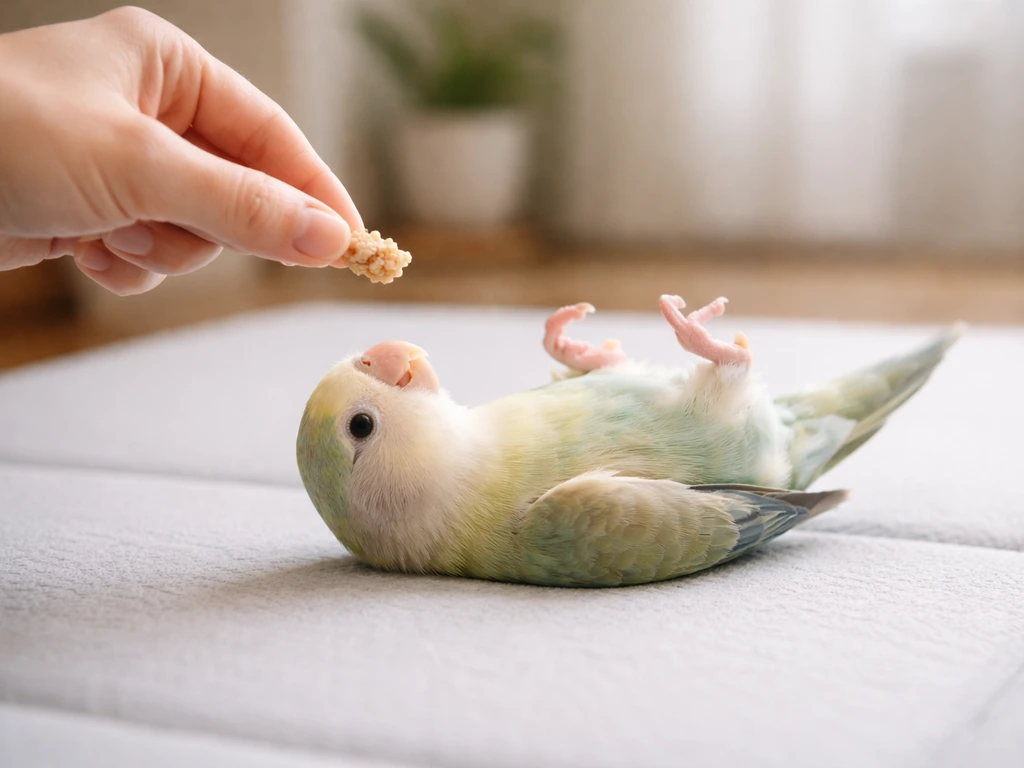
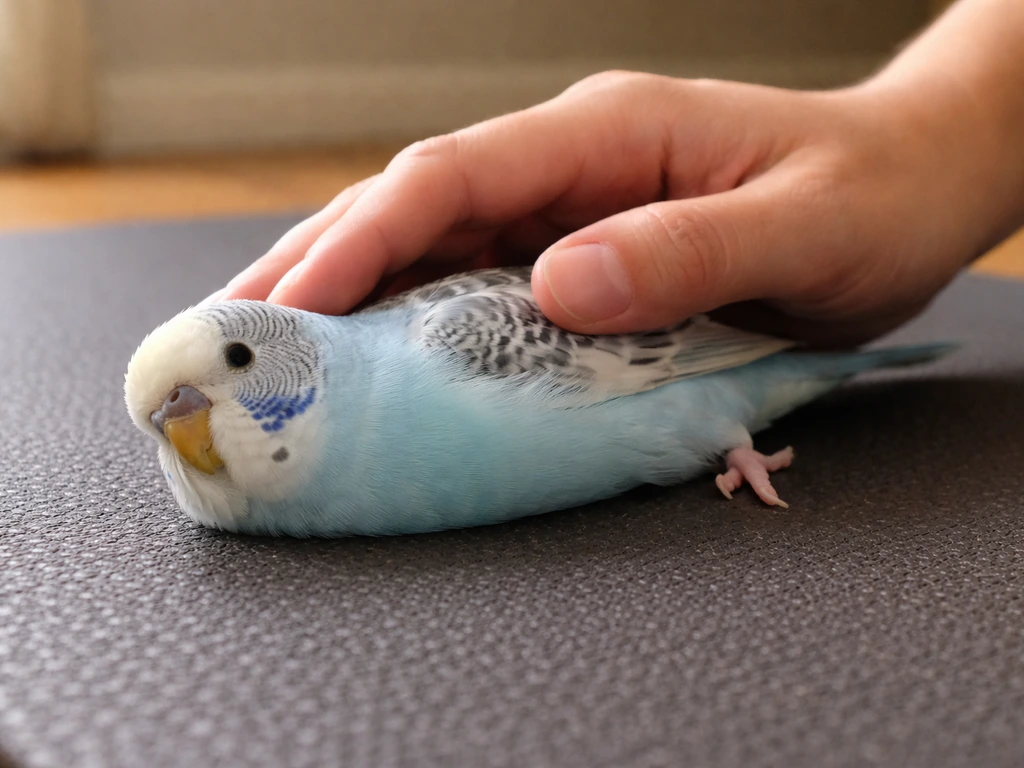
Continue the arc of the treat further down toward the surface on the same side, guiding the bird to shift its weight until one shoulder and side are resting on the towel. This is the hardest step for most birds because lying on their side feels vulnerable. Go slowly. You may need to break this into several smaller approximations over multiple sessions. When the bird lies on its side willingly and holds it for even one second, mark and reward enthusiastically. This is the keystone of the whole trick.
Step 4: Complete the roll
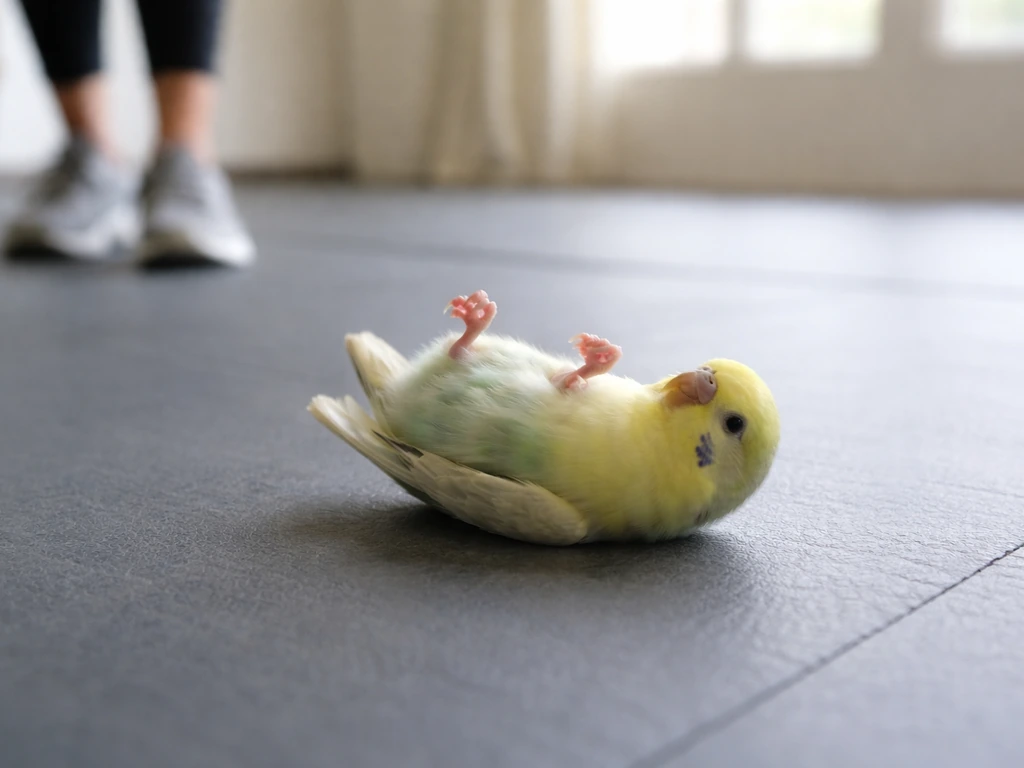
Once the bird lies on its side reliably, continue the treat arc up and over their body so they follow it the rest of the way through to the other side. Some birds will pop right through; others will need this broken down further. You can use your other hand, very gently, to support the bird's back through the motion on the first few attempts. Mark and reward the moment the bird returns to an upright position on the other side. That full arc from standing, to side-lying, to standing again on the other side is the complete roll over.
Step 5: Fade the lure
Once the bird is rolling consistently with the treat in your hand, start fading the lure. Begin by using an empty hand to make the same arc motion, then reward from your other hand immediately after the roll. Progressively reduce how obvious the hand motion is until you are using a small, clean signal. This is now your hand-signal cue. Add a verbal cue ('roll over' or 'roll') at the same moment you give the hand signal, repeated consistently for several sessions, and the bird will learn to respond to both.
Timing, repetition, and cue control
Timing the marker is everything in trick training. You need to mark the exact moment the desired behavior happens, not a second after. If you are shaping a lean, mark the lean. If you are shaping the side-lying position, mark the moment the bird settles onto its side. Late marking means the bird gets reinforced for whatever it did after the behavior, which causes confusion and slows progress considerably.
For repetition, aim for five to ten clean trials per session. Do not drill the same step more than ten times in a row; fatigue and frustration both look like the same thing in birds (turning away, preening, refusing treats). If that happens, end the session or drop back to an easier step for a few easy wins before stopping.
Cue control means the bird only performs the roll when you give the signal, not randomly or on its own initiative. To build this, keep your hand still and neutral between trials. Only give the cue when you are ready and waiting. If the bird offers a roll without a cue, simply do not reward it. This teaches the bird that the behavior has value only in response to the signal, which is what you want for a reliable, on-cue performance.
The transition from verbal to hand signal (or using both together) is flexible. Most owners use a hand signal as the primary cue because it is easier for the bird to read during the luring phase, then add the verbal cue on top. Some birds, especially those already tuned into voice, pick up the verbal cue quickly. You can eventually test each cue independently to confirm the bird knows both.
Troubleshooting common problems and regressions
The bird refuses to lie down
This is the most common sticking point. Lying on the side feels unnatural and exposed for a prey animal, and some birds need significantly more time at step 2 (the lateral lean) before they will commit to step 3. Slow down, reward smaller tilts, and build duration in the lean before asking for a full side-lying position. Never push or force the bird into position; forced lying-down creates fear associations that are very hard to undo. Punishment may suppress behavior temporarily through fear rather than teaching the alternative behavior reliably punishment can suppress behavior temporarily through fear.
The bird rolls the wrong direction
Birds often have a preferred side, just like humans. If your bird consistently tries to roll to the right when you are cueing left, let them. Teach the roll in their preferred direction first to build the behavior chain, then attempt the non-preferred side as a separate, later project. Do not fight the preferred side early in training.
Partial reps or stopping midway
If the bird starts the roll but does not complete it, you moved through the shaping steps too fast. Go back to the last step the bird did confidently and consolidate it for a few more sessions before asking for more. You can also try a higher-value treat to pull the bird through the full motion.
Loss of motivation or disinterest
If the bird stops taking treats or starts ignoring the training session, end immediately. Possible causes: the bird is not hungry enough, the treat is not high-value enough, the session is too long, or the bird is overtired. Try switching to a different treat, training at a different time of day, or shortening sessions to just two or three trials until engagement comes back.
Backing away or avoidance when approached
This signals the bird is uncomfortable with the physical proximity or the training surface. Go back to basics: hand-feed treats without asking for anything, let the bird come to you, and rebuild the positive association with the training area from scratch. Approaching slowly, from the side rather than head-on, reduces the threat signal significantly.
Regression after taking a break
Regressions are normal, especially after illness, a change in environment, or even just a few days off. Do not start from scratch; start from two steps below where the bird last was. Most birds re-acquire earlier steps very quickly and catch back up within a session or two.
Safety, handling, and species-specific considerations
The physical act of rolling does not hurt a healthy bird when done correctly on a padded surface with the bird's willing participation. The risk comes from forcing the motion, training on a slippery or hard surface, or working with a bird that is ill, injured, or otherwise compromised. Never train a bird that is showing signs of illness (fluffed feathers, lethargy, changes in droppings, or loss of appetite). Check with your avian vet if you are unsure.
Supporting the bird gently through the first few full rolls is fine and often helpful. Use an open, cupped hand under the back or shoulder rather than gripping. The distinction matters: a supportive hand reassures the bird; a gripping hand creates panic. Once the bird is rolling on its own willingly, remove the physical support entirely.
| Species | Typical readiness | Special notes |
|---|---|---|
| Cockatiel | Often fast learners; beginner-friendly | Watch for stress crests; ears-back posture means stop immediately |
| Budgerigar | Can learn with patience; small body makes luring easy | Very short sessions (2-3 min); high arousal means they may flutter instead of lying down |
| African Grey | Capable but cautious; intermediate difficulty | Needs high trust baseline; responds well to verbal cues once established |
| Amazon Parrot | Willing but can be nippy if pushed | Use back-of-neck scratches as a reward in addition to food if the bird enjoys them |
| Cockatoo | Emotionally sensitive; variable readiness | Emotional state matters enormously; skip sessions on difficult days |
| Lovebird / Conure | Energetic; may need extra time on step 2 | High-energy breeds may prefer very short bursts; keep sessions under 3 minutes |
For rehabilitated or permanently housed non-releasable birds, always confirm with the supervising rehabilitator or wildlife program coordinator that trick training is appropriate for that individual. Some birds have injury histories or trauma responses that make certain positions genuinely uncomfortable. Behavioral wellness should always take priority over performance goals.
It is also worth noting that roll over sits in the same family as other position-based tricks: teaching a bird to lay on its back, to play dead, or to spin all use overlapping skills and desensitization work. If your bird already knows one of those, roll over will likely come faster because the comfort with unusual body positions is already partially established. If you want a complete walkthrough, this guide on how to teach your bird to spin covers the same kind of lure-and-shape approach and cue timing.
Progress tracking and how to generalize roll-over
Generalization means the bird can perform the roll over reliably in different places, on different surfaces, with different people present, and not just in the one spot where you trained it. If you want to go further, this same approach helps when learning how to teach a bird to dance by making the behavior reliable in new situations generalization means. This is the step most owners skip, and it is why a bird that performs perfectly at the kitchen table stares blankly at you when you try the same trick in the living room. Generalize deliberately and early.
Once the bird is doing clean, on-cue rolls in your primary training spot for at least three sessions in a row, start introducing small changes one at a time. Change the surface (a different towel, a different table). Change the room. Add a second person in the background. Each change will likely cause a small temporary dip in performance; that is expected. Reward generously for any attempt in a new context, then gradually raise your criteria back to the full clean roll.
Here is a simple starter plan you can follow from day one:
- Days 1-3: Confirm all baseline behaviors (step-up, treat-taking, flat-surface comfort). No rolling yet.
- Days 4-6: Introduce the lateral lean lure. Five reps per session, two sessions per day. Mark any lean.
- Days 7-10: Shape toward side-lying. Add physical support if needed. Do not rush this phase.
- Days 11-14: Complete full rolls with lure. Aim for three consistent rolls per session.
- Days 15-18: Begin fading the lure. Introduce hand signal and verbal cue together.
- Days 19-21: Test hand signal alone, then verbal cue alone. Confirm the bird knows both.
- Week 4 onward: Generalization. New surface, new room, new audience. One variable at a time.
Your criteria for success: the bird completes a full roll from standing to standing within three seconds of the cue, without a treat lure present, in at least three different locations, with at least an 80 percent response rate over ten trials. That is a genuinely reliable, trained roll over.
Keep your training log going even after the trick is learned. A quick note after each session (date, location, number of trials, success rate, any issues) takes thirty seconds and gives you a clear picture of where your bird is and where small regressions start before they become big ones. Birds that perform tricks reliably are birds whose owners stayed consistent, paid attention, and kept sessions positive. That is really all it takes.
Once your bird can reliably roll over on cue, you can build other fun movement tricks, like how to make your bird dance, using the same positive-reinforcement timing. Once your roll over is reliable, you can use the same positive-reinforcement training approach to teach your bird how to play basketball how to teach your bird to play basketball.
FAQ
How do I know I’m marking at the right moment for roll over?
Use a marker as close as possible to the behavior you want (for example, the moment the bird settles onto its side, not the instant it stands back up). If your timing is off, go back one shaping step and mark for an easier target so you can practice cleaner timing before asking for the full roll.
What if my bird is willing to lean, but refuses to lie on its side?
Start with tiny, low-risk steps: reward a brief body tilt, then side-lying for one second, then longer holds. If your bird freezes at the side-lying step, it usually needs more repetitions at step 2 with slower treat movement and more reassurance, not more pressure.
Can I teach roll over on the living room floor or bed?
No, avoid training on slick or hard flooring. If you cannot use a towel on a stable table, use a thicker non-slip mat plus a towel or grip surface underneath. Slippery setups create instability that makes birds resist lying down or complete the roll.
What are the best treats, and what if my bird loses interest during training?
Choose treats based on how quickly the bird will work when slightly hungry, high-value is typically something the bird eats eagerly and selectively. If your bird becomes distracted, try smaller, more frequent bits, and switch treat types rather than continuing to lure when interest drops.
My bird rolls over without being cued. Should I reward it to keep motivation up?
Between trials, keep your cues “off” and your body still, then only give the cue when you are ready to wait for the roll. If the bird rolls randomly, do not mark or reward those spontaneous attempts, wait for the cue, and reward only on-cue performance to build reliability.
What should I do if my bird starts the roll but never completes it?
If a bird starts rolling halfway and stops, it usually means the previous step was rushed or the bird is overwhelmed mid-motion. Consolidate the last fully reliable approximation for a few sessions, then resume the next arc more slowly, and consider a higher-value treat during the transition step.
How should I handle setbacks after a few days off or after my bird gets sick?
Falling back after travel, illness, or a break is normal. Do not restart from the very beginning, instead go about two steps easier than where you last succeeded (for example, reward the lean again before asking for side-lying), then rebuild step-by-step.
My bird performs perfectly at the training table but acts blank elsewhere. How do I fix that?
Introduce generalization after the roll is clean and on cue in your main spot for at least several sessions. Change only one variable at a time (room, then surface, then people), reward generously for attempts, and gradually raise your criteria back to the original standard.
How do I fade from lure to hand signal if the bird keeps looking for the treat?
If the bird does not accept a cue, reduce the challenge: use the same hand motion but with a smaller arc, or revert to lure for one to two sessions to reestablish the association. Then resume fading the lure carefully, because abrupt cue changes often cause confusion.
What stress signals mean I should stop, and how do I restart after a stressful session?
Stop the session immediately if your bird shows stress signs (tail tucking, frantic moving, refusal to take treats, prolonged turning away). The next session should be shorter and at an easier step, and you should rebuild the training-area comfort with simple hand-feeding before continuing.
Is it okay to physically support my bird during the roll over?
For safety, avoid pushing or gripping. Use a gentle open cupped support only during the earliest attempts if the bird benefits from reassurance, and remove support as soon as the bird can complete the roll willingly on its own.
Can I teach roll over to a rescued or rehabilitated bird?
Not in the usual “pet trick training” way. For wild or rehabilitated non-releasable birds, follow the rehabilitator or wildlife program coordinator’s guidance and ensure welfare goals come first, since trauma history or injury comfort can make certain positions inappropriate.