You can encourage a bird to fly safely and willingly through a combination of health checks, a secure environment, and positive reinforcement training built up in small steps. What you cannot do is force it, throw it, or rush it. Those approaches cause injury, destroy trust, and often set back any real progress by weeks. Whether you are a pet bird owner trying to give your parrot more exercise, or a rehabilitator working to get a recovering songbird airborne again, the core process is the same: check the bird is physically ready, set up a safe space, and reward every small step toward flight.
How to Make a Bird Fly Safely and Humanely

Maya Harris
5 Apr 2026
Encouraging flight vs. forcing it: know the difference first
Encouraging flight means creating conditions where a bird chooses to use its wings, builds muscle and confidence, and associates flying with good outcomes. Forcing flight means throwing, dropping, pushing off perches, or chasing a bird into the air. The second approach almost always backfires. Birds that are scared may jump or flap unpredictably, leading to collisions, feather damage, or injury. The RSPCA notes that frightened birds often launch themselves into the air instinctively, which is exactly why your environment needs to be escape-safe and hazard-free before any training session begins. Think of your job as setting the stage and letting the bird make the decision to fly.
This distinction also matters legally and ethically for rehabilitators. If you are working with a wild migratory bird, you are operating under a regulated framework, and the goal of that framework is release to suitable habitat once the bird is genuinely ready, not before. Rushing a bird into flight to meet a timeline you have in your head is not rehabilitation; it is a welfare risk.
Health, safety, and legal checks before you do anything else
Physical readiness assessment
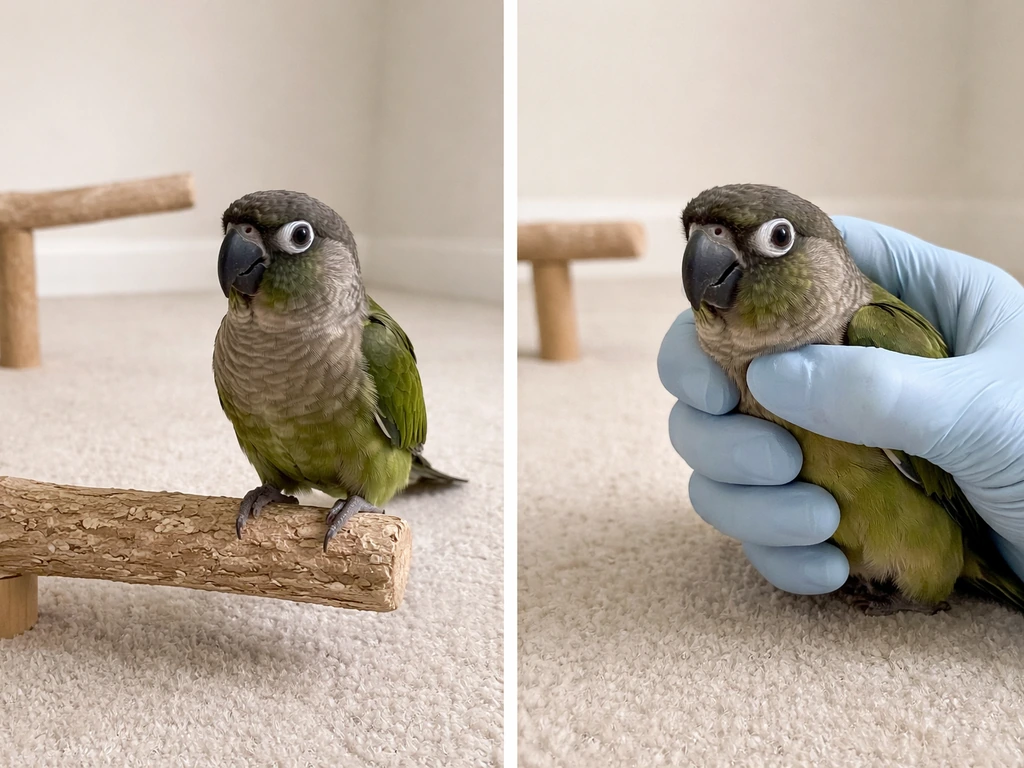
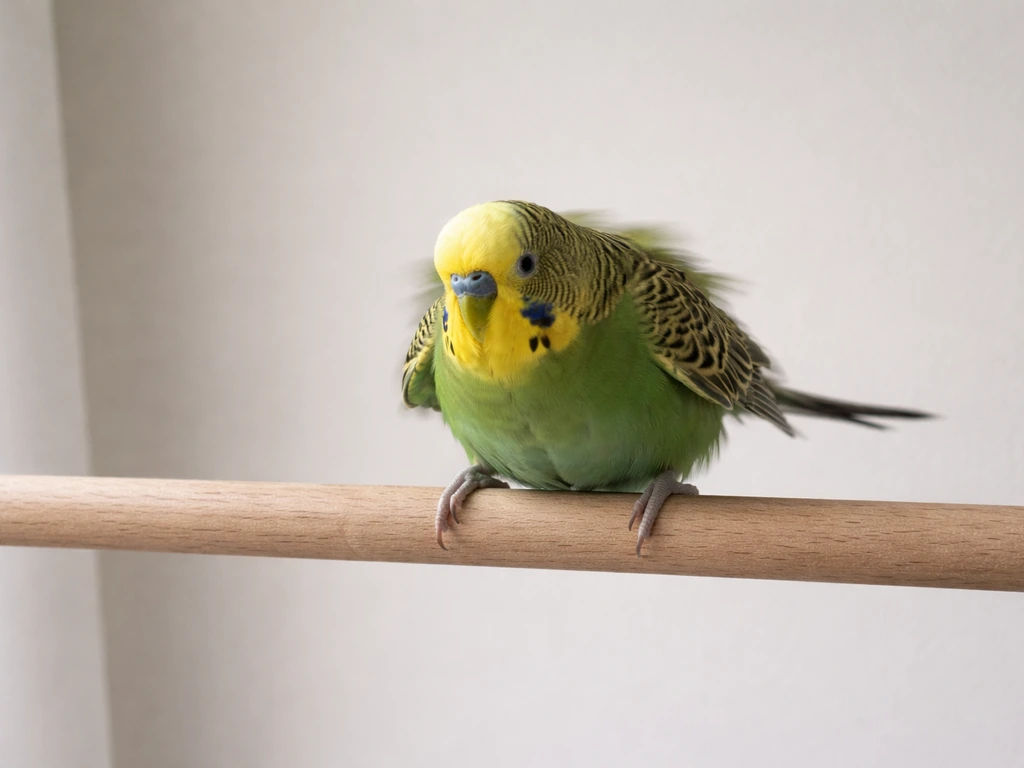
Before you ask a bird to fly, observe it carefully from a distance. The Merck Veterinary Manual recommends an observational exam before any manual handling, watching for respiratory rate and effort, posture, tail bobbing, wing position, and whether the bird is using one or both legs. These details tell you a great deal. A bird that can perch on both feet, holds its wings symmetrically against its body, and breathes quietly through a closed beak is a candidate for flight training. A bird showing any of the following signs is not ready and needs veterinary attention first.
- Open-mouth breathing or visible tail bobbing at rest
- A drooping or dangling wing on one side
- Inability to perch or use one leg
- Active bleeding, including from a blood feather
- Puffed feathers combined with lethargy or closed eyes
- Any visible swelling around a joint or along the wing
Wing fractures in larger birds can take roughly 4 to 8 weeks to heal properly with cage rest and therapy, so any sign of structural injury means you are weeks away from flight training at minimum, not days. If a bird is holding a wing incorrectly or cannot fly after what looks like a minor incident, there is a real possibility of fractures, nerve damage, or significant feather damage underneath. Get an avian vet involved before you try anything else.
Feather condition check

Feather condition matters more than most people realize. Poorly aligned or damaged flight feathers force a bird to work much harder to generate lift and stay airborne. A bird with heavily molted, clipped, or improperly repaired primary feathers will struggle even if it is otherwise healthy and motivated. If a rehabilitated bird has had feathers imped (replaced), check that they sit flush and aligned, because gaps between feathers allow air to leak through, reducing efficiency and tiring the bird quickly. Your vet or a licensed rehabilitator can assess whether feather condition is adequate for flight training to begin.
Legal requirements for rehabilitators
If the bird in your care is a wild migratory species, you need to be operating under a valid federal migratory bird rehabilitation permit, and that federal permit is only valid when you are also in compliance with your state's requirements. A veterinarian who stabilizes an injured migratory bird but does not hold a rehabilitation permit must transfer that bird to a federally permitted rehabilitator within 72 hours.
Once a bird is rehabilitated to a condition suitable for release, federal regulations under 50 CFR §21. 76 require that it be released to suitable habitat as soon as seasonal conditions allow. For birds that cannot be released, there are authorized alternative disposition pathways, but those require prior authorization and cannot be decided informally. If you are unsure where you stand legally, contact your state wildlife agency before proceeding.
Setting up a safe training environment
Space is the single most important variable. A bird cannot build flight muscle or confidence in a cage that barely lets it stretch its wings. For rehabilitating songbirds, a dedicated flight enclosure at minimum 5 feet wide by 24 feet long gives birds enough room to reach full flight speed and practice takeoffs and landings repeatedly. Cardiovascular conditioning depends on sustained flight, not just short hops. For pet birds training indoors, you need a room large enough to allow several wing beats between perches, ideally at least 10 to 15 feet across.
Hazard-proofing the space comes next. What helps a bird fly is not just muscle and motivation, it is also a space that does not punish a learning bird for making mistakes. Cover or turn off ceiling fans completely before any session. Ceiling fan collisions cause serious injuries and happen fast. Cover windows with opaque film, screens, or hang lightweight fabric across the glass: birds cannot see glass as a barrier and will fly into it at full speed. Block off any narrow gaps between furniture where a panicked bird could become trapped.
For outdoor aviaries, use a double-door entry system (sometimes called a porch or airlock) so the bird cannot escape if one door is opened. This is standard practice recommended by welfare organizations for exactly this reason: birds that get startled mid-session can make a fast exit if your setup allows it. Secure all mesh edges so there are no sharp points that could catch a wing on a fast pass. Place perches at varying heights to encourage vertical as well as horizontal flight, and position them so landing is easy and unobstructed.
Step-by-step training plan: from first perch hop to confident flight
Stage 1: Build trust and basic cooperation (beginner)
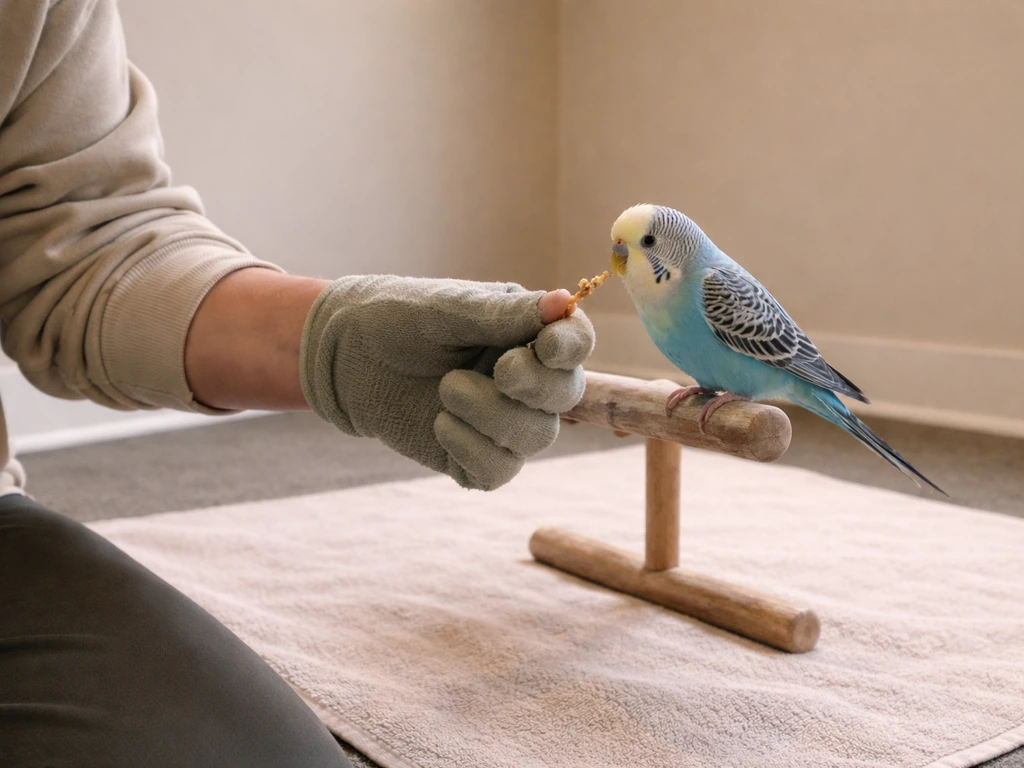
Before flight training starts, a pet bird needs to be comfortable with you and responsive to a basic step-up cue. Teaching a bird to step onto your hand on cue using positive reinforcement builds the foundation of trust and cooperative handling that every subsequent stage depends on. Use small, high-value food rewards (a piece of favorite fruit, a sunflower seed for seed-eaters) and keep sessions short: 5 minutes maximum, two or three times a day. Never push through resistance. If the bird backs away or bites, the session is over and you try again later with less pressure.
Stage 2: Perch-to-perch hops (beginner to intermediate)
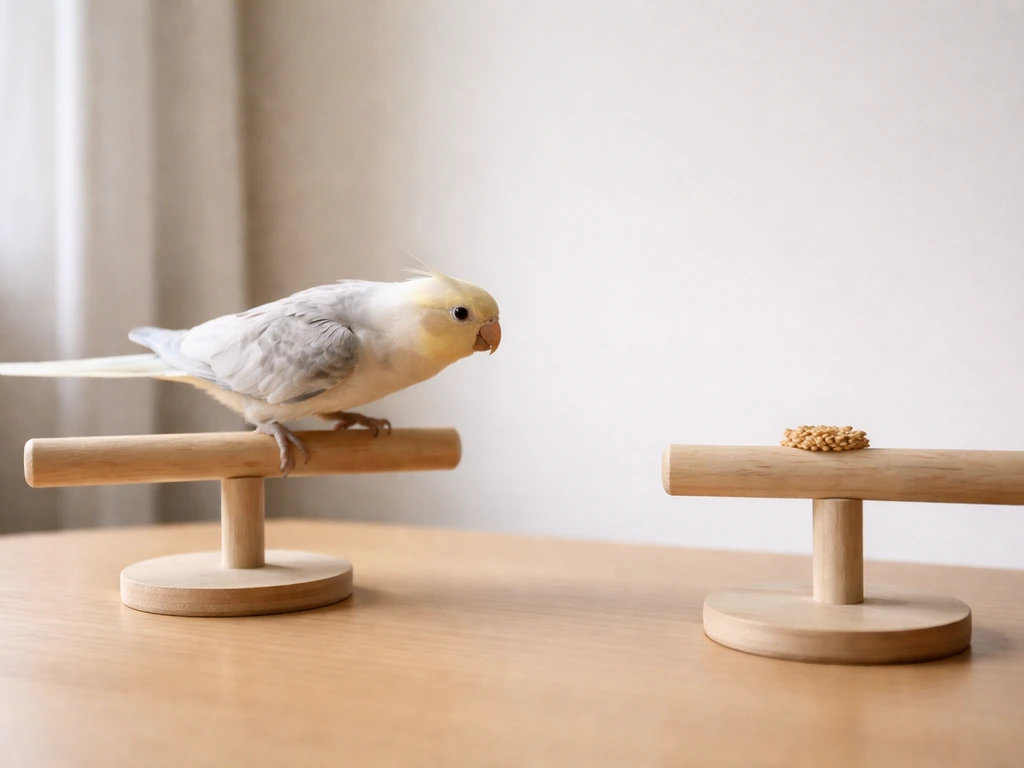
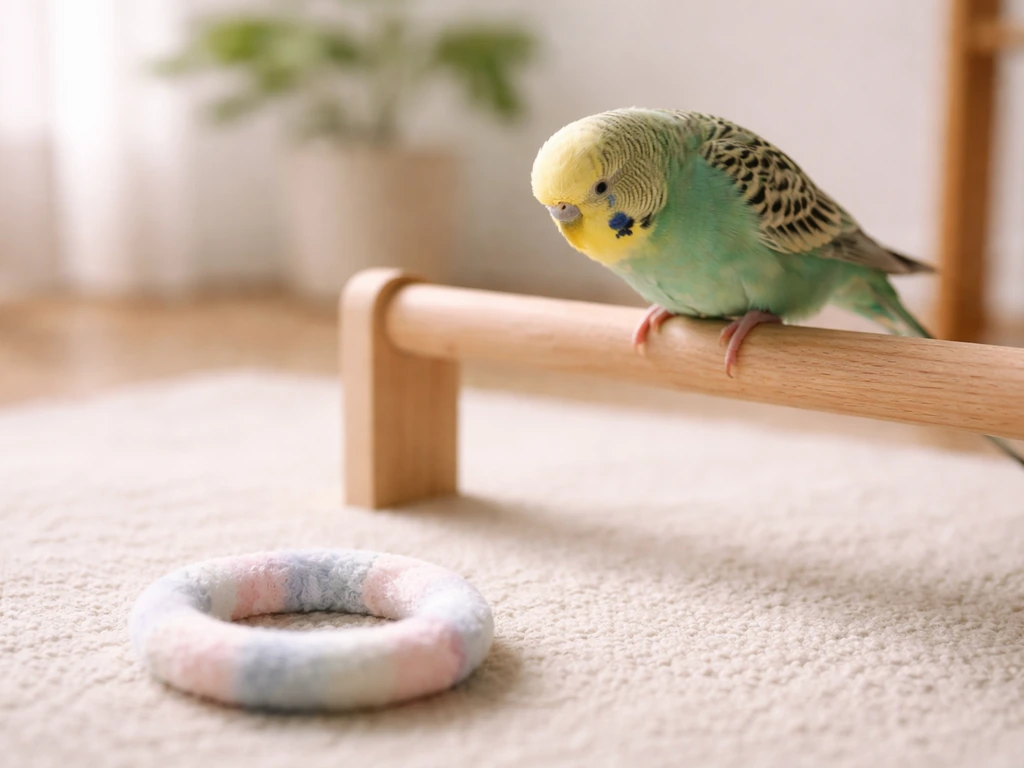
Place two perches about one body-length apart. Encourage the bird to move from one to the other by presenting a reward at the destination perch and using a consistent verbal cue, something simple like "fly" or "come." When the bird steps or hops across, reward immediately. Over multiple sessions, increase the distance between perches gradually: a few inches at a time, not feet at a jump. The goal here is not speed, it is building the bird's confidence that moving through the air toward a target results in something good.
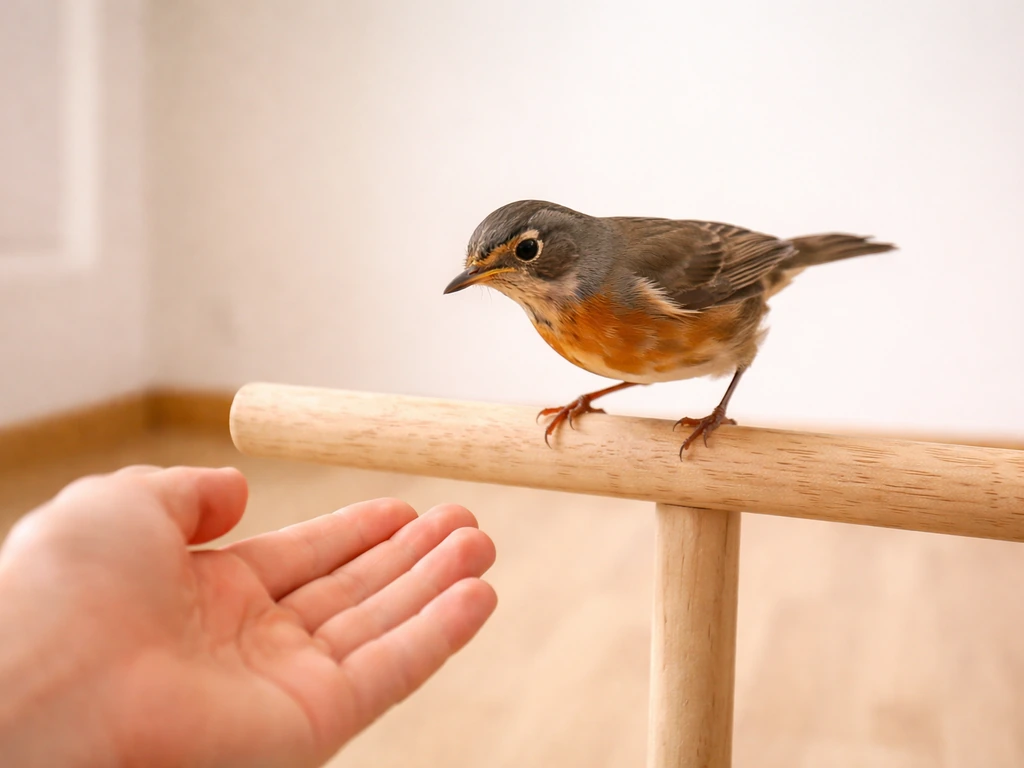
Stage 3: Short flights with a recall cue (intermediate)
Once the bird is hopping reliably between perches 2 to 3 feet apart, you can begin working a recall cue. Offer your hand or a target stick at increasing distances and reward every approach. The RSPCA also advises that you should be able to [train birds to step on and off a hand or small stick when asked](https://www. rspca.
org. uk/adviceandwelfare/pets/birds/training), and that training can include teaching them to fly to you or to other places such as their cage or perch on request. Training a bird to fly and come back on cue is one of the most important skills in this whole process, because a reliable recall is your safety net if something goes wrong.
Keep rewards highly consistent at this stage: the cue must predict the reward every single time or the behavior will not hold under real-world conditions.
Stage 4: Longer flights and free-flight preparation (advanced)
Only move to longer, more open flights once the recall is reliable and the bird is flying confidently between perches across the full length of your training space. Free-flight training for birds is described by avian behavior experts as extremely rigorous, even for birds that have the muscle and basic skill. A well-trained recall cue and reliable crating behavior (so you can end a session safely) are prerequisites, not optional extras. Do not attempt free flight outdoors until the bird has demonstrated consistent indoor recall across many sessions, and even then, start with a very secure, enclosed outdoor space before moving to open areas.
For rehabilitators, this stage corresponds to flight cage conditioning: placing the recovering bird in the flight aviary and allowing it to choose to fly on its own schedule, while monitoring for fatigue, crash landings, or respiratory distress after exertion. The bird should be able to sustain flight for progressively longer periods before you consider it release-ready.
What to expect from different species
Not all birds are working from the same starting point, and managing your expectations by species will save you a lot of frustration. Here is a practical breakdown.
| Species group | Flight style and training notes | Typical challenge |
|---|---|---|
| Parrots (cockatiels, budgies, African greys, macaws) | Intelligent and reward-motivated; respond well to step-up and recall training; may be reluctant if previously clipped | Clipped birds need time to regrow flight feathers before training is effective; fear of flying is common in long-clipped birds |
| Raptors (hawks, owls, falcons) | Require a licensed rehabilitator or falconer; flight conditioning in a large flight cage is essential before release | High injury risk if handled incorrectly; sharp talons and strong beak; legal permit required for wild individuals |
| Songbirds and passerines (robins, sparrows, finches) | Flock-oriented; flight conditioning works best in a species-appropriate flight enclosure; often recover quickly once healthy | Stress from close human presence; work at distance and minimize handling to reduce stress |
| Waterfowl (ducks, geese) | Need open water access and long flight runs; flight conditioning requires large space and appropriate habitat | Wing injuries heal slowly; waterproofing of feathers must also be assessed before release |
| Corvids (crows, ravens, jays) | Highly intelligent; can learn recall cues well; wild individuals require rehabilitation permits | Bond with humans easily, which can make release difficult; assess imprinting status early |
For pet parrots that have been clipped for a long time, the learning curve is real. These birds sometimes have no memory of flying and need to rebuild both muscle and confidence from scratch. Teaching a bird to fly after a long period of clipping requires extra patience at the perch-to-perch stage and may take weeks before the bird attempts anything resembling a sustained flight. That is normal. Do not interpret slow progress as failure.
Why the bird won't fly and what to do about it
Fear and reluctance to leave the perch
Fear is the most common reason a bird refuses to fly. It might be fear of the open space, fear of the unfamiliar room, or fear of you. The fix is almost always to go back a step: reduce the distance between perches to something the bird will attempt, reduce the number of people in the room, and make the reward more motivating. High-value treats vary by bird, so experiment. If the bird is eating well and interacting with you but simply will not launch itself into the air, it may just need more exposure to the training space with no pressure at all. Let it sit in the room, observe, and build comfort before asking for anything.
Poor takeoff or crashing on landing
Crash landings are normal early in training, but repeated crashes, especially ones where the bird seems unable to brake or steer, warrant a closer look. Check whether flight feathers are fully grown, undamaged, and properly aligned. A bird missing key primary feathers simply cannot generate enough lift for a controlled flight. If feathers look healthy, the issue may be pure muscle weakness from inactivity: keep sessions short, increase gradually, and give the bird recovery time between sessions. If a bird crashes and then shows any of the distress signs described earlier (tail bobbing, open-mouth breathing, wing droop), stop the session immediately and observe for at least 30 minutes before deciding whether veterinary care is needed.
Refusal to respond to the recall cue
If a bird that previously responded to a recall cue stops doing so, there are a few likely causes. The reward has lost its value (the bird is not hungry enough, or the treat has become boring), the training environment has changed in a way that increased stress, or the bird is not feeling well. Rule out illness first: a bird that suddenly becomes unresponsive or sluggish in training sessions should be assessed by a vet before more training is attempted. If health checks out, go back to basics with higher-value rewards and shorter distances.
Stress signals to watch for during training
- Feathers slicked tightly against the body (fear/stress posture)
- Rapid, shallow breathing after minimal exertion
- Biting, screaming, or aggressive lunging toward you
- Refusing food rewards that the bird normally accepts enthusiastically
- Repeated attempts to hide or face away from you
- Excessive preening or feather-picking after sessions
Any of these signals means you are pushing too hard or too fast. Shorten sessions, reduce the difficulty level, and give the bird more downtime. Stress does not build resilience in birds; it erodes trust and delays progress.
When to stop training and get professional help
Some situations are not training problems; they are medical emergencies. Stop training and contact an avian vet immediately if you observe any of the following: open-mouth breathing or obvious tail bobbing at rest, a wing that droops or hangs at an abnormal angle, collapse or inability to stand, active bleeding from a wound or blood feather, seizures, or any sign of trauma after a collision with a window or wall. These are not signs to "wait and see" on. Birds hide illness and injury well, and by the time signs are this obvious, the situation is often urgent.
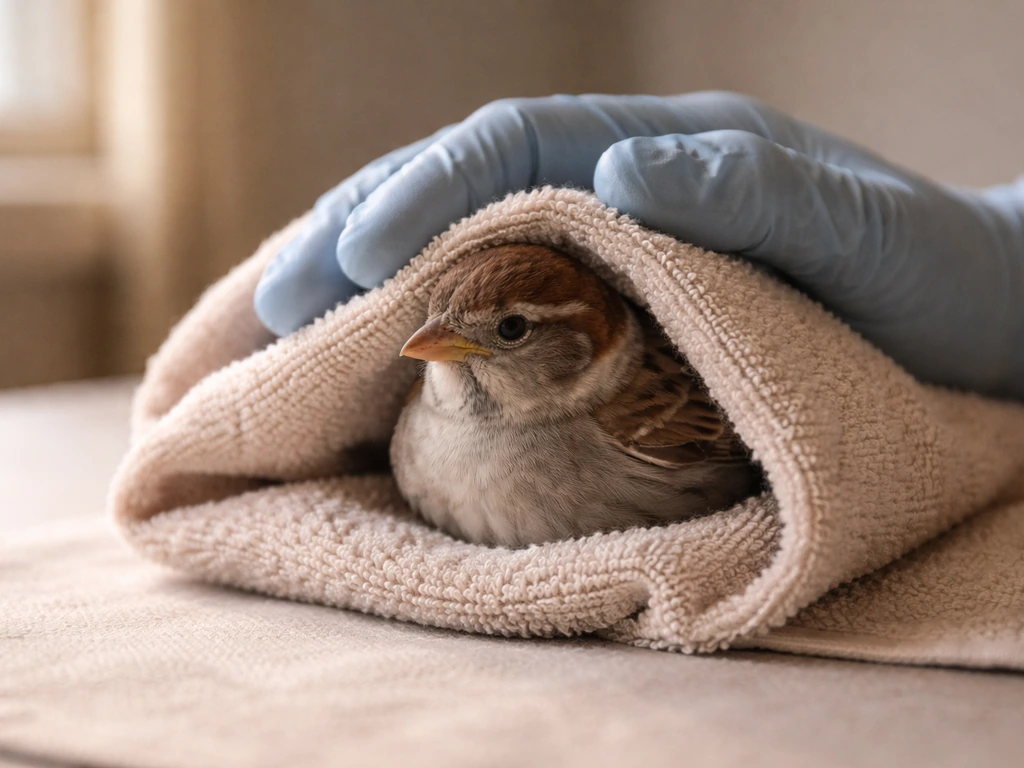
If you are working with an injured wild bird, do not attempt to handle or rehabilitate it yourself beyond initial stabilization (placing it in a secure, ventilated box in a quiet, warm location). The Raptor Trust explicitly warns against improvised care for injured birds, and for good reason: improper handling can worsen injuries, cause additional stress, and result in legal liability if the bird is a protected migratory species. Your job at that point is to get the bird to a licensed wildlife rehabilitator as quickly as possible.
For rehabilitators managing a bird that simply is not progressing toward flight readiness, the honest assessment is sometimes that the bird is not going to be releasable. Federal regulations are clear that rehabilitated birds should be released to suitable habitat as soon as seasonal conditions allow, but they also provide authorized pathways for birds that cannot be released to the wild. Non-releasable status must be determined in consultation with your permit authority and a vet, not as a personal judgment call. What to do if your bird flies away is a separate concern, but it reinforces why having a solid safety plan before any open-space flight is essential: once a bird is out, recovery is never guaranteed.
The overall principle here is readiness over persistence. A bird that is not ready to fly will not be made ready by trying harder. Pushing a bird that is in pain, stressed, or physically unfit into flight attempts causes harm and sets back recovery. When progress stalls, the right move is always to step back, reassess, and get expert eyes on the situation if needed. That is not giving up; that is good practice.
FAQ
What if my bird is excited and keeps trying to launch, but I am not sure it is physically ready yet?
Start by doing nothing for flight training until you confirm readiness, then begin with perch-to-perch hops only. If you cannot find a way to safely prevent window and ceiling-fan exposure, postpone training and focus on step-up plus comfort in the same room, because panic during a first attempt is the main setup failure.
How do I tell the difference between normal early progress and me going too fast?
Avoid “airtime tests” like short throws or letting it jump from heights. Use a measured progression: keep perches about one body-length apart first, then increase a few inches at a time, and only advance when it can land and immediately re-perch without distress signals.
My bird ignores the “fly” or “come” cue during training. What should I change first?
Many birds redirect attention to other sounds or movement, so choose a consistent, quiet room and keep distractions minimal. If the bird ignores the cue or refuses the reward, reset the session (shorten it, use higher-value treats, and reduce distance), rather than repeating the cue louder or longer.
What should I do if my bird keeps stepping down or refuses to cross to the next perch?
If your bird steps off the perch during early training, treat it as a sign the distance or setup is too hard. Reduce to the previous successful distance, ensure the landing perch is stable and easy to reach, then reward any attempt to move toward the destination, not only complete crossings.
When is it no longer training and becomes an emergency?
Stop and contact an avian vet if you see tail bobbing or open-mouth breathing at rest, a drooping wing angle, collapse, bleeding, seizures, or signs of trauma after a collision. Birds hide problems, so “it seems fine after a few minutes” is not a reliable safety check.
What if my bird used to come reliably on cue but suddenly stopped?
If recall suddenly drops, first rule out health, then check reward logistics. Make sure the treat is fresh, genuinely motivating, and delivered immediately at the moment of the approach, also confirm the cue and body positioning are consistent across sessions.
Is it safe to practice recall near open doors or near windows if I watch closely?
For pet birds, do not rely on open doors, screens, or “mostly safe” areas during recall practice. Practice only in the fully hazard-proof room you have already prepared, because one escape route or glass exposure can turn a recall drill into a lost-bird scenario.
How should I end a training session safely so my bird does not get stressed or injured?
Use a consistent end-of-session routine, then stop before fatigue and before the bird shows repeated crashes or refusal. Reliable crating or a predictable safe stop process matters because it prevents you from extending sessions in a way that increases stress or risk of injury.
My parrot has been clipped for a long time. How long should I expect the early stages to take?
Because clipped or long-term clipped birds may lack a flight memory, keep expectations lower and spend more time on confidence-building steps, short hops, and step-up trust. If you do not see attempts after several sessions at the previous level, reassess feather condition and overall comfort with an avian vet or licensed rehabilitator.
What if my bird is molting or feathering looks messy during training?
If a bird is molting, be cautious with progression, because flight feathers and control can be partially compromised. If feathers look misaligned, recently broken, or the bird crashes more than usual, slow down to the last comfortable level and consider a vet evaluation.
I found an injured wild bird. What is the safest next step before any flight attempts?
For wild migratory birds, do not attempt independent rehabilitation beyond initial stabilization in a secure, ventilated container. Your first next step is getting the bird to a federally permitted wildlife rehabilitator within the required timeframe, because permitting rules can also affect who can legally transport the bird onward.
My bird is crashing during early training. How do I decide whether to adjust the plan or get medical help?
If the bird crashes and then can still perch and eat normally, return to shorter distances and allow longer recovery windows between sessions. If crashes become repeated, if the bird cannot brake or steer, or if distress signs show after exertion, escalate to veterinary assessment before trying again.
Next Articles
What Helps a Bird Fly: Humane Steps and When to Get Help
Humane, step-by-step help for a bird not flying: safety checks, likely causes, calm support, and rehab timing.
How to Teach a Bird to Fly to You Safely Step by Step
Humane step-by-step flight-to-you training for pet birds, plus safe guidance for wild birds and troubleshooting fears.
How to Teach a Bird to Fetch Step by Step Guide
Humane, step-by-step training to teach your bird to fetch safely, with targets, rewards, troubleshooting, and gradual re