If a bird in your care isn't flying right now, the most important thing you can do is stay calm and move slowly. Whether it's a pet parrot that landed wrong, a wild songbird you found on the ground, or a bird recovering from illness, the steps you take in the next few minutes matter more than anything else. This guide walks you through exactly what to do today: how to check for life-threatening problems, stabilize the bird humanely, figure out the most likely cause, and decide whether you're dealing with something you can handle at home or something that needs a vet or wildlife rehabilitator.
What Helps a Bird Fly: Humane Steps and When to Get Help

Maya Harris
3 Apr 2026
Your first five minutes: check safety, injury, and breathing
Before you touch the bird, observe it from a short distance for 30 to 60 seconds. You're looking for three things: is it breathing, is it bleeding, and is it in immediate danger from a predator, traffic, or other hazard? If any of those answers are yes, you need to act right away. If the bird is just sitting still and alert but not flying, you have a moment to assess more carefully.
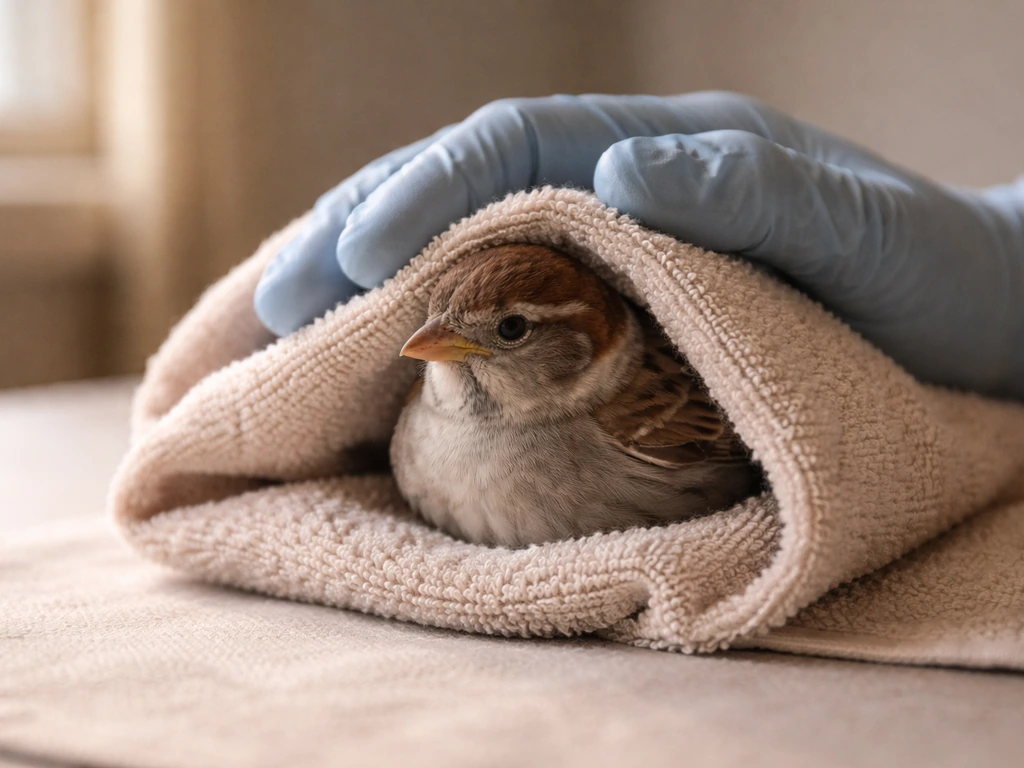
When you do pick it up, use a light towel or cloth rather than bare hands. This reduces stress for the bird and protects you from bites or scratches. Fold the towel gently around the body, keeping the wings against its sides. Never squeeze the chest, because birds breathe using thoracic movement and even mild compression can be dangerous.
Once you have the bird secured, do a quick head-to-tail check before placing it in a container. Here's what to look for:
- Breathing: Is the bird breathing with its mouth open or bobbing its tail with each breath? Open-mouth breathing and tail bobbing while breathing are emergency-level signs that require veterinary attention immediately.
- Bleeding: Is there active blood flow, or just dried blood in the cage or on feathers? Most minor bleeding from skin wounds will clot on their own, but uncontrolled bleeding from a broken blood feather, beak, or nail is urgent.
- Eyes: Are both eyes open and tracking? A swollen, closed, or protruding eye is a red flag that warrants a vet call.
- Posture and neurological signs: Is the head twisted sharply to one side or held upside down? Can the bird stand? Inability to stand, or a severely abnormal head position, signals a neurological problem.
- Wings and legs: Do the wings hang asymmetrically at rest? Is one leg dragging? These can indicate fractures or soft tissue injury.
If you see any of the red flags above, skip ahead to the section on when to contact a vet or rehabilitator. If the bird looks stable, move on to containment.
Why birds can't fly: the most common causes
Understanding what's happening helps you respond correctly and communicate clearly with a vet or rehabilitator. The causes fall into a few main categories.
Trauma and injury
This is the most common cause for wild birds. Window strikes, cat or dog attacks, vehicle collisions, and entanglement in fishing line or hooks all cause trauma. A bird caught by a pet, even briefly, must be seen by a licensed rehabilitator as quickly as possible because puncture wounds from claws and teeth introduce bacteria that can be fatal within hours, even if the bird looks fine on the surface. Similarly, birds with fishing line wrapped around legs, wings, or beaks need professional removal. Do not try to cut the line yourself in most cases, because this can tighten it or cause further injury. Keep the bird calm, contained, and get it to a wildlife center.
Illness and systemic disease
A sick bird often grounds itself before showing any other obvious symptoms. Pet birds especially hide illness until it's fairly advanced. Common culprits include respiratory infections, heavy metal toxicity, internal parasites, and viral disease. If your pet bird has been flighted and suddenly refuses or struggles to fly, treat it as a potential illness and schedule an avian vet visit. For wild birds showing signs of illness such as eyes swollen shut, inability to stand, or extreme lethargy, contact a rehabilitator rather than attempting home care.
Feather problems
Flight feathers that are broken, severely barbered, or missing from over-preening, nutritional deficiencies, or a previous clip won't support flight. This is not a medical emergency but it does mean the bird will need time to molt and regrow feathers before it can fly well again. For pet birds, this is also a good time to look at diet quality, because poor feather condition often points to nutritional gaps.
Wing and leg injuries
Fractures, sprains, and dislocations in the wing or leg can ground a bird completely. A wing hanging lower than normal or held at an abnormal angle is the classic sign. Leg injuries can affect a bird's ability to grip a perch and launch into flight. These need veterinary diagnosis. You cannot splint a bird's wing safely at home without training and proper materials.
Shock
A bird that has hit a window or been chased by a predator may be in shock even if it has no visible injuries. Signs include sitting very still, fluffed feathers, eyes half-closed, and no response to nearby movement. Some stunned birds recover completely with quiet rest in a dark, warm space. Others may have internal injuries that aren't visible. Always treat a potentially shocked bird as if it may have serious injuries until you know otherwise.
Humane handling and calming: what to do right now

The single most important thing you can do for a bird that can't fly is to reduce its stress load. Stress alone can be fatal for wild birds, and even pet birds can go into cardiac stress during handling. Here's how to handle and contain the bird safely.
- Use a towel or cloth to pick up the bird gently, keeping wings against the body. Avoid gripping the chest.
- Place it in a well-ventilated box or container lined with a clean towel or paper towel. A cardboard box with small air holes works well. For small wild birds, a paper bag with the top loosely folded works in a pinch.
- Cover the carrier or box with a towel on at least three sides to minimize visual stimuli. Darkness reduces panic and encourages rest.
- Keep the container in a warm, quiet room away from pets, children, and noise. Room temperature around 80 to 85°F (27 to 29°C) is generally appropriate for most small birds in distress, but watch for signs of overheating like open-mouth breathing.
- Do not use a heat lamp or bare lightbulb directly on or near the container. Direct light sources keep the bird awake, cause dehydration, and risk burns.
- Leave the bird alone. Resist the urge to check on it every few minutes. Repeated handling increases stress significantly.
- Do not offer food or water unless you've been specifically advised to do so by a vet or licensed rehabilitator. Attempting to drop liquids into a bird's mouth carries real aspiration risk, and feeding the wrong food at the wrong time can cause additional harm.
For active bleeding, you can apply gentle pressure with a clean cloth. If a broken blood feather (a feather still actively growing, visible as a darker, waxy-looking shaft) is the source, contact your avian vet about whether to remove it. Don't wrap wounds with anything that will adhere to feathers. Vet wrap or roll gauze are the right materials if you need to protect a wound temporarily before transport.
Basic rehab principles: rest, warmth, and hydration
If you're managing recovery at home for a pet bird under veterinary guidance, or you're a licensed rehabilitator, the core framework is simple: warmth, rest, and appropriate nutrition at the right time.
Warmth matters because injured and ill birds lose the ability to thermoregulate efficiently. A warm environment (not hot) keeps the bird from burning energy just to stay alive. The bird should feel warm to the touch but not be breathing with its mouth open, which would indicate overheating. A heating pad set to low under half the container, so the bird can move away from the heat if needed, works well for many situations.
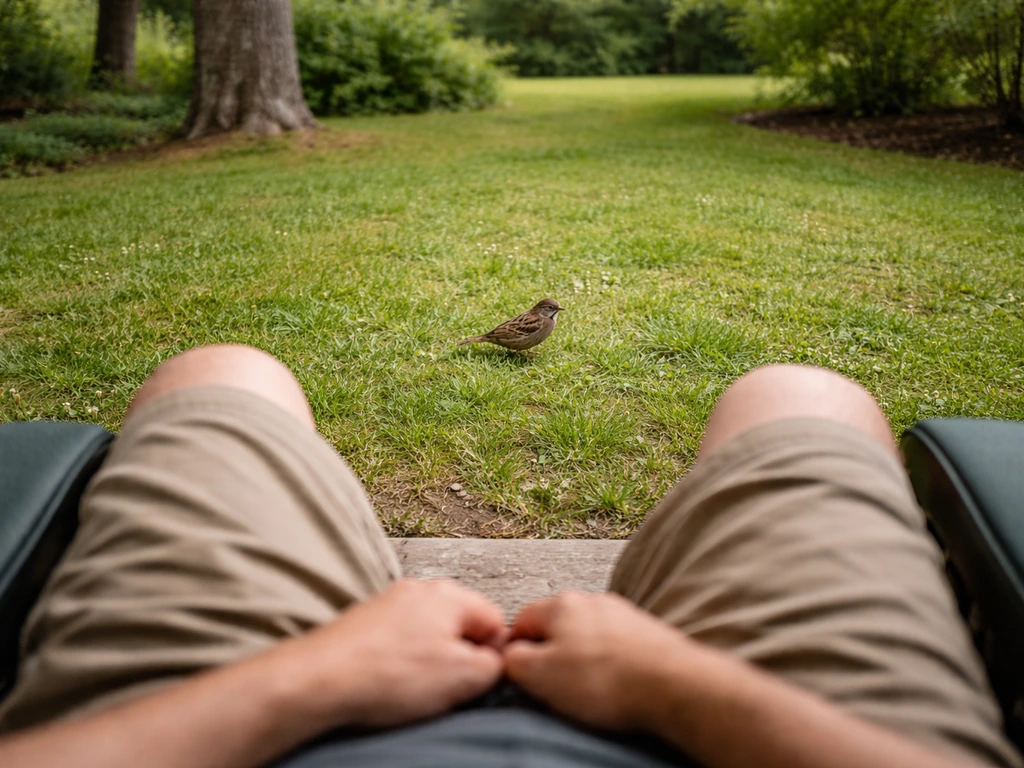
Rest comes before any flight conditioning or training. A bird that hasn't yet stabilized should not be encouraged to fly. Keep the environment calm, perches low to the ground (so a fall won't cause further injury), and the space small enough that the bird isn't forced to attempt flight. For wild birds, the goal during the early phase is to minimize human contact as much as possible to preserve wildness.
Hydration and feeding should only be reintroduced once the bird is stable, alert, and standing on its own. Help Wild Birds also warns not to feed a wild bird and notes that blank" rel="noopener noreferrer">force-feeding can do more damage than good. For wild birds in your temporary care, wait for professional guidance. Commenters in r/birding rehab threads commonly emphasize blank" rel="noopener noreferrer">not giving food or water to a baby, fledgling, or injured bird unless directed by a licensed rehabilitator, due to risks from improper diets and aspiration. For pet birds recovering at home, follow your vet's specific instructions about diet and fluid support. The general rule across multiple wildlife rehab organizations is clear: do not give food or water to a bird in the acute emergency phase unless a professional has told you to.
Once a bird has stabilized and you're moving toward recovery, flight conditioning can begin carefully. This is where teaching a bird to fly again becomes part of the rehabilitation process, but only after the vet or rehabilitator has cleared it for that stage.
Pet birds vs. wild birds: species-specific guidance
The approach you take depends heavily on whether you're dealing with a pet bird or a wild bird, and the size and species involved. Here's a practical breakdown.
| Bird Type | First Response | Food/Water? | Flight Conditioning | When to Escalate |
|---|---|---|---|---|
| Small pet bird (budgie, finch, lovebird) | Warm quiet box, low perch, cover cage | Follow vet advice; do not force-feed | Gentle short-distance encouragement once stable | Not eating for 24 hours, labored breathing, neurological signs |
| Medium-large pet bird (parrot, cockatiel, conure) | Towel wrap, padded carrier, minimize handling | Avian vet guidance only in emergency | Graduated perch-to-perch training once cleared | Any uncontrolled bleeding, open-mouth breathing, or sudden collapse |
| Small wild songbird (sparrow, wren, warbler) | Dark ventilated box, 1-hour quiet rest, then contact rehabilitator | No food or water | Not your role; hand to rehabilitator | All cases; contact a licensed rehabilitator |
| Waterfowl or shorebird | Large box or tub, keep feathers dry, minimal handling | No food or water | Not appropriate at home | Immediately; these birds have specialized needs |
| Raptor (hawk, owl, falcon) | Thick gloves, large dark box, do not handle unless trained | Never attempt feeding | Trained rehabilitators only | Immediately; raptors are dangerous to handle and have complex needs |
Raptors and large birds of prey are a category of their own. Their talons can cause serious injury to an untrained handler, and their flight and conditioning needs require specialist knowledge. If you find a grounded raptor, call a licensed wildlife rehabilitator or your state/local wildlife agency before you do anything else.
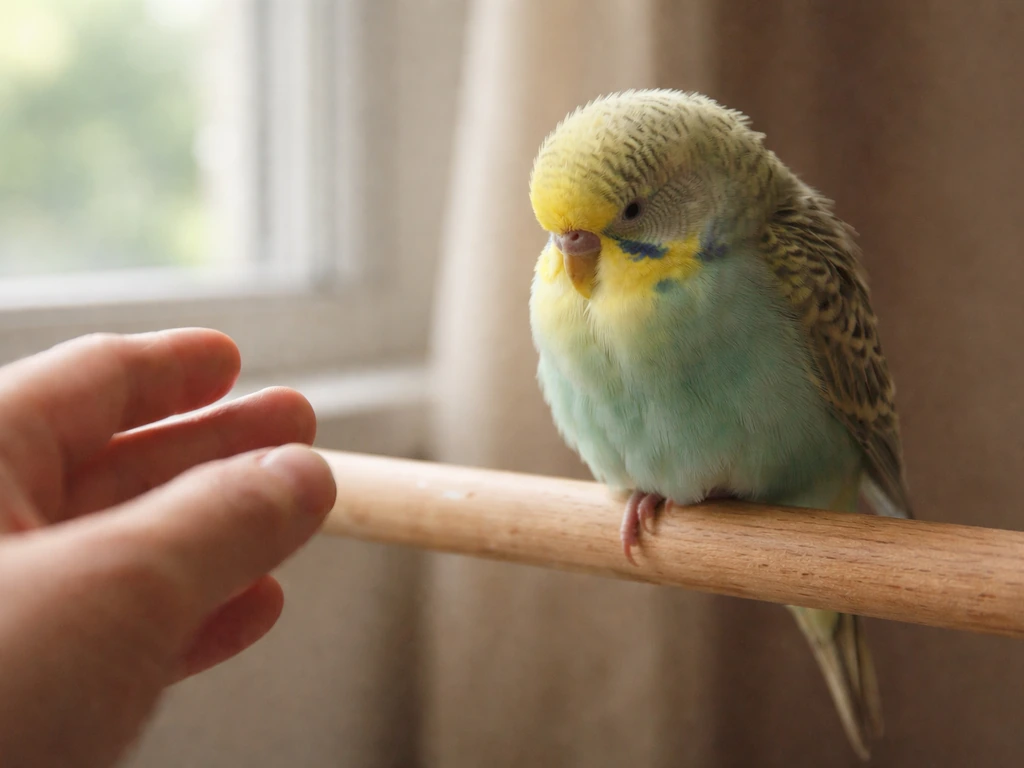
For pet bird owners who want to support a bird's flight ability over the long term, the environment plays a huge role. If you're not sure how to make a bird fly in a safe, home setting, start with understanding what the right space and perch setup looks like before introducing any flight exercises.
Stop here if you see these red flags: when to call a vet or rehabilitator
Some situations are beyond home management, no matter how well-intentioned you are. Here are the clear signs that you need professional help today, not tomorrow.
- Open-mouth breathing or tail bobbing with each breath (respiratory distress)
- Bleeding that won't stop after a few minutes of gentle pressure
- Head held twisted sharply to one side, or tilted nearly upside down
- Eyes swollen shut, closed, or protruding abnormally
- Inability to stand or perch at all
- The bird was caught or struck by a cat, dog, or other predator (even with no visible wounds)
- Fishing line, hook, or foreign material entangled around any body part
- No improvement or worsening condition after one hour of quiet rest in a warm dark box
- Any wild raptor, owl, or large waterbird on the ground
For wild birds, contact a licensed wildlife rehabilitator as quickly as possible after initial containment. Every hour matters with an injured wild bird. You can find licensed rehabilitators through your state's wildlife agency, the National Wildlife Rehabilitators Association, or by searching for local wildlife rescue organizations. Get the bird to them, don't wait for the bird to 'seem better.'
For pet birds, call an avian vet specifically, not a general practice vet if you can avoid it. Avian medicine is specialized, and a vet without bird experience may not recognize subtle signs of serious illness. The Association of Avian Veterinarians (AAV) has a vet locator tool that can help you find a qualified specialist in your area.
If your bird was flighted and has escaped or flown away during this process, that's a separate but urgent situation. Knowing what to do if your bird flies away before it happens (or the moment it does) can make the difference between a recovery and a permanent loss.
Building flight back up: training and conditioning once the bird is stable
Once your bird has been cleared by a vet or rehabilitator for flight activity, the process of rebuilding its flight confidence and muscle is gradual. Pushing too fast causes setbacks. Here's how to approach it practically.
Set up the right environment first
The space matters as much as the training itself. For pet birds, this means a room that is bird-proofed: windows covered or blocked with curtains (so the bird doesn't fly into glass), mirrors identified, ceiling fans off, and no open water sources like toilets or fish tanks. Perches should be at multiple heights so the bird can practice landing at different levels without long flights at first. Keep the initial training space small so the bird doesn't have to fly far to reach a perch or your hand.
Start with short, rewarded flights
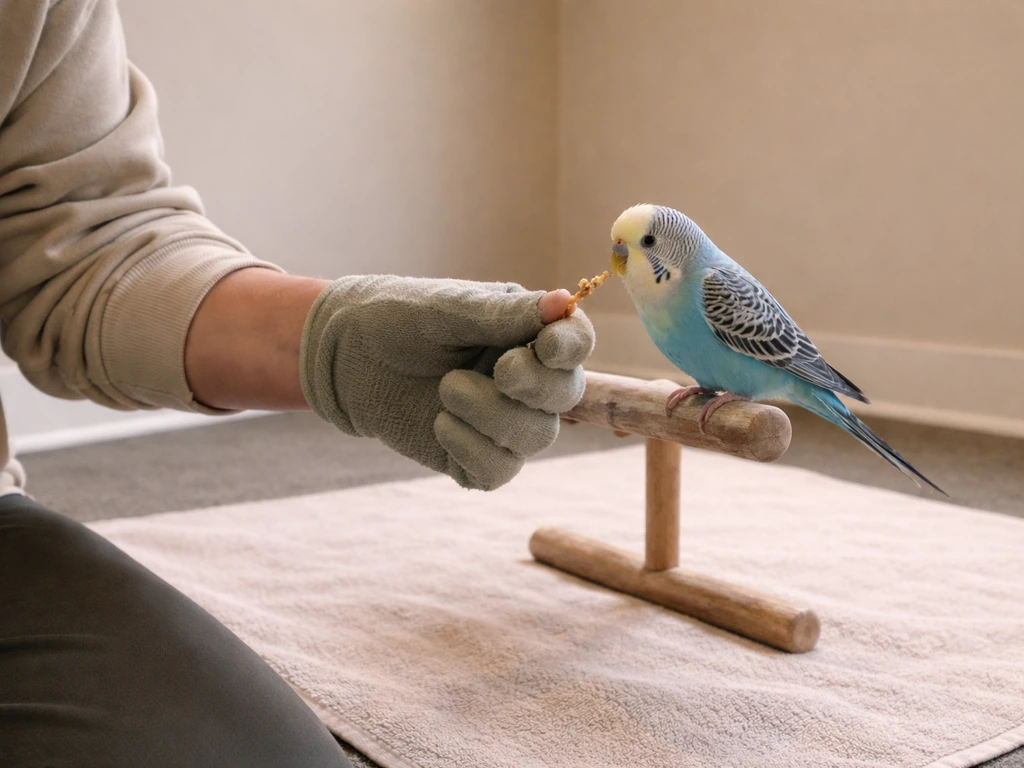
The foundational exercise is a simple perch-to-hand or perch-to-perch recall. Hold your hand or a perch 6 to 12 inches from where the bird is sitting and encourage it to step or hop across. Reward immediately with a favorite treat or calm verbal praise. Over several sessions, gradually increase the distance by a foot or two at a time. The goal is to build muscle tone and confidence together. Never force the bird off a perch or throw it into the air to 'make it fly.' That approach causes fear and can result in crash landings and re-injury.
For a more detailed, step-by-step approach to this kind of conditioning, the process of <a data-article-id="784977F3-9B57-498F-8CD5-A79E4KB9C5B2">training a bird to fly and come back on cue is one of the most practical skills you can build during recovery. It gives the bird a reason to return to you and keeps you in control of the training environment.
Progress to free flight only when the bird is consistently strong
Free flight, meaning unrestrained flight in an open or outdoor space, is the most advanced stage and is not appropriate during recovery. A bird that has been injured, clipped, or grounded for any length of time needs weeks to months of indoor conditioning before you consider outdoor flight. The risks of a recovering bird losing orientation, tiring quickly, or being unable to evade predators are real. If free flight is your long-term goal, understanding how to train a bird to free fly responsibly means building a foundation of reliable recall and physical conditioning first.
Keep sessions short (5 to 10 minutes maximum for a recovering bird) and end on a positive note before the bird shows signs of fatigue. Signs of fatigue include open-mouthed breathing after landing, reluctance to fly again, or clumsy landings. If you see these, the session is over. Rest is still doing the work at this stage.
Track progress and adjust
Keep a simple log of each session: how far the bird flew, how many flights, how it landed, and its energy level afterward. This makes it easy to spot trends and catch setbacks early. If a bird that was improving suddenly regresses, that's a signal to slow down and possibly revisit your vet. Recovery isn't always linear, and that's completely normal.
The overall process of rebuilding flight after an injury or illness is genuinely one of the most rewarding things to work through with a bird. Take it at the bird's pace, stay consistent, and you'll get there.
FAQ
If a bird is not flying, should I assume the worst and rush to a vet or rehabilitator immediately?
Not always. First check whether it is breathing normally and whether there are signs of life-threatening danger like active bleeding or exposure to traffic or predators. If those are present, treat it as urgent. If it is breathing, not bleeding heavily, and not in immediate danger, you can take a few minutes to stabilize and assess posture, but still plan professional help quickly if you suspect trauma, poisoning, or illness.
What should I do if the bird keeps flapping or panicking in its container?
Move it to a quieter, darker, warmer spot and keep the container small enough that it cannot launch into erratic flight or hit the sides. Briefly reduce handling, because repeated handling can worsen shock and stress. If the bird is overheating (open-mouth breathing), remove it from supplemental heat and restore a comfortable, not hot, temperature while you arrange guidance from an avian vet or rehabilitator.
Is it ever safe to give water or food to a grounded bird right away?
In the acute emergency phase, avoid food and water unless a vet or rehabilitator instructs you to. Birds can aspirate liquid into the airway when they are weak, shocked, or unable to swallow normally. Instead, focus on warmth and rest until the bird is alert, stable, and standing under professional guidance.
Should I try to cut off entangling material like fishing line if it looks easy to remove?
Usually no. Cutting can tighten the line and worsen injury to the leg, wing, or beak. The safer option is to keep the bird calm, contained, and seek professional removal, especially because lines can also hide circulatory damage under the skin.
My pet bird is alert but won’t fly and seems tense. How do I tell if it is pain or illness?
Look for patterns rather than one symptom. Pain often shows as an abnormal limb position, reluctance to perch or grip, or guarding a specific area. Illness more commonly shows as sudden refusal to fly plus whole-body changes such as lethargy, breathing changes, fluffed posture, or swollen eyes. If the bird was recently flighted and now struggles, treat it as a potential illness and contact an avian vet.
Can I splint a broken wing at home?
Do not attempt a wing splint unless you have training and the correct materials. Improvised splints can misalign bones, restrict breathing, or cause skin sores. A bird can also suffer internal damage even if the wing looks “not that bad,” so veterinary diagnosis is important.
How can I check for shock without over-handling the bird?
Use a calm, brief observation from a short distance first, then minimize touch. Shock can look like very still fluffed feathers, eyes half-closed, and low or absent response to nearby movement. If those signs appear, keep the bird warm and quiet, and treat it as potentially injured until a professional assessment.
What is the best way to transport a bird that can’t fly?
Use a ventilated container lined with soft material, and keep the bird upright or supported so it does not twist its body. Provide warmth indirectly (low heat under part of the container so the bird can move away). Avoid wrapping wounds with sticky materials that can adhere to feathers. Transport promptly, because timing matters especially for wild birds.
If my bird’s flight feathers are missing, does that mean I should start flight training right away?
No. Missing or damaged flight feathers typically require time to molt and regrow, and forced activity can delay recovery or lead to crashes. During the feather-regrowth stage, prioritize veterinary checks if there are other symptoms, and optimize nutrition and rest rather than flight conditioning.
When is free flight appropriate during recovery?
Free flight is the advanced final stage, not an early recovery step. Only consider outdoor or open-space flight after the bird has been cleared by an avian vet or rehabilitator and has reliable recall and physical conditioning indoors. Otherwise, the bird may become disoriented, tire quickly, or be unable to evade hazards and predators.
What should I do if training causes open-mouthed breathing or clumsy landings?
Stop immediately and end the session. Open-mouthed breathing after landing or reduced willingness to fly are fatigue signals, rest is the intervention, not “pushing through.” If these setbacks happen repeatedly, reduce session length further and revisit the recovery plan with your avian vet.
Next Article
How to Teach a Bird to Fly to You Safely Step by Step
Humane step-by-step flight-to-you training for pet birds, plus safe guidance for wild birds and troubleshooting fears.