Yes, you can litter train a bird, but it works differently than training a cat. Can you house train a bird? Yes, and this guide explains how to teach a consistent spot and timing association. Birds can't reliably hold their droppings on command the way mammals can, so what you're really teaching is a place and timing association: you learn when your bird naturally needs to go, you position them over a designated spot, and you reinforce the behavior with a reward. SpectrumCare similarly notes that “true toilet training” is usually inconsistent for birds and recommends using observation, timing, and positive reinforcement with a chosen potty spot and rewards for calm success blank" rel="noopener noreferrer">timing and positive reinforcement. Done consistently, many parrots, cockatiels, and other pet birds will begin moving toward or signaling at a preferred spot before eliminating. It takes patience and a realistic mindset, but it genuinely works for most healthy, socialized pet birds.
Can You Litter Train a Bird? Step-by-Step Guide

What litter training actually means for birds
Bird litter training is not a carbon copy of cat litter training. Cats have a degree of sphincter control that birds simply don't have. A bird's digestive system moves fast, and most small-to-medium birds eliminate every 15 to 30 minutes. Larger parrots like macaws or African greys can sometimes go 30 to 45 minutes between eliminations. Because of that rhythm, the training goal is really about you learning to read the bird and getting them to the right spot at the right moment, then reinforcing it so the bird starts to connect the spot with the act.
One important note: some avian vets and specialists raise concerns about pushing this training too hard. If a bird learns to associate a spot it can't always reach, it may try to hold it, which creates genuine health risk, especially when the owner is away or the routine changes. The approach described in this guide keeps that risk low by emphasizing frequent access and never punishing accidents.
Picking the right bird and the right setup
Which birds take to this most easily
Parrots of most sizes (budgies, cockatiels, conures, African greys, amazons, macaws) tend to respond well because they're highly food-motivated and bond closely with their owners. Corvids in appropriate rehab or educational settings also show strong learning potential. Wild birds and species that are not hand-tamed are not good candidates. The bird needs to be comfortable being handled and perched on your hand or a designated stand outside the cage. If your bird is still biting or clearly stressed when out of the cage, work on basic taming first before attempting potty spot training.
Setting up the cage and designated potty area
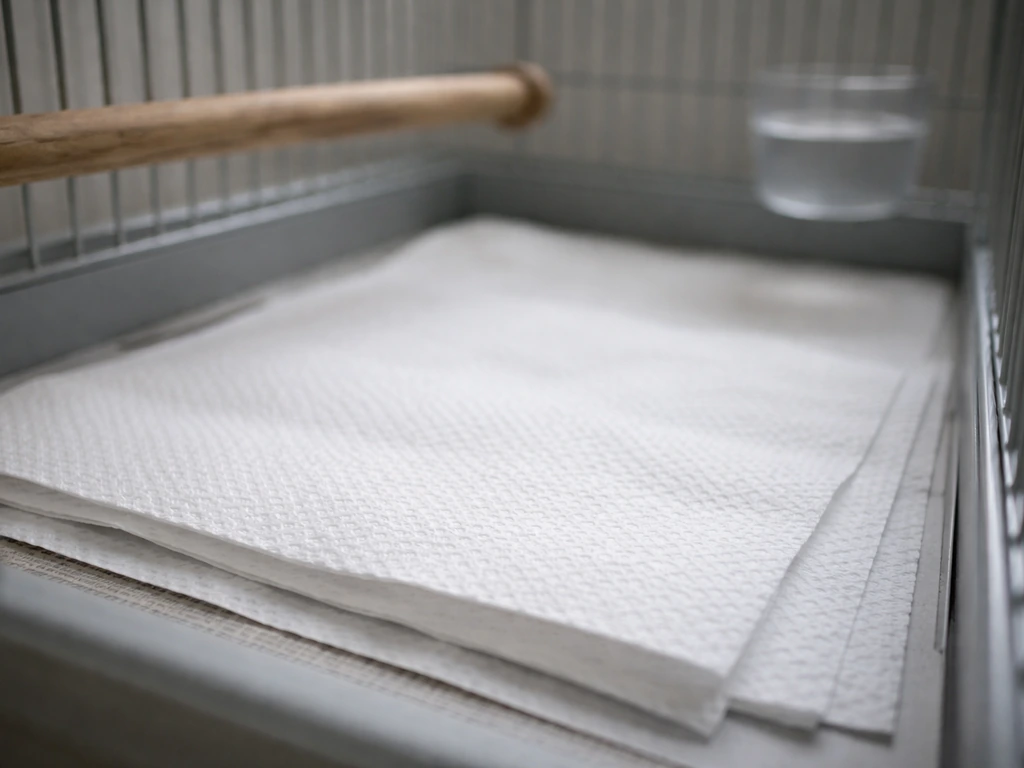
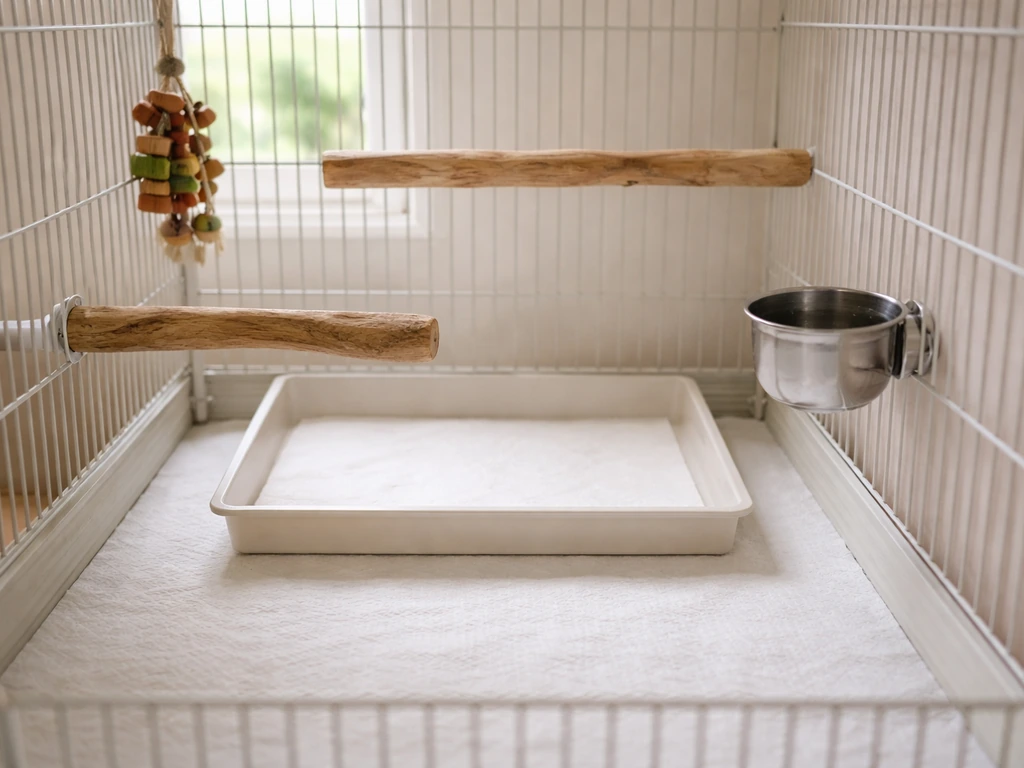
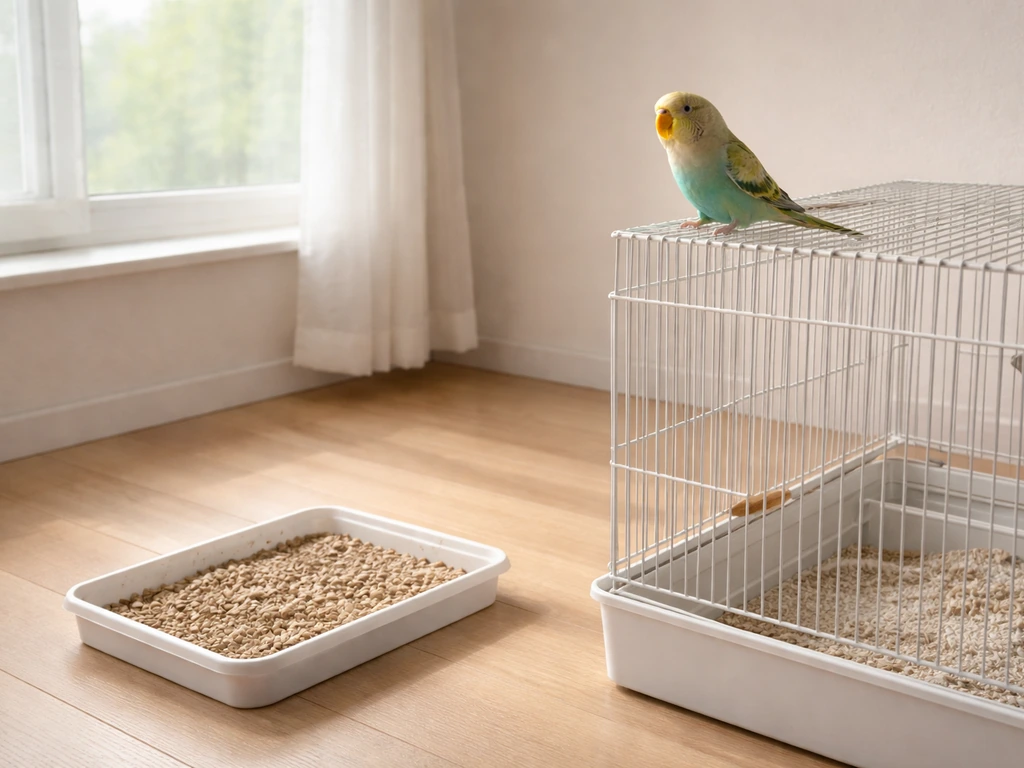
Inside the cage, keep the bottom lined with plain white paper towels, unprinted newspaper, or paper bags. These are avian-vet recommended substrates because they're easy to swap out, let you clearly monitor dropping color and consistency (which matters for health tracking), and don't harbor bacteria the way fabric or loose substrate can. Avoid wood shavings, corn cob bedding, or anything that stays damp, because wet surfaces are a direct risk factor for bumblefoot (pododermatitis), a painful footpad infection.
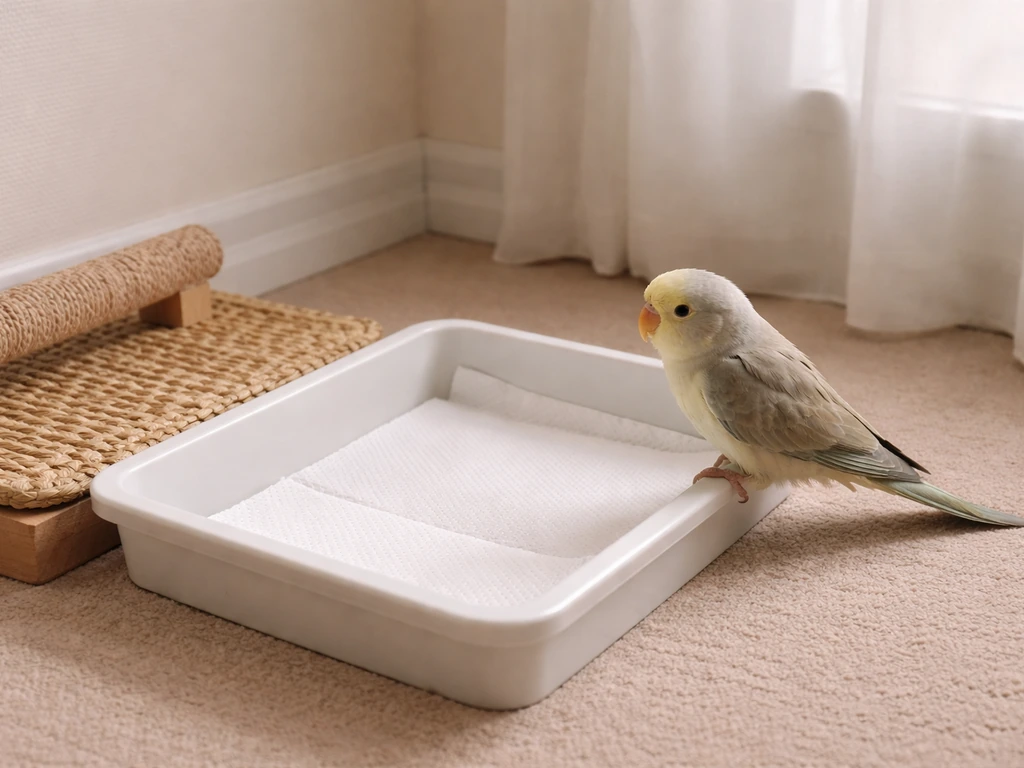
Outside the cage, set up a dedicated potty perch or tray. This can be a simple T-stand perch with a replaceable paper lining underneath, a tray covered with a paper towel, or a small flat surface your bird is comfortable landing on. The spot should be easy to access quickly, because timing is everything in this training method. Keep it in the same location so your bird builds a consistent mental map.
- Use plain paper towels or unprinted newspaper as the lining material — inside the cage and under the potty perch
- Place the potty stand somewhere you can move the bird to within seconds when you spot pre-elimination cues
- Keep the area dry at all times — damp litter or substrate dramatically raises bumblefoot risk
- Avoid scented litters, pine shavings, or any material that retains moisture
- If your bird spends time on a cage-top play gym, add a small tray there too so they always have an accessible spot
Step-by-step training workflow
- Observe your bird's natural elimination schedule for 2 to 3 days. Note roughly how many minutes pass between droppings when your bird is relaxed and out of the cage. Write it down — this is your training window.
- Learn the pre-elimination cues. Most birds give a subtle signal just before they go: a slight tail bob, a squat, shifting weight, or a brief pause in activity. These cues are your trigger to act.
- At the first sign of the cue (or just before the expected time window closes), pick up your bird calmly and move them to the designated potty perch or tray.
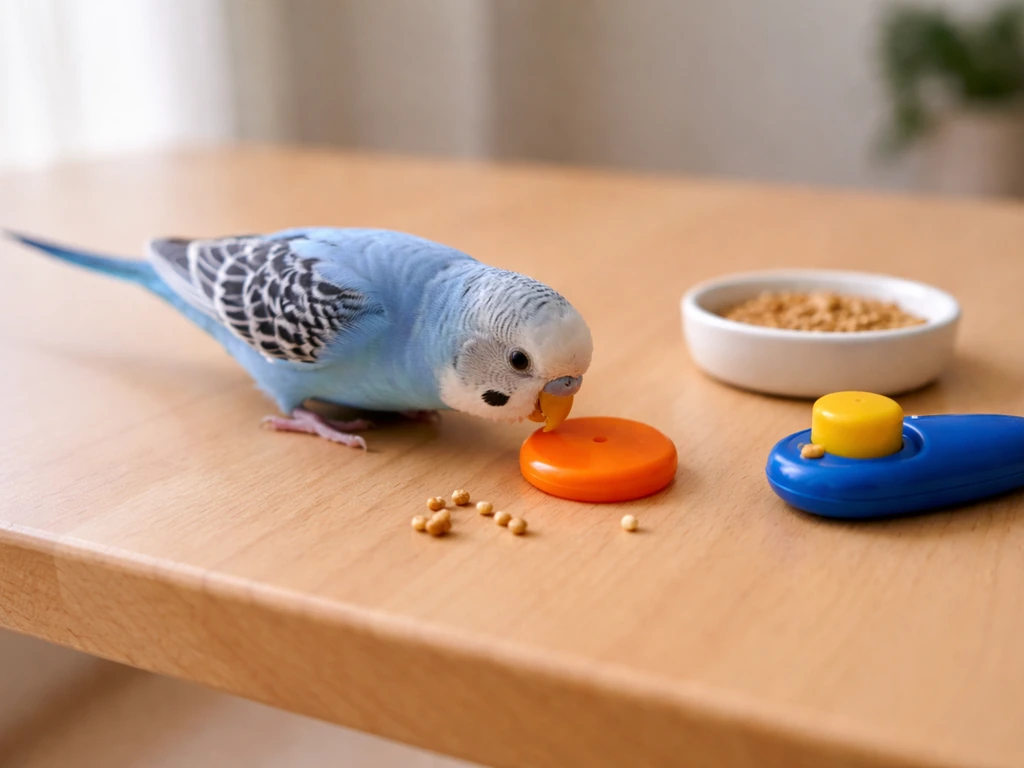
- Use a consistent verbal cue every single time — something short like 'go potty' or 'bombs away.' Say it once in a calm voice as you place them over the spot.
- Wait quietly. If the bird eliminates within about 30 seconds, immediately reward with a high-value treat: a small piece of their favorite fruit, a nut, or enthusiastic verbal praise if they're highly bonded to you.
- If nothing happens after 60 seconds, bring the bird back without a reward and try again at the next window. Never punish a miss.
- Repeat consistently for every out-of-cage session. In the early days, aim to set an alert on your phone matching their interval so you never miss a window.
- As the association builds, your bird may begin moving toward the spot or giving stronger cues before you prompt them. When that happens, let them lead — follow them and reward.
The treat needs to come within 2 to 3 seconds of the elimination or the behavioral connection weakens. Timing is the single most important factor here, more important than the choice of treat or the spot itself. If you miss the moment, skip the reward and simply reset for the next interval.
How long this takes and what progress looks like
Most bird owners working consistently start seeing clear responses within 2 to 4 weeks. You'll notice progress in stages, not as a sudden switch. First, the bird tolerates being moved to the spot without fuss. Then they begin eliminating reliably when placed there. Finally, they start showing active cues or moving toward the spot independently. That last stage is true success, and some birds get there in three weeks while others take three months. Both timelines are normal.
What success looks like in practice: your bird eliminates on or near the designated spot at least 80 percent of the time during supervised out-of-cage sessions. You'll still have accidents, especially if the bird is distracted, excited, scared, or you miss a timing window. Accidents don't erase the training. Just clean up calmly, adjust your timing, and continue.
If you're also exploring related goals like keeping your bird from pooping everywhere during free-flight time or training them to go only in one spot in the room, those are extensions of the same skill set built on this foundation. If you want the fastest path to less mess, learn how to train your bird to choose that one spot consistently during free-flight time too from pooping everywhere.
When it's not working: troubleshooting stubborn cases
Bird shows no interest in the spot
If your bird consistently eliminates right before or after you move them, your timing is off. Shorten the interval by 5 minutes and try again. It can also help to place a small dropping (from a previous session) on the paper at the potty spot so the bird gets an olfactory or visual cue associated with that location. Some birds also respond better to a specific perch height, so experiment with having the spot slightly lower or higher than their usual out-of-cage perch.
Frequent misses even with good timing
If the bird is going to the spot but droppings are landing slightly off-target, simply make the target area larger. Use a wider tray, a bigger sheet of paper, or a flat surface they can walk around on. Some birds prefer to turn around or shift before eliminating, and a tight perch gives them no room to do that. Also re-examine the spot location: is the approach easy? Is the bird having to travel across a scary surface or jump over something to get there? Make the path friction-free.
Hormonal or territorial behavior interfering
During breeding season, some birds become territorial about certain perches or areas, refuse to move on cue, or start marking specific spots around the room. This is a hormonal behavior, not a training failure. Scale back expectations during these periods and focus on management instead: limit free-roam time, cover favorite marking spots, and return to training when hormonal behavior settles. Pushing the training hard during a hormonal phase often backfires and can damage the trust you've built.
Bird refuses to move to the spot or becomes aggressive when handled
This is a cue to back up and work on step-up training and general handling comfort before continuing with potty training. The bird needs to move to and from the spot without stress. If being picked up triggers biting or lunging, the training association you're building will be negative rather than positive. Spend a week or two just reinforcing calm step-up behavior with treats before reintroducing the potty spot routine.
Keeping your bird healthy while litter training
Foot health and bumblefoot prevention
The biggest welfare risk tied to any potty-area setup is bumblefoot. This is a painful, progressive footpad infection caused by pressure, bacteria, and especially prolonged contact with blank" rel="noopener noreferrer">wet or dirty surfaces. If your bird's potty perch or tray stays damp with droppings, you are actively creating a bumblefoot risk. Change paper liners every single day at minimum, and spot-clean them more often if needed. Keep the surface completely dry. If you see any redness, swelling, or unusual posture on the feet, visit an avian vet immediately, as bumblefoot progresses quickly.
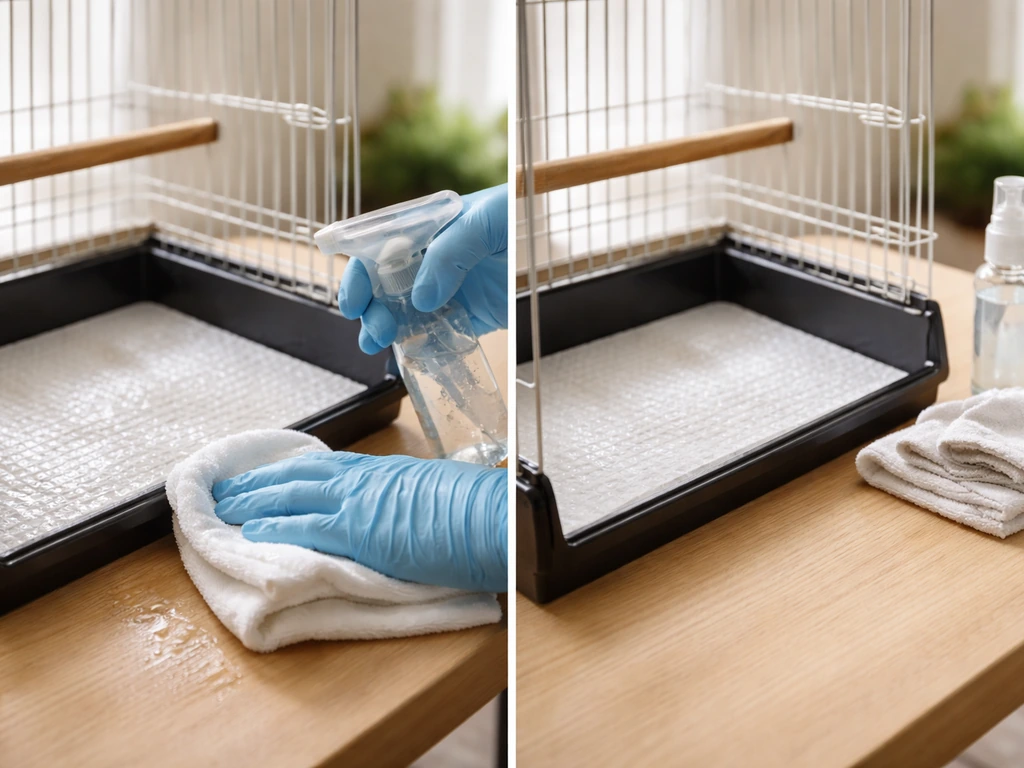
Cleaning routines and safe products
When cleaning the tray, perch, or cage bottom, use bird-safe disinfectants and make sure surfaces are fully dry and fume-free before the bird returns. Many common household cleaners (bleach-based sprays, ammonia, scented disinfectants) are toxic to birds via inhalation even in small amounts. Diluted white vinegar or avian-specific cage cleaners are safer choices. Always rinse surfaces with clean water after cleaning and allow them to air dry. Never clean the potty area with the bird in the room.
When droppings are a health signal
One significant benefit of litter training is that it makes it easier to monitor your bird's droppings, which are one of the best early health indicators you have. Normal droppings have a solid green or brownish portion (feces), a white urate portion, and a small amount of clear liquid (urine). If you notice very watery droppings consistently, a color change to bright red, black, or yellow, or a sudden dramatic increase or decrease in dropping frequency, treat it as a potential medical issue and contact your avian vet. These changes can indicate infection, dietary problems, or organ stress. A bird that suddenly stops eliminating normally or seems to be straining is an emergency.
| Dropping change | Possible cause | What to do |
|---|---|---|
| Very watery, frequent | Dietary change, stress, infection, or kidney issue | Monitor for 24 hours; vet visit if it continues |
| Bright red or dark black | Possible internal bleeding | Avian vet same day |
| Bright yellow or lime green urates | Liver stress, infection, or fasting | Avian vet within 24 hours |
| Dramatically reduced frequency | Dehydration, blockage, or holding due to stress | Offer water; vet visit if no improvement in hours |
| Solid, normal color but more frequent | Dietary change or excitement | Monitor; usually resolves on its own |
The holding-it risk
As mentioned earlier, if your bird learns that the only acceptable place to go is a single designated spot, and that spot becomes unavailable (you're away, the cage is moved, the routine is disrupted), the bird may attempt to hold it. Unlike cats, birds are not physically built for this, and it can cause real discomfort or health complications. To reduce this risk, always ensure your bird has multiple designated areas (at least the cage bottom plus the out-of-cage potty spot), never restrict access to appropriate elimination areas, and always treat litter training as a preference you're reinforcing rather than a rule you're enforcing.
Litter training a bird is one of those skills that pays off in day-to-day quality of life for both of you. Your bird gets structured, rewarding interactions with you, and you get fewer surprise messes on your shoulder. Keep your expectations realistic, stay consistent with timing and rewards, and prioritize the bird's comfort and health at every step. That combination is what actually works. If you are trying to do something unrelated, like how to train a bird to find money, keep the same idea in mind: link the cue to a clear, repeatable reward so the bird understands what you want. You can use the same cue-reward approach when learning how to train a bird to collect money from the right setup and timing.
FAQ
Can you litter train a bird if it still isn’t fully tame or comfortable with handling?
It’s possible only if your bird can be calmly placed or guided onto the potty perch without panic or biting. If the bird lunges when touched or refuses step-up, pause potty training and first reinforce calm step-up and relaxed perch behavior with treats, then restart with short, low-stress sessions.
How many hours a day can my bird be on free-roam while litter training?
Limit free-roam to supervised periods while training, because you still need tight timing. A practical starting point is a few short windows per day, and only increase duration once your bird reliably signals or goes to the spot most of the time.
What if my bird eliminates somewhere else even though I put it on the designated spot?
Treat it as a timing or access issue. Move the potty spot closer to where your bird naturally pauses to go, shorten the interval between checks by a few minutes, and do not scold. Consistency plus immediate rewards within the correct window is what shifts the behavior.
Can I use the same litter training setup for multiple birds in one room?
Use caution. If more than one bird shares the area, each bird may treat the tray as a social or territorial marker rather than an elimination cue. Ideally provide separate potty options (at least separate trays or clearly separated stations) and supervise so you can reinforce the correct bird going to the correct spot.
Do I need to remove all other paper or surfaces, so the bird learns only one spot?
No, and actually restricting elimination access can increase welfare risk. The safer approach is to reinforce the preferred spot, while still maintaining at least the cage bottom plus the out-of-cage option so the bird is never forced to “hold it” if the timing window is missed.
Is it okay to use scented liners, newspaper dyes, or flavored treats near the potty spot?
Avoid scented or chemically treated materials near the elimination area. Some birds can react strongly to odors, and anything that complicates cleaning or dryness increases bumblefoot risk. Stick to plain paper-based liners and food treats only as rewards.
How do I tell the difference between training setbacks and a health problem?
Look at patterns, not single events. Occasional misses are normal, but consistent watery droppings, persistent color changes (for example bright red, black, or yellow), or a sharp drop or stop in droppings means check with an avian vet. Also treat straining or sudden inability to eliminate as urgent.
My bird starts stepping into the tray but backs off before eliminating. What should I change?
First confirm the perch height and footing are comfortable. A slightly lower or wider target, more space to turn, and a friction-free approach path can help. Also try ensuring the treat arrives within seconds of elimination so the association strengthens when your bird commits.
Should I reward the bird every time it goes to the spot during training?
During the learning phase, yes for consistency, but keep rewards tightly linked to successful elimination. If your bird goes to the spot and you miss the moment, skip the reward and reset, because delayed reinforcement can weaken the association and slow progress.
What’s the safest way to clean the potty tray and prevent odor without using dangerous chemicals?
Wash and disinfect in a bird-safe way, ensure full dryness, and let fumes dissipate before the bird returns. Avoid bleach-based, ammonia-based, and scented cleaners. After cleaning, rinse with clean water, air dry completely, and never clean the area while the bird is loose in the room.
How often should I change the liners to reduce bumblefoot risk?
Change liners daily at minimum, and more frequently if they get wet or soiled. The key goal is keeping surfaces dry and clean. If you notice redness, swelling, or abnormal foot posture, contact an avian vet immediately.
If my bird regresses after it learned, how long should I pause and troubleshoot?
Pause and troubleshoot right away if the misses become frequent. Review timing (shorten checks by a few minutes), confirm the target hasn’t moved, and temporarily reduce free-roam duration while you rebuild the routine. A full return to calm handling and short training sessions can help if stress triggers the regression.
How to Train a Bird to Find Money Safely and Humanely
Humane, welfare-first plan to train a pet bird to “find” safe, non-swallowable tokens like money, with steps and trouble