Becoming a bird of prey handler means picking a legal route first: falconry, wildlife rehabilitation, or education/display work. Service animal work with a bird requires additional, situation-specific legal and training requirements beyond the raptor handling routes described here legal route first. Each path has its own licensing framework, mentorship requirements, and day-to-day reality. If you want to handle raptors legally and responsibly, you will need a permit, a sponsor or supervising organization, verifiable hours of hands-on experience, and the foundational skills to read a bird's body language before you ever put on a glove. None of that is out of reach, but it does take a structured approach and a genuine commitment to the bird's welfare over your own excitement.
How to Become a Bird of Prey Handler: Step-by-Step Guide

What a bird of prey handler actually does day-to-day
The job is less glamorous and more routine than most people expect, and that is a good thing. A handler's core daily duties revolve around the bird's welfare first and any training or public-facing work second. On a typical day you will weigh the bird (weight management is a non-negotiable part of falconry and rehabilitation care), clean and check the mews or housing, prepare and deliver a single daily feeding for most adult raptors, inspect jesses, anklets, and perches for wear, and log everything in a written record. Depending on your route, you might also transport an injured bird to a licensed vet, conduct a public education program, or take a trained hawk or falcon out for a free-flight session.
Rehabilitation handlers spend a significant portion of their time on triage and monitoring rather than active training. The goal with a rehab bird is minimal handling: you want the animal to stay wild-oriented so it can be released. Education or falconry handlers, by contrast, invest time in progressive conditioning and relationship-building with a bird intended to remain in human care. Both workflows demand the same foundational skill set, but the mindset and the end goal are very different.
- Daily weighing and weight logging (even a 10-gram drop in a small kestrel matters)
- Feeding: typically once per day for adults, adjusted by species and body condition
- Mews/hack area cleaning and equipment inspection
- Behavioral observation and stress assessment before any hands-on contact
- Transport, veterinary coordination, and recordkeeping as needed
- Public education sessions or free-flight work (education and falconry routes only)
Legal routes: falconry, wildlife rehabilitation, or education work
In the United States, every path to handling raptors runs through a federal permit because nearly all birds of prey are blank" rel="noopener noreferrer">protected as migratory birds under the Migratory Bird Treaty Act. The U.S. Fish and Wildlife Service issues the relevant permits, including Migratory Bird Permits covering falconry, rehabilitation, and education/special purpose categories. Audubon notes that the Migratory Bird Treaty Act protects nearly all native birds in the U.S., so these permitting categories support that broad coverage blank" rel="noopener noreferrer">Migratory Bird Permits. Internationally, if you are ever involved in acquiring or transporting raptors across borders, CITES documentation governs the process: permits for export and import are required for listed species, and acquisition must be demonstrably legal. Start by assuming every raptor you will ever touch is protected and work backwards from there.
The falconry route
Falconry in the U.S. is regulated under 50 CFR Part 21 (§ 21.82), which sets federal minimum standards that states must meet or exceed. The process requires a written exam, a facility inspection before you may possess a bird, and a formal apprenticeship under a licensed General or Master falconer for at least two years. Your housing (mews) must pass inspection before you even get your permit. This is the route for people who want to fly and work closely with a trained hawk, falcon, or eagle long-term. It is time-intensive and equipment-heavy, but it offers the deepest handling relationship possible.
The wildlife rehabilitation route
Wildlife rehabilitation permits are also issued at the federal level (and then by state agencies), but individual state requirements vary significantly. Washington State is a useful benchmark: to qualify for a raptor rehabilitation permit, applicants must document 500 hours of direct hands-on raptor handling practice, pass a Raptor Rehabilitation Exam with at least 80% correct, and obtain a letter of recommendation from a current primary permittee in good standing. Most states have similar competency gates. This route is right for people drawn to rescue, medical care, and release work rather than trained-bird handling. It connects closely with the broader path of becoming a wildlife rehabilitator, which is a related but broader credential.
The education and display route
Education permits allow qualified organizations (wildlife centers, zoos, schools, nature programs) to use non-releasable raptors for public outreach. Individual handlers at these organizations typically work under the organization's permit rather than holding their own. This is often the most accessible entry point: you volunteer, build hours, and eventually become a certified handler within that organization's framework. If you are aiming for a bird sitter role, use this education path to start building safe, supervised daily care skills with non-releasable raptors becoming a bird sitter. If your goal is how to become a bird trainer, the humane training steps and bonding fundamentals in this guide are the same foundation you will build on through your licensing path becoming a bird trainer. If your goal is how to become a bird handler, start by volunteering with an organization that can train you under its permit. Some handler jobs at raptor centers, zoos, and falconry display companies are paid positions once you have the experience. If becoming a bird handler or bird trainer in a professional sense is your broader goal, the education route is often the fastest path to paid work. If your goal is specifically how to get a job as a bird (handler or trainer), start by turning that volunteer experience into the hours and credentials your target employers require.
| Route | Primary Permit | Key Requirement | Best For |
|---|---|---|---|
| Falconry | State falconry license (federal 50 CFR §21.82 standards) | 2-year apprenticeship, facility inspection, written exam | Long-term trained bird relationships, free flight |
| Wildlife Rehabilitation | State rehab permit + federal Migratory Bird Permit | 500 hours (e.g., WA state), species exam at 80%+, sponsor letter | Rescue, medical care, and release of injured/sick birds |
| Education/Display Work | Organization's education permit (federal + state) | Volunteering hours, in-house handler certification | Public outreach, zoo/center employment, paid handler roles |
Getting started safely: foundational skills before you touch a raptor
Before you ever wear a glove around a live bird, you need a working knowledge of avian anatomy and stress signals. Raptors communicate discomfort loudly with body language: flattened feathers, bating (frantic flapping off the fist), wide eyes with a hard stare, tight feathering, and mantling (spreading wings over prey or food) all mean something specific. Misreading these signals is how handlers get injured and how birds get stressed into illness. Spend time watching raptor videos and, better yet, observing birds at a local center before handling starts.
Anatomy basics matter practically, not just academically. You need to know where a raptor's crop is so you can assess feeding status, understand keel (breastbone) prominence as a body condition indicator, and recognize foot/talon anatomy so you can safely check for bumblefoot or jess issues. A thin keel on a bird that should be heavier is an immediate welfare flag. Learn to feel for it gently and consistently as part of every handling interaction.
- Learn to read stress signals before any hands-on contact: bating, mantling, eye dilation, feather position
- Study avian anatomy with a focus on crop, keel, feet, and wing structure
- Understand weight management basics: weigh daily at the same time, before feeding
- Practice glove handling posture with a weighted object before a live bird
- Know the difference between a bird that is calm and a bird that is merely frozen with stress
Species-specific considerations for beginners
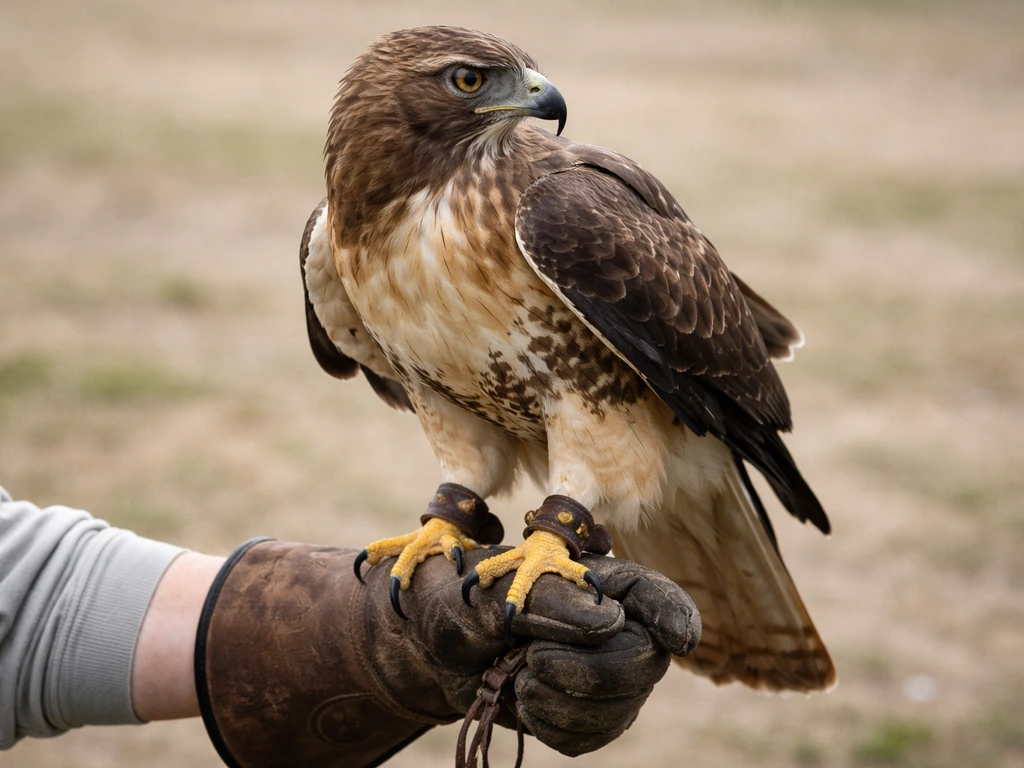
Not all raptors handle the same way, and the differences matter early on. Hawks (buteos like red-tails, accipiters like Cooper's hawks) are generally more reactive and quicker to bate than falcons. Falcons tend to be calmer on the fist once conditioned but can be faster and more precise with their talons. Owls have exceptionally powerful feet relative to their size and grip differently than diurnal raptors, and their silent, still demeanor can mask stress that a hawk would express more obviously. Eagles are a beginner-intermediate handling challenge at minimum: their grip strength is serious, and handling errors have more physical consequence. Start with smaller, more manageable species under supervision and work up.
Essential equipment, housing, and safety procedures
You do not need to own everything before you start volunteering or an apprenticeship, but you need to know what the equipment does and why. Falconry equipment in particular has a welfare function, not just a handling function: jesses (leather or Teflon straps attached to the bird's legs) allow controlled perching and glove work without harming the bird's legs when fitted correctly. Hoods reduce visual stimulation and are used to calm a bird during transport or in busy environments, preventing the stress spiral that can come from overstimulation. Both the Raptor Welfare guidelines and the UK's Hawk Board Code of Welfare emphasize that hoods are a welfare tool, not a punishment.
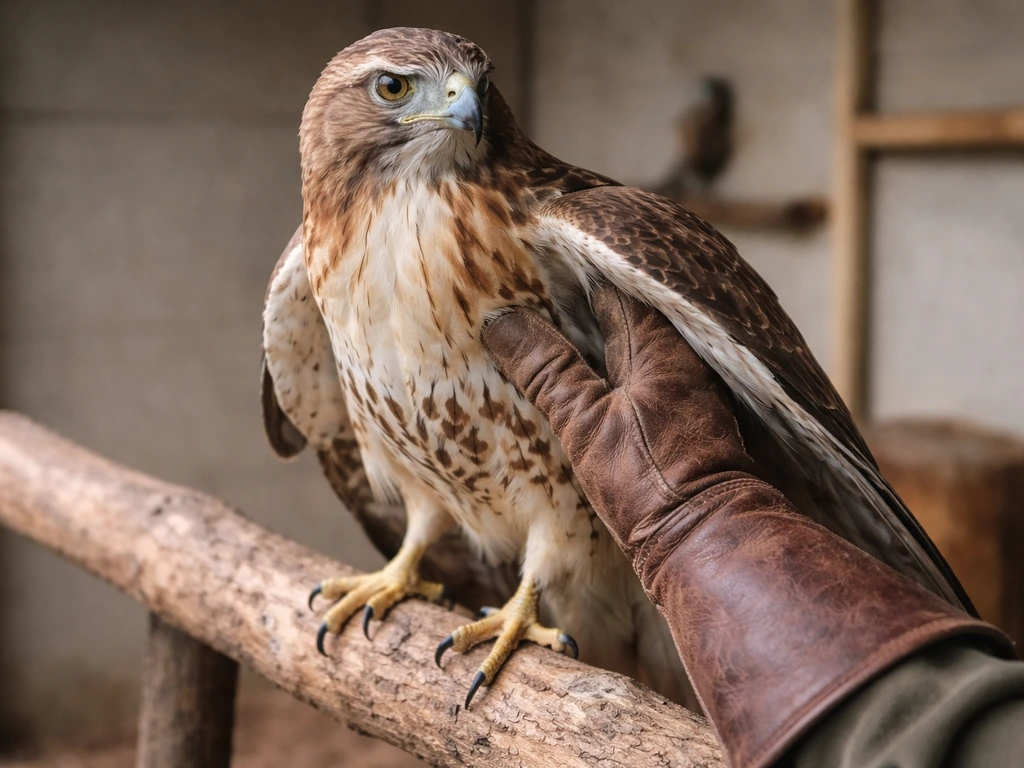
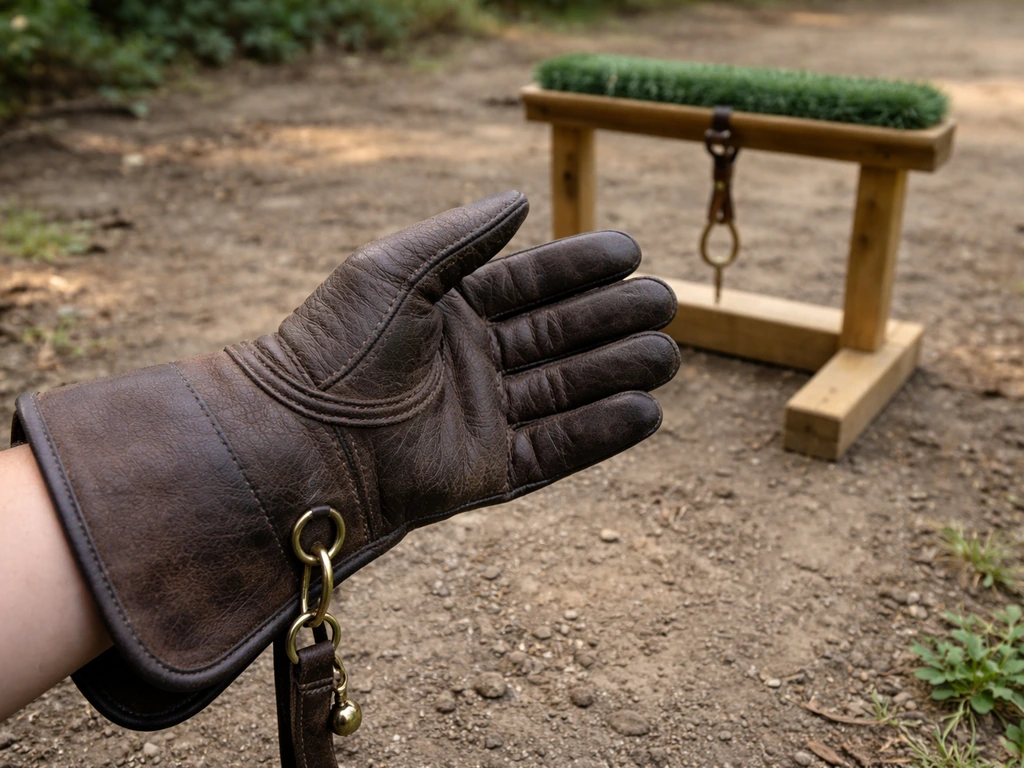
- Heavy leather falconry glove (gauntlet): right- or left-handed, species-appropriate thickness
- Jesses and anklets: leather or Teflon, correctly sized for the species (ill-fitting jesses cause injury)
- Hood: species-fitted; essential for transport and stress reduction
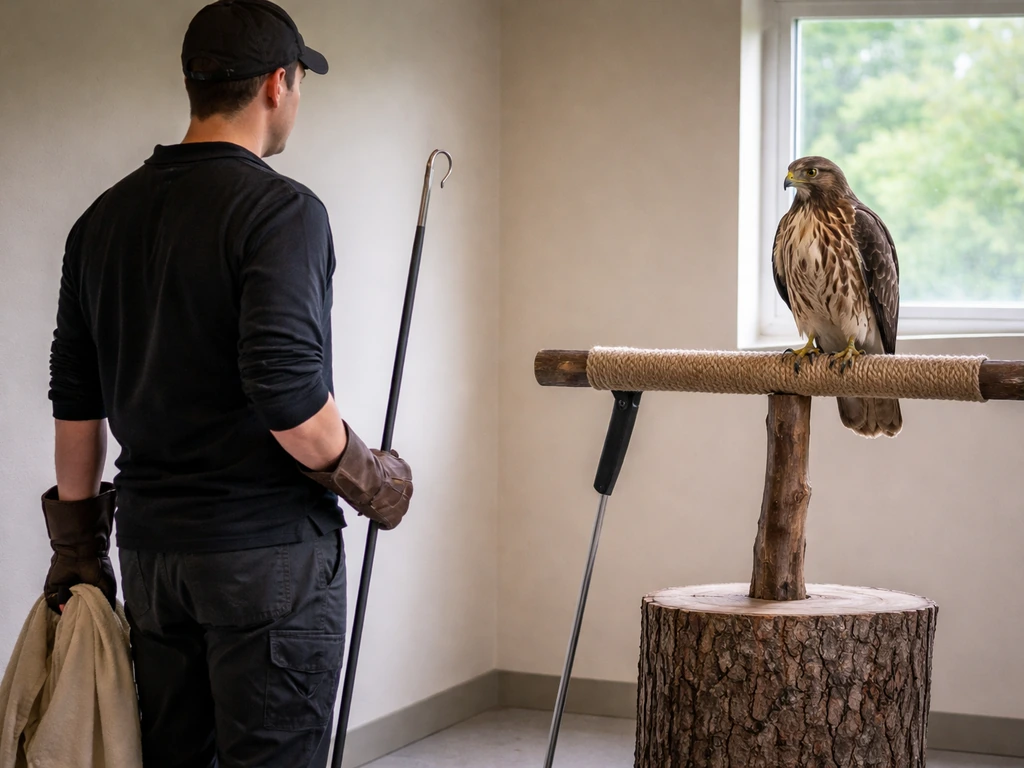
- Perch: appropriate type (block perch for falcons, bow perch or T-perch for hawks/eagles, shelf perch for owls)
- Scale: digital, accurate to 1 gram for small birds; weigh daily
- Mews or housing: weatherproof, secure, with appropriate size for species (must pass inspection for falconry)
- Leash and swivel: prevents tangling and injury when bird is tethered
- Transport box or crate: dark, ventilated, lined with a non-slip surface
Personal protective equipment is not optional. Thick leather gloves protect your fist hand, but the other hand is often exposed during hood placement or health checks. Raptors do not usually intentionally attack handlers, but a startled bird can foot you (grip with talons) reflexively. Keep your movements slow and predictable, approach from below the bird's line of sight, and never reach over a bird's head. If a bird foots you, resist the urge to jerk away, as this causes more injury. Stay calm, cover the bird's head gently with the hood or a cloth, and the grip will usually release.
Housing safety basics
Housing for falconry birds must pass a facility inspection before you legally possess a bird in the U.S. The mews must be predator-proof, large enough for the species, have appropriate perching, good ventilation without drafts, and a safe entry system (double-door or screen porch setup to prevent escape). For rehab birds, housing requirements are set by the permitting agency and typically go through your supervising organization. Do not improvise housing before you have reviewed your state's specific requirements.
Humane training steps: bonding, step-up, recall, and progressive handling
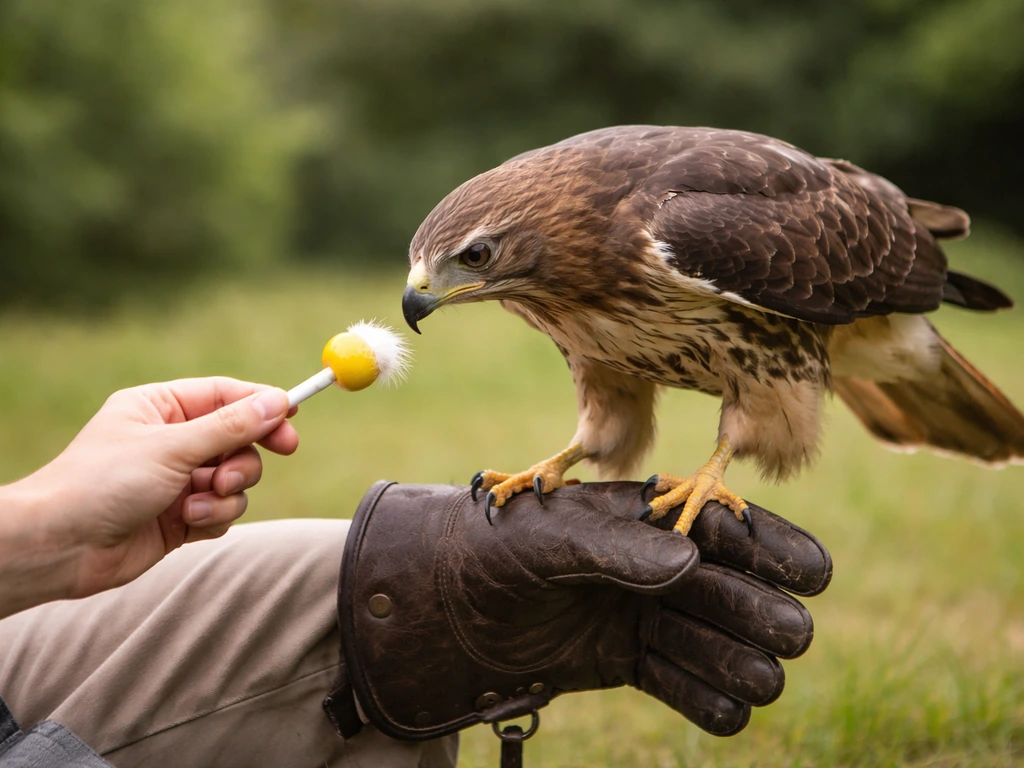
Training a raptor is not about dominance or force. It is about systematic desensitization: you gradually expose the bird to new stimuli at an intensity it can tolerate, always pairing the experience with something positive (food, reduced pressure, or both). The bird learns that your presence, then the glove, then movement, then outdoor environments are safe. This process is called manning in falconry terminology, and it applies to any raptor you are conditioning to accept handling.
- Presence phase: Sit quietly near the bird without direct eye contact. Let the bird observe you as neutral and non-threatening. Do this daily until the bird is relaxed in your presence (calm feathers, alert but not bating).
- Glove introduction: Present the gloved fist with food at the bird's foot level. Do not lift; just offer. Repeat until the bird regularly steps onto the fist voluntarily to take food.
- Step-up on cue: Once the bird reliably steps up, add a consistent verbal cue (a single word or click). Reward every correct response immediately. Keep sessions short (5 to 10 minutes max for new birds).
- Indoor fist walking: Walk slowly with the bird on the fist indoors. Introduce mild distractions one at a time. If the bird bates, lower the fist slightly and wait for the bird to climb back up rather than forcing it.
- Outdoor exposure: Move sessions outside in a quiet area on a creance (a long line) before any free-flight work. The creance allows recall training with a safety net.
- Recall to fist: With the creance attached, place the bird on a perch and step back a short distance. Call the bird with the cue and present the glove with food visible. Increase distance as reliability improves.
- Free flight (falconry/education birds only): Only attempt once recall on the creance is 100% reliable across varying distances and distractions. This step requires experienced supervision.
For rehabilitation birds, the training protocol is intentionally abbreviated: you want the bird calm enough to handle safely for medical care and assessment, but you are not building a long-term relationship. Minimize contact, use a towel wrap for restraint during exams rather than glove-only holding, and keep all handling sessions as brief and efficient as possible. The welfare principle here is the opposite of the falconry approach: less human contact is better for a bird that will be released.
Finding mentors, volunteering, and building your experience hours
There is no shortcut to the experience hours required for any licensed raptor handling role, and that is genuinely good news because the hands-on time is where you learn everything that matters. If your goal is an emotional support bird rather than raptor handling credentials, you still need to research welfare, legal requirements, and a safe plan for daily care emotional support birds. Start by contacting your nearest licensed raptor rehabilitation center or falconry club. Many rehabilitation centers (like The Raptor Center at the University of Minnesota) have structured volunteer programs with defined roles, shift systems, and hour-logging processes. Volunteers often start with support tasks like transport coordination and animal care observation before progressing to supervised hands-on work. This is exactly how you build the documented hours that state permits require.
For the falconry route, finding a sponsor is the formal first step. Your sponsor must be a licensed General or Master falconer who agrees to supervise your apprenticeship. The North American Falconers Association (NAFA) and state falconry clubs are the best places to find sponsors and mentors. Attend a field meet or club event before cold-calling anyone: showing up, asking good questions, and demonstrating genuine commitment is how you get a sponsor. Most experienced falconers are generous with time and knowledge when they can see you are serious.
- Contact your nearest raptor rehabilitation center and ask about their volunteer intake process
- Search for your state falconry association or NAFA-affiliated club and attend a meet
- Ask about formal hour-logging and documentation from day one (you will need it for permit applications)
- Request a letter of recommendation from your supervising permittee well before you apply for your own permit
- Consider related pathways (bird rehabilitator training, bird handler certification programs) to build transferable skills while you accumulate hours
As you accumulate hours, keep a detailed logbook: date, duration, species handled, what you did, and who supervised you. This is not just good practice; it is required documentation for most permit applications. Some states specify exactly what kinds of hands-on activities count toward your hour total, so review your state's regulations early and structure your volunteer work accordingly.
Troubleshooting common raptor handling problems and when to escalate
Persistent bating (repeated launching off the fist)
Bating is the most common issue beginners encounter, and it almost always means you have moved too fast in the training sequence or the bird's weight is too high for focused work. In falconry, working weight (a slightly reduced weight from peak condition that increases the bird's food motivation) is calibrated carefully. If the bird is bating constantly, try shorter sessions, reduce environmental stimuli, and check that the weight is appropriate for the individual bird. Do not push through bating by forcing the bird back to the fist repeatedly; you are reinforcing a stress cycle. Go back a step in the training sequence instead.
Refusal to step up
A bird that stops stepping up is usually telling you that the food reward is not motivating enough (weight too high), the approach is too fast or threatening, or a recent negative experience has created an aversion. Slow everything down. Return to the presence phase for a session or two without asking for the step-up. Then re-introduce the glove with higher-value food (fresh quail or prey appropriate for the species) and lower your expectations for the session. Progress happens in weeks, not days, and regression is normal.
Footing the handler
Footing (gripping with the talons) is a defense reflex, not aggression in most cases. It happens when a bird is startled, over-stimulated, or handled carelessly. Review your approach technique: always come from below, move slowly, and never hover your bare hand above the bird's head. If footing is happening regularly during care routines, check whether you are moving too quickly or skipping the bird's behavioral signals before initiating contact. For rehab birds with no conditioning, use a leather handling glove on both hands or a thick towel wrap.
Stress during transport
Transport is one of the highest-stress events for any raptor. Use a properly fitted, darkened transport box rather than keeping the bird on the fist in a vehicle. Darkness via a hood or an enclosed box dramatically reduces stress responses during transport. Keep the vehicle quiet and at a comfortable temperature. If the bird is repeatedly distressed during transport despite correct equipment, have a vet assess for underlying injury or illness before attributing it purely to behavior.
Imprinting concerns
An imprinted raptor (one that has bonded too strongly to humans during a critical developmental window) presents a different set of handling and welfare challenges. Imprinted birds are often easier to physically handle but may show aggression toward people during hormonal seasons, have reduced ability to survive if released, and can be frustrating as falconry birds due to poor hunting drive. If you are working with a rehab bird and suspect it is imprinted, escalate immediately to your supervising permittee or the organization's wildlife vet. The management and legal status of imprinted birds is complex and needs experienced oversight.
When to escalate to a vet or senior handler
Any sudden change in behavior, a bird that is unusually quiet and fluffed up, reduced or absent appetite for more than one feeding, discharge from eyes or nares, abnormal droppings, or an injury that is not immediately and obviously minor all require veterinary escalation. Do not wait to see if it improves. Raptors are prey-avoidant in showing illness, which means by the time you can clearly see something is wrong, the bird is often significantly compromised. Build a relationship with an avian vet who has raptor experience before you need one urgently.
A realistic timeline to independent handling responsibility
Most people realistically reach supervised independent handling competence in 12 to 24 months, depending on how consistently they volunteer and how quickly they accumulate and document hours. The falconry apprenticeship is a minimum two-year commitment by federal standard, and that is calibrated to the actual learning curve, not bureaucratic conservatism. Wildlife rehabilitation requires 500 documented hours before permit eligibility in states like Washington, which at a typical volunteer schedule of 4 to 8 hours per week takes one to three years. If you are aiming specifically to become a bird rehabilitator, check your state’s raptor rehab rules early and map out how you will reach the required hours and documentation wildlife rehabilitation requires 500 documented hours before permit eligibility in states like Washington. Neither of these timelines is punishing if you start immediately and stay consistent.
The practical progression looks like this: start as a volunteer observer and support role, move into supervised hands-on care, then into supervised solo handling of calm or conditioned birds, then supervised solo handling of more challenging birds, and finally independent responsibility with a permit or under an organizational certification. Each step should feel earned because, with raptors, it genuinely is. The birds will tell you when you are ready faster than any exam will.
FAQ
Can I become a bird of prey handler if I do not live in the U.S.?
Yes, but you will still need a legal pathway in your country (often a wildlife or animal welfare licensing framework) and you must confirm cross-border rules if you ever transport or acquire birds. If you travel for training, ask the organization for which permits cover training activities versus possession, since those two are often handled differently.
What is the safest way to start volunteering if I have zero handling experience?
Start with observation and support tasks that do not require independent contact, like logging, equipment prep, cleaning under supervision, transport coordination, and weighing if allowed by your organization. Request a written checklist of what “counts” as hands-on hours so you can avoid wasting time on tasks that do not meet permit requirements.
Do I need to own birds or a license before I can start learning?
In most cases, no. For falconry, you typically need the permit framework and a sponsor before possession, but you can still train skills through club events and supervised apprenticeship steps. For education and many center roles, you can build competence under the organization’s permit without personal possession.
How do I choose between falconry, rehabilitation, and education if I am not sure yet?
Use your motivation and tolerance for routine versus clinical work. Falconry is relationship and conditioning with a long-term handling plan, rehab prioritizes minimal handling and release readiness, and education focuses on safe outreach with non-releasable birds. If you enjoy medical triage and structured monitoring, rehab is usually a better early fit than display work.
Are hours from volunteering always accepted for permits?
Not necessarily. Some states and permit categories accept specific types of direct raptor handling, while other tasks are treated as indirect experience. Keep a log that includes species, what you physically did, and who supervised you, and compare your hours against your state’s stated “countable” activities.
What should I do if a bird is bating or refusing to step up during manning?
Do not force the glove routine forward. Go back to a lower-intensity step, shorten the session, and reassess body condition and working weight, because constant bating often pairs with weight that is too high or an environment that is too stimulating. After a few calmer sessions, reintroduce the step-up with higher-value food for that species.
How can I reduce the risk of footing or talon-related injuries?
Slow your approach and control the bird’s visual exposure. Approach from below the bird’s line of sight, avoid hovering your hand over the head, and keep your other hand positioned to support safe handling rather than reaching abruptly. If the bird often feet during routine care, ask your supervisor to observe your technique and timing, since repeated footing usually signals you are entering contact too fast.
Is transport always done with a hood, or is a darkened box enough?
Both can be used, but the priority is minimizing stimulation. Many handlers rely on a properly fitted, darkened transport box because it prevents sudden visual inputs and reduces stress behaviors during the trip. If a bird still shows severe distress repeatedly, arrange a veterinary assessment instead of assuming it is only behavioral.
What does “imprinted” mean in practice, and what changes for a handler?
Imprinted birds have an atypical bond to humans, so physical handling may be easier while welfare and management become harder. They can show aggression during hormonal seasons, may have limited survival skills if release is attempted, and can frustrate falconry training due to mismatched hunting drive. If imprints are suspected, escalate immediately to your supervising permittee or raptor-savvy veterinarian.
How do I know when I should escalate to a vet instead of monitoring at home?
Escalate quickly for raptors showing reduced appetite for more than one feeding, unusual quietness and fluffed posture, abnormal droppings, discharge from eyes or nares, or any injury that is not clearly minor. Because raptors often hide illness, “wait and see” can cost recovery time. Ask your organization which symptoms trigger same-day action before a problem happens.
What PPE and safety steps are most commonly missed by beginners?
Beginners often focus on glove protection but overlook safe control of the non-glove hand during hood placement and health checks. Make PPE part of a routine, use slow predictable movements, and never reach over a bird’s head. Also confirm whether your organization expects double-gloving, a towel-wrap technique, or species-specific restraint tools.
What if my goal is “bird trainer” or “bird sitter” but I also want to handle raptors legally?
Treat them as overlapping skills with different regulatory boundaries. Bird sitter roles may involve non-releasable or domestic species, while raptor handling usually requires raptor-specific permits and supervision structures. If you want legal raptor handling, focus first on your permitting route and get supervised hours under an organization whose authorization covers the species you will touch.
How to Become a Bird Sitter: Step-by-Step Guide
Learn how to become a bird sitter with humane setup, daily safety workflow, species needs, and step-by-step booking.