Becoming a licensed bird rehabilitator takes real commitment, but the path is clearer than most people expect. You need the right permits for your location, a foundation of hands-on skills, supervised experience with an established program, and a setup that keeps birds safe during recovery. This guide walks you through every step so you can start moving today rather than spending weeks just figuring out where to begin.
How to Become a Bird Rehabilitator: Licensing and Steps

Maya Harris
8 Apr 2026
Bird rehabilitation vs bird rescue: what the job actually involves
"Bird rescue" and "bird rehabilitation" get used interchangeably online, but they mean different things in practice. A bird rescue organization typically focuses on surrendered or abandoned pet birds, rehoming them to new owners. Bird rehabilitation is a regulated wildlife health function: you take in injured, sick, or orphaned wild birds, provide veterinary-level supportive care, and work toward releasing them back into the wild in a healthy, disease-free state. That last part is critical. The goal is always release, not keeping.
As a rehabber, your day-to-day work might include triaging a songbird that flew into a window, tube-feeding a nestling, cleaning and bandaging a raptor's wing, or coordinating with a vet clinic for X-rays. You are not a sanctuary operator or a pet keeper. You are providing short-term, welfare-first medical and behavioral support. Understanding this distinction matters because it shapes your licensing requirements, your facility setup, and how you interact with the public.
The work is deeply rewarding, but it is also physically and emotionally demanding. You will handle birds at their most stressed and vulnerable. Some will not survive despite your best efforts. The ones that do survive and get released are the reason people stay in this field for decades. If you are drawn to working directly with birds in a hands-on capacity, it helps to also explore what becoming a bird handler involves, since many of the safe restraint and low-stress handling techniques overlap directly with rehabilitation work.
Legal requirements and licensing steps
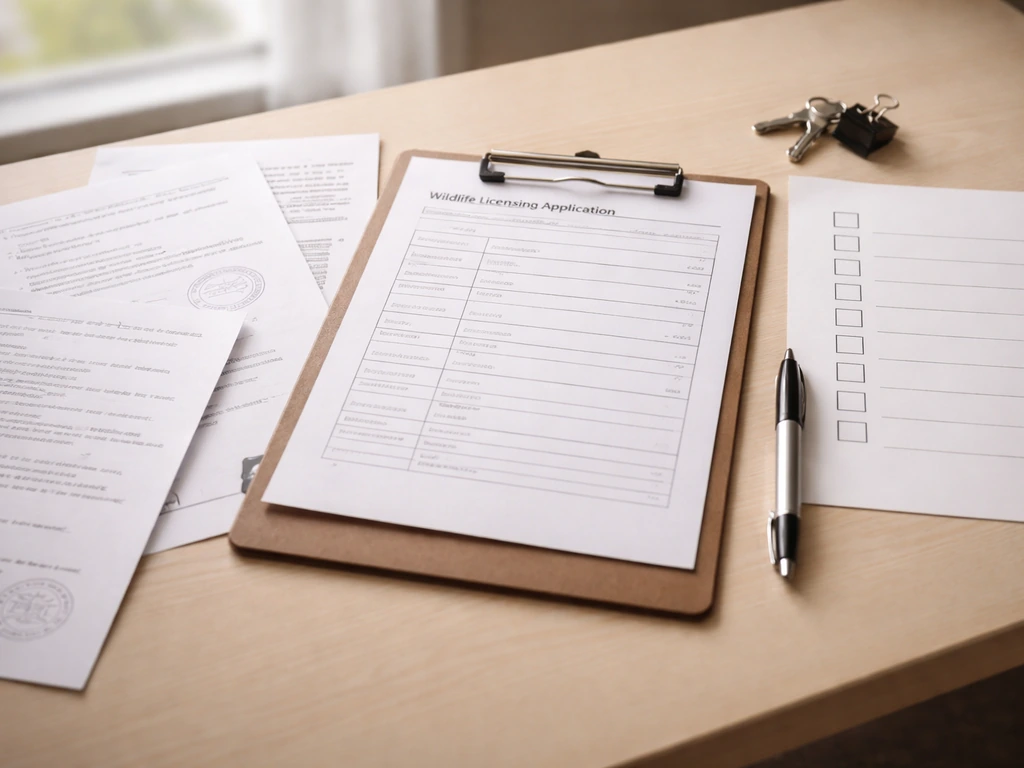
This is the part that trips most beginners up, so let's be direct: you almost certainly need at least one permit before you legally touch a wild bird. In the United States, rehabilitating migratory birds (which covers the vast majority of wild bird species) requires a federal Migratory Bird Rehabilitation Permit from the U.S. Fish and Wildlife Service, AND a separate state-level wildlife rehabilitation permit. The federal permit does not replace state requirements, and many states are more restrictive than federal rules. For example, Washington State explicitly requires both a WDFW state permit and a Federal Migratory Bird Permit. Michigan's DNR states that anyone who captures, transports, houses, treats, or otherwise holds a native wild bird for rehabilitation must hold a DNR wildlife rehabilitation permit.
In England, the framework is different. A General Licence GL07 from Natural England allows an "authorised person" to keep certain disabled Schedule 4 wild birds for up to 15 days for the purpose of rehabilitation. Birds of prey listed on Schedule 4 of the Wildlife and Countryside Act 1981 can be kept under GL07 or GL08 terms as outlined by the British Wildlife Rehabilitation Council (BWRC). GL07 guidance requires that birds be kept in accordance with recognised good practice to ensure they are released in a healthy and disease-free state, and there are additional reporting requirements around diseases such as avian influenza.
The steps below apply broadly, but always verify with your specific regulatory authority because the details vary significantly by jurisdiction.
- Identify your regulatory authority: In the US, start at the USFWS Migratory Bird Permit office for your region, then contact your state fish and wildlife agency. In England, check Natural England and the BWRC. In Canada, contact Environment and Climate Change Canada and your provincial wildlife authority.
- Download and read the permit application carefully before doing anything else. Most applications list prerequisites such as supervised hours, sponsor letters, or facility inspections.
- Fulfill prerequisites first: Most state and federal agencies require you to document supervised experience (often 100 to 200 hours) under a currently licensed rehabilitator before you can apply for your own permit.
- Complete any required training courses: Organizations like the National Wildlife Rehabilitators Association (NWRA) and the International Wildlife Rehabilitation Council (IWRC) offer foundational courses that many agencies accept as proof of training.
- Prepare your facility for inspection: Many jurisdictions require a site visit before issuing a permit. Your housing, sanitation setup, and record-keeping system need to meet minimum standards.
- Submit your application with all supporting documentation, including your supervised hours log, training certificates, sponsor letters, and facility photos if required.
- Plan for renewal: Most permits must be renewed annually or biennially, and renewal often requires updated activity reports showing how many birds you took in, treated, and released.
Training and skill-building: handling, first aid, species basics, and records
Permits get you legal permission. Skills keep the birds alive. The core competencies you need to build before flying solo fall into four categories: safe handling, basic first aid and triage, species identification, and recordkeeping.
Safe, low-stress handling
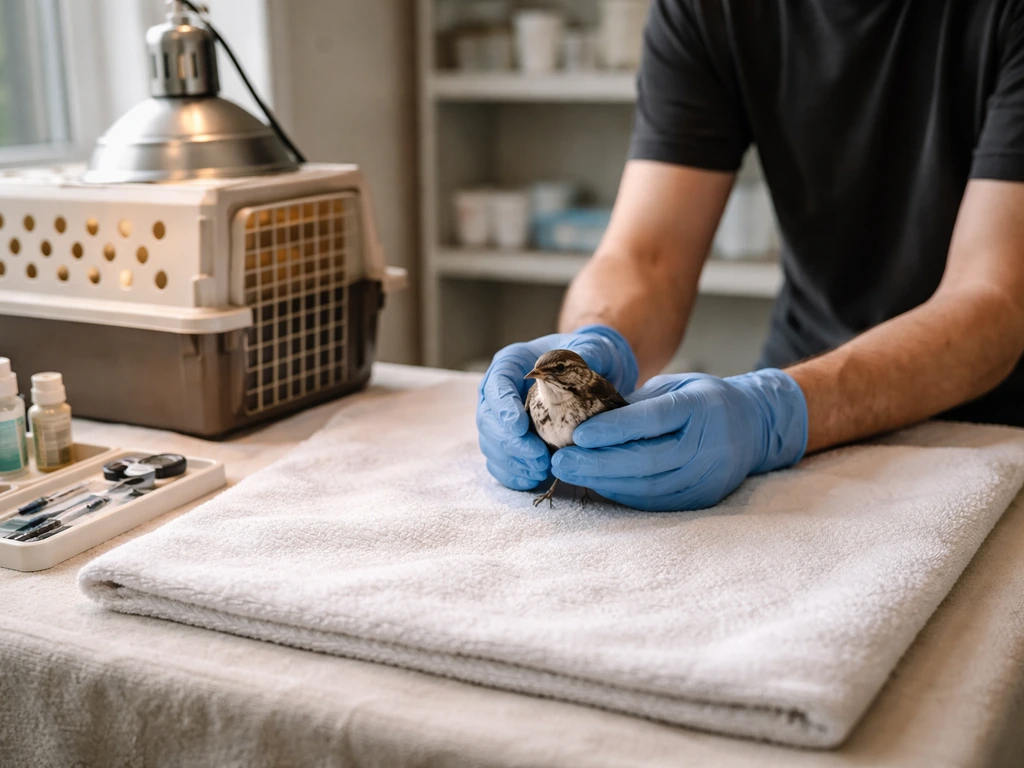
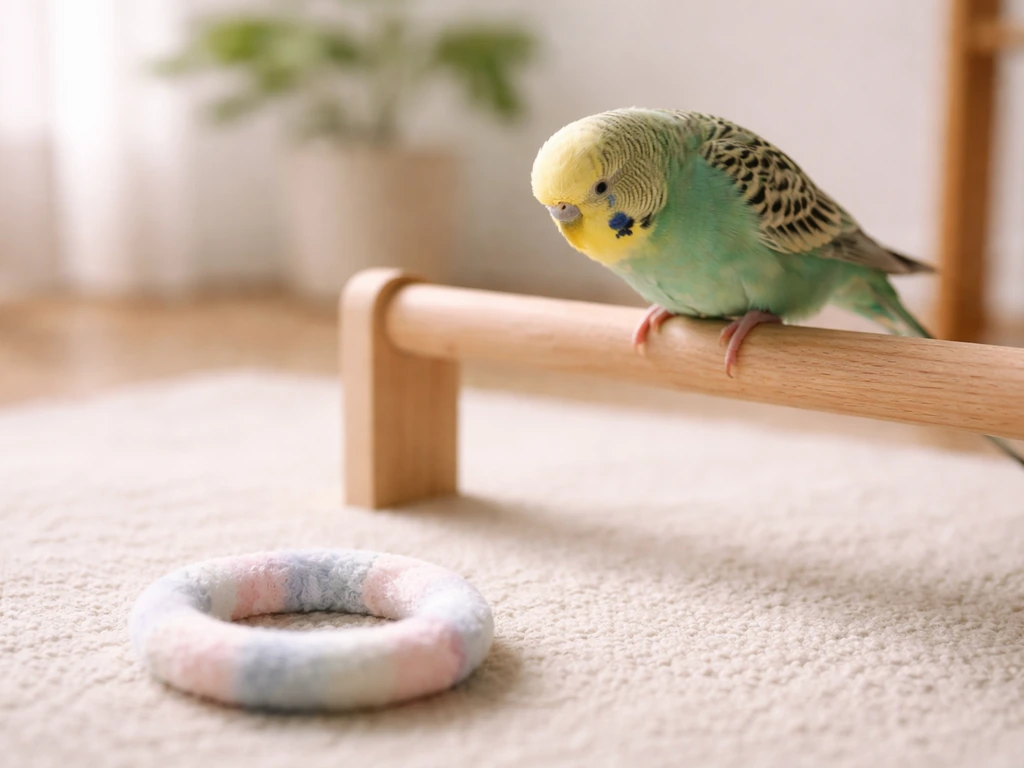
Wild birds are not pets. Even a small songbird can puncture skin, and larger birds like herons, owls, and raptors can cause real injuries. Stress during handling can kill an already compromised bird. The core principle is minimal contact: handle only when necessary, use the least restraint required, work in a quiet and dimly lit space, and never hold a bird longer than needed. Keep your grip secure but never squeeze the keel (breastbone). For raptors specifically, the talons are the danger, not the beak, so toweling the feet comes first. If you want to build on these foundations, reading about becoming a bird of prey handler is a great next step since raptor-specific techniques are the most transferable and most heavily regulated in rehabilitation work.
Bird first aid fundamentals
You are not a vet, and you should not try to perform veterinary procedures without training. But there are stabilization skills every rehabber needs: how to keep a bird warm (thermoregulation is the first priority for any compromised bird), how to recognize and respond to shock, how to assess hydration status, how to safely transport a bird without causing additional injury, and when to refer immediately to a licensed wildlife vet rather than attempting treatment yourself. NWRA and IWRC both offer first-response wildlife courses that cover these basics at a beginner level.
Species identification and natural history
You need to know what species you are dealing with to provide appropriate care. A cedar waxwing and a house finch are both small songbirds, but their diets, housing needs, and release criteria differ. Build your species knowledge by studying field guides for your region, attending local birding groups, and doing intake work alongside an experienced rehabber who can narrate their decision-making. Focus on the most common species in your area first, then work outward.
Recordkeeping standards

Good records are not optional. They are a permit condition, a legal protection, and a welfare tool. At minimum, you need to record the intake date, species, condition on arrival, treatments provided, feeding logs, weight measurements, and outcome (released, transferred, died, euthanized). Many rehabbers use spreadsheets or free wildlife rehabilitation software. Your records are what you submit at permit renewal, what a vet reviews when a bird is transferred, and what protects you legally if there is ever a question about an animal in your care.
Getting experience: volunteering, apprenticing, and finding reputable rehab networks
Almost every licensing pathway requires supervised experience, which means your first move is finding a licensed rehabber or organization to work under. Start by searching the NWRA and IWRC member directories, your state wildlife agency's list of licensed rehabbers, or local wildlife center websites. When you reach out, be specific: tell them you are working toward your own license, you want to build supervised hours, and you are available for unglamorous work like cleaning enclosures and preparing food.
Before committing to a program, ask a few key questions to evaluate whether it is reputable and a good fit for your learning goals.
- Is the program and its supervisor(s) currently licensed at both the state and federal level?
- Do they work with a licensed wildlife veterinarian for medical cases?
- Will they sign off on your supervised hours for permit application purposes?
- Do they follow NWRA or IWRC standards of care?
- What species do they primarily handle, and does that align with your interests?
- How do they track outcomes (release rates, mortality, transfers)?
- Are they willing to teach and explain their decisions, or will you just be doing chores?
Volunteering at a well-run center gives you more than just hours. You learn workflow, you see how experienced rehabbers make triage decisions, and you build a professional network that will be genuinely useful when you apply for your permit and start taking in birds on your own. Think of it like an apprenticeship in a skilled trade. If your long-term ambition extends beyond rehabilitation into professional working roles with birds more broadly, it is also worth understanding what becoming a bird trainer requires, since behavioral understanding and conditioning principles come up in rehabilitation contexts too, especially with long-term patients.
Facility and equipment essentials for safe intake and housing
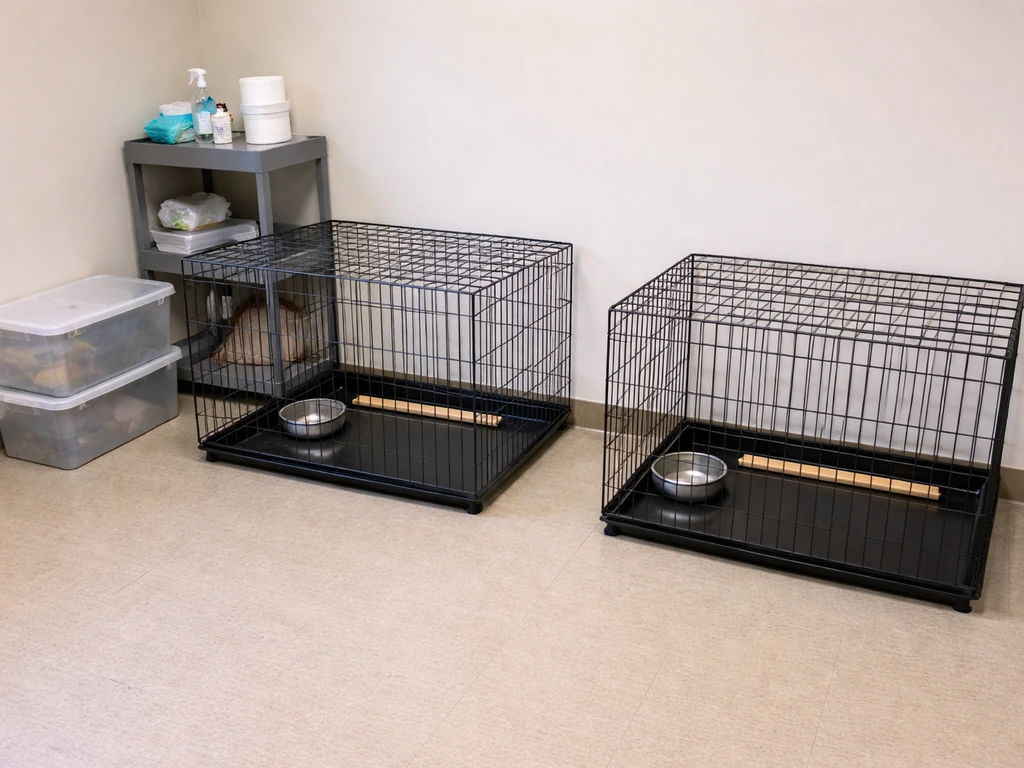
You do not need a purpose-built wildlife center to get started, but you do need a dedicated, appropriate space. Mixing rehabbing birds with pet birds is never acceptable: disease transmission, stress, and imprinting risks are all serious concerns. Your rehabilitation space should be separate from your home living areas and from any pet birds you keep.
Here is a realistic beginner setup that meets most state inspection standards.
| Item | Purpose | Beginner Notes |
|---|---|---|
| Transport carriers (hard-sided, ventilated) | Initial intake and vet transport | Small, medium, and large sizes; line with non-fraying fleece |
| Heat source (heating pad or ceramic heat emitter) | Thermoregulation for compromised birds | Never cover entire floor; allow bird to self-regulate by moving off heat |
| Quarantine enclosures (separate from flight cages) | Isolate new intakes from recovering birds | Minimum one per intake to prevent disease spread |
| Flight cage or aviary (species-appropriate size) | Pre-release conditioning and exercise | Dimensions must meet state permit minimum requirements |
| Sanitation supplies (F10 or similar avian-safe disinfectant) | Daily cleaning and disease control | Bleach solutions also work; full drying time critical |
| Digital scale (accurate to 1 gram) | Daily weight monitoring | Weight loss is often the first sign of deterioration |
| Basic first aid kit (saline, gauze, vet wrap, syringes) | Wound care and fluid support | No medications without vet guidance |
| Species-appropriate food stocks | Nutritional support during recovery | Consult care sheets from NWRA for each species |
Imprinting prevention is a major welfare and legal concern, especially with baby birds. Minimize direct visual and vocal contact, use puppet feeders for some species, and house birds with conspecifics whenever possible and safe. A bird that imprints on humans cannot be released and legally cannot be kept without a special permit in most jurisdictions. Your facility design should make low-contact care the default, not the exception.
Intake workflow and welfare-first protocols
Every bird that comes through your door needs a consistent intake process. Consistency protects the bird, protects you legally, and makes your records usable. Here is the standard workflow used by most licensed facilities.
- Receive the bird in a secure, ventilated carrier from the finder. Limit handling during transfer. Do not let the public handle the bird unnecessarily.
- Document intake immediately: date, time, species (or best estimate), location found, condition on arrival, and finder contact information.
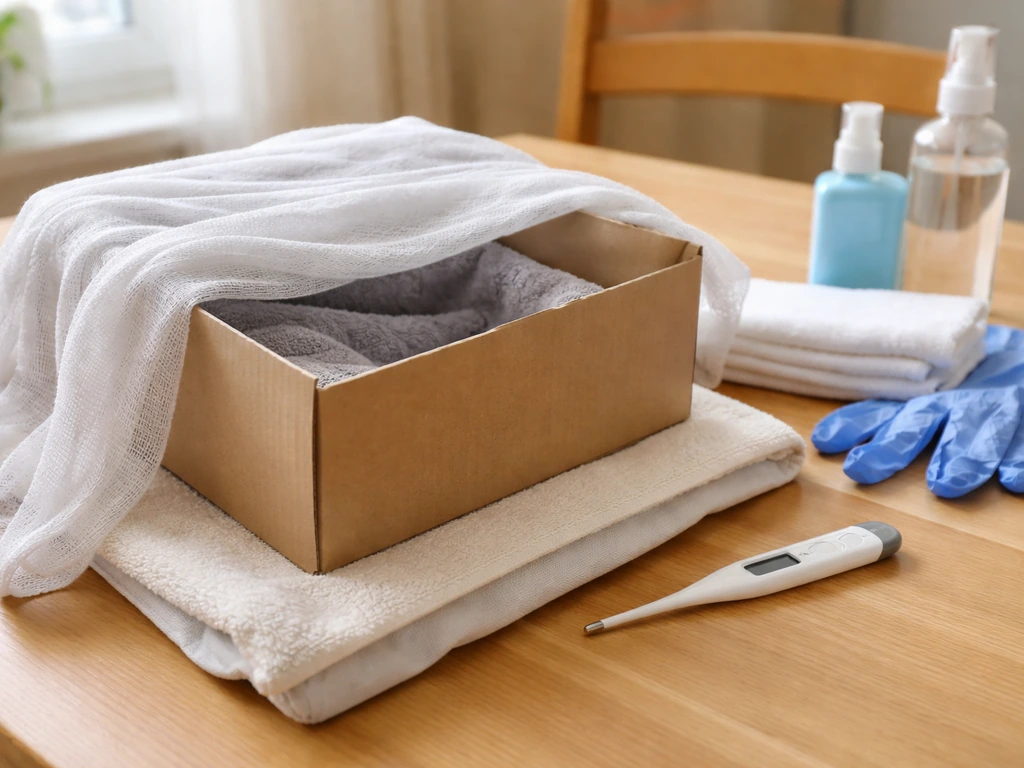
- Move the bird to a quiet, warm, dark holding area. Darkness reduces stress significantly. Prioritize warmth: aim for 85 to 90°F (29 to 32°C) for compromised birds unless contraindicated.
- Conduct a hands-on triage assessment: check for wounds, fractures, blood, eye injuries, respiration quality, and hydration (skin tent test on the neck). Do not force food or water on a bird in shock.
- Contact your supervising vet or sponsor if injuries are beyond your training level. When in doubt, transport. Delay costs lives.
- Assign a cage card or intake ID and begin a daily monitoring log (weight, food consumed, behavior, droppings quality, any treatments given).
- Plan for release from day one: document the release criteria for that species and start tracking progress against those benchmarks weekly.
Sanitation runs through every step of this workflow. Disinfect all carriers, tools, and surfaces between birds. Wash your hands before and after every handling session. Change gloves between species. Avian diseases can move between patients quickly in a small facility, and disease transmission during rehabilitation is one of the most common reasons birds fail to recover.
Documentation is not just paperwork. It is how you prove a bird's trajectory of improvement, make defensible decisions about euthanasia or long-term care, and stay compliant with your permit conditions. Think of your records as the bird's medical chart. Anyone picking up where you left off should be able to understand the full case from your notes alone.
Career path and common hurdles
Most licensed bird rehabilitators start as volunteers, spend one to two years building supervised hours and skills, then apply for their own permit. From there, the path branches in several directions: some rehabbers work exclusively from a permitted home setup, others join or found nonprofit wildlife centers, and some transition into paid roles at established organizations. Paid positions in wildlife rehabilitation are competitive and often require advanced credentials, so most people in this field work as dedicated volunteers for years before any paid opportunity appears.
Burnout is real and common. You will lose birds that you worked hard to save. You will deal with the public at their most panicked and sometimes their most unreasonable. You will spend your own money on food, supplies, and vet bills, because funding for wildlife rehabilitation is chronically limited. Building a support network with other rehabbers (through NWRA chapters or local wildlife alliances) is one of the best things you can do for your long-term sustainability in this work. Shared grief and shared wins both matter.
Staying compliant is an ongoing job. Permits renew, regulations change, and species-specific rules get updated. Subscribe to your state agency's wildlife rehabilitation newsletter, keep your NWRA or IWRC membership current, and review your permit conditions every year before renewal rather than scrambling at the deadline. One missed reporting requirement can cost you your permit.
Ethics will come up in ways you do not expect. You will be asked by well-meaning people to keep non-releaseable birds as pets (illegal without the right permit). You will face pressure to attempt treatments outside your scope. You will need to make euthanasia decisions that are in the bird's best interest but feel devastating. Having a clear welfare-first framework and a relationship with a wildlife vet you trust makes these decisions more navigable. If you find yourself drawn more toward long-term bird care and human-bird relationships rather than rehabilitation specifically, it is worth looking into what becoming a bird sitter involves as a complementary or alternative path.
Some rehabbers eventually expand their work into advocacy, education, or professional wildlife services. If your interests include working with birds in more formal employment contexts, understanding how to get a job working with birds can help you connect your rehabilitation experience to broader career options in conservation, education, or wildlife management. Others in the field explore adjacent roles like getting an emotional support bird or even working to make a bird a service animal, particularly when working with long-term non-releaseable birds who end up in ambassador roles at educational programs.
Your action checklist for starting today
- Look up your state or national wildlife agency and download the wildlife rehabilitation permit application today. Read it fully before taking any other step.
- Identify the nearest licensed bird rehabilitator or wildlife center and contact them about volunteering or apprenticing. Frame it as building supervised hours toward your own permit.
- Sign up for a foundational wildlife rehabilitation course through NWRA or IWRC. Many are available online and can be completed at your own pace.
- Start a permit tracking document: note your required supervised hours, training prerequisites, facility requirements, and application deadline.
- Begin assembling your basic intake kit (carrier, heating pad, scale, sanitation supplies) even before your permit is issued, so you are ready to pass a facility inspection.
- Join your regional NWRA chapter or a local wildlife rehabilitation network for peer support and regulatory updates.
- Set a target date for submitting your permit application and work backward from it to schedule your supervised hours and training.
FAQ
Can I start helping injured wild birds before I have a rehab license?
Yes, but only under the correct authorization. In most places you should not take custody of an injured wild bird unless you are operating under an active wildlife rehabilitation permit or working under a licensed organization. If you find an injured bird before you are permitted, the safest next step is to contact your state or local wildlife agency, a licensed rehabber, or an established wildlife center and ask for intake instructions.
Is it okay to temporarily care for a wild bird at home if I plan to hand it over later?
No. Feeding or “treating” a bird you are not licensed to rehabilitate can create legal risk and can also make the bird worse (diet errors, incorrect temperature, dehydration from improper handling). Instead, focus on stabilization that does not require ongoing treatment, then hand off to a permitted rehabber quickly.
How long can I keep a rescued wild bird before transferring it to a licensed rehabber?
Length of holding is a common compliance issue. Even when a location allows short-term care, you still must follow reporting rules, correct housing, and any limits on how long birds can be kept before transfer. Build your plan around “stabilize, document, transfer or release,” rather than trying to “wait it out.”
What records should I keep beyond basic intake and outcome, and how detailed do they need to be?
Public guidance usually matters more than people think. Many jurisdictions require that intake logs, treatment notes, and outcomes be complete and submitted on schedule, and your permit may specify what must be reported for certain species or disease concerns. If you have to improvise, document exactly why (for example, delayed vet access, power outage, transport delay).
Can I give antibiotics, pain meds, or other veterinary drugs if I think it will help?
Dosing and medications are a frequent mistake. Rehabbers often provide supportive care, but administering drugs or performing procedures outside their training scope can violate license conditions and harm the bird. Use your vet relationship and your program’s protocols for anything that resembles veterinary treatment.
What if I already keep pet birds at home, can I still rehab wild birds?
You should expect a hard boundary between wild bird rehab and pet bird housing. If any pet birds are in the same home, you can still be out of compliance if there is no separate, biosecure setup and disease-control workflow. Plan for separate rooms or a clearly separated facility area, with dedicated supplies and strict sanitation.
How do I know when a bird is ready to be released, especially if it looks healthy?
A lot of beginners underestimate species-specific release criteria. Even when two birds look similar, diet needs, habitat requirements, and health thresholds can differ. Your supervised hours should include learning how rehabs decide release readiness (weight stability, normal behavior, feather condition, flight ability, and disease clearance steps).
What are the safest basics for transporting an injured bird to a rehabber?
Transport is not just about getting the bird there. Use species-appropriate, secure containers, avoid overheating or chilling, minimize handling time, and keep birds separated as required to prevent stress and disease spread. Also, bring your intake info and any observations because the receiving rehab will use it for triage decisions.
Do I need formal coursework, or is volunteering enough to qualify for rehabilitation licensing?
Yes, but you should treat it as a “regulated career skill” rather than casual practice. Most pathways require supervised experience, and online-only learning usually is not sufficient for licensing. Look for courses that include hands-on components, and use your supervised work to meet competency expectations in handling, first response, records, and disease prevention.
How should I handle biosecurity if I suspect a disease outbreak or contagious symptoms in an intake bird?
Because of avian influenza and other contagious diseases, many programs expect strict isolation practices and immediate action if exposure is suspected. Don’t share equipment between birds, follow glove and hand changes between species, and notify your supervising rehab lead or vet if a bird shows signs of a transmissible illness.
What factors typically determine whether a bird is transferred to a vet, kept for long-term care, or euthanized?
Euthanasia is often required when the bird’s prognosis is poor or suffering can’t be prevented. If your permit allows euthanasia or transfer to a vet for euthanasia, the key is having a decision framework, clear documentation, and a trusted wildlife vet relationship. When starting out, ask your supervising organization what triggers euthanasia versus referral.
What tasks should I expect to do during my first supervised volunteering hours?
Your first hours should be weighted toward low-risk, high-value tasks, like triage observation, cleaning and disinfection, preparing approved foods, monitoring temperature and hydration status under supervision, and learning documentation standards. Working only with “the interesting cases” can slow your competency growth and can be unsafe without mentorship.
Can a minor volunteer or start training for bird rehabilitation?
Generally, minors can get involved through supervised roles, but rules vary by jurisdiction and facility policy. You may be limited in who you can handle, what tasks you can do (for example, cleaning versus direct bird handling), and whether an adult supervisor must be present. Check your local program’s age requirements and your state’s rehabilitation regulations.
What should I do if I cannot find a licensed rehabber right away?
If you cannot find a permitted rehabber quickly, your best move is to contact the wildlife agency for guidance and follow their instructions, since “waiting” can worsen the bird’s condition. Avoid feeding unless you are sure of the species-appropriate diet, and keep the bird warm and calm while you arrange handoff.
Next Articles
How to Teach a Bird to Fetch Step by Step Guide
Humane, step-by-step training to teach your bird to fetch safely, with targets, rewards, troubleshooting, and gradual re
How to Teach Your Bird: Calm, Positive Training Steps
Step-by-step humane training to bond, reduce stress, and teach behaviors with positive reinforcement for parrots and sma
How to Teach a Bird to Wave: Step-by-Step Training
Humane step-by-step training to teach your bird to wave on cue, with shaping, safety, troubleshooting, and proofing tips